Put Your Projects On A Diet: Reduce Your Track Count in Ableton Live
It’s a wonderful thing that with computer production, there are few limitations on track count. But there are practical and artistic implications. Martin Delaney shows you how to streamline your projects… Our aim is simple. We’re going to look at some techniques we can use to reduce the number of audio and MIDI tracks in […]
It’s a wonderful thing that with computer production, there are few limitations on track count. But there are practical and artistic implications. Martin Delaney shows you how to streamline your projects…
Our aim is simple. We’re going to look at some techniques we can use to reduce the number of audio and MIDI tracks in an Ableton Live project. We’ll use instrument racks, freezing, resampling, and group tracks to achieve this aim. And why, precisely, are we doing this? ‘Because we can’, is the smart answer. ‘Because we want to learn some cool new things,’ is a better answer…
For most of us, our computers, or even ’phones, can run projects with more tracks than we need; that’s not much of an issue any more. But those track-heavy projects can be hard to handle, hard to keep an overview on, hard to mix… there’s an aesthetic beauty about a minimal layout that’s clean, but still functioning as a composition, a mix and a performance space. For live shows, it’s definitely on my mind: I want to have fun, not feel like I’m spinning plates.
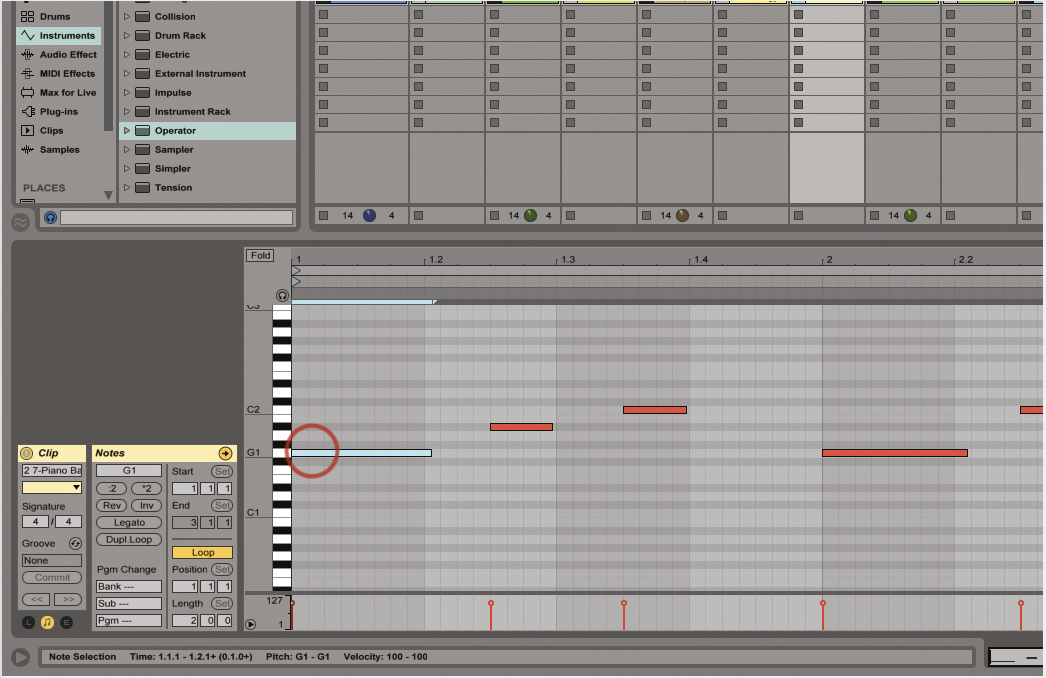
If you want to make this a long-term thing, you can embrace it from the offset by composing in a more minimal way. Sometimes using fewer tracks sounds bigger and more exciting than using a lot of tracks. Instrument racks and clip envelopes are a great way to ‘cut down’, if you want to keep the full flexibility of MIDI programming and software instruments; using a clip envelope to select the correct chain means that you can launch the clips in any order and they’ll still sound as they should. There are more dynamic ways to switch chains, based on manual selection, or note range, or velocity (drum racks behave differently – they don’t have the same chain-select tools, but you can put a drum rack inside an instrument rack, and control the chain selection from there).
There are also audio effect racks, so once again, you don’t need separate tracks just because you want to use a certain compressor or EQ at one point in your set. The freeze and flatten commands, on the other hand, do away with all of that MIDI flexibility entirely, creating simple audio clips, which are much easier to reorganise while Live’s running, without the risk of triggering the wrong instrument sounds.
There are a couple of things to bear in mind with these commands – firstly, if you try freezing a sidechained track, you’ll see this message ‘The track [name of current track] cannot be frozen because of the routing [name of sidechain source track].’ The other thing is that freeze can’t be executed while Live’s transport is running, so better do that before you begin your set!
The Hateful Eight
Let’s talk about tracks. Why does everything have to be in multiples of four? I guess it goes back to the days of tape, where you’d be recording on two, four, eight or 16 tracks. But we’re not recording on tape any more, not if we’ve got any sense. Hardware controllers are still based on that format, though – eight knobs, eight faders, eight rows of pads. Ableton’s Push is just as guilty. And then we get the famous red box in Live’s Session View, which forces us to work in banks of eight rows, eight scenes… somebody please try something different!
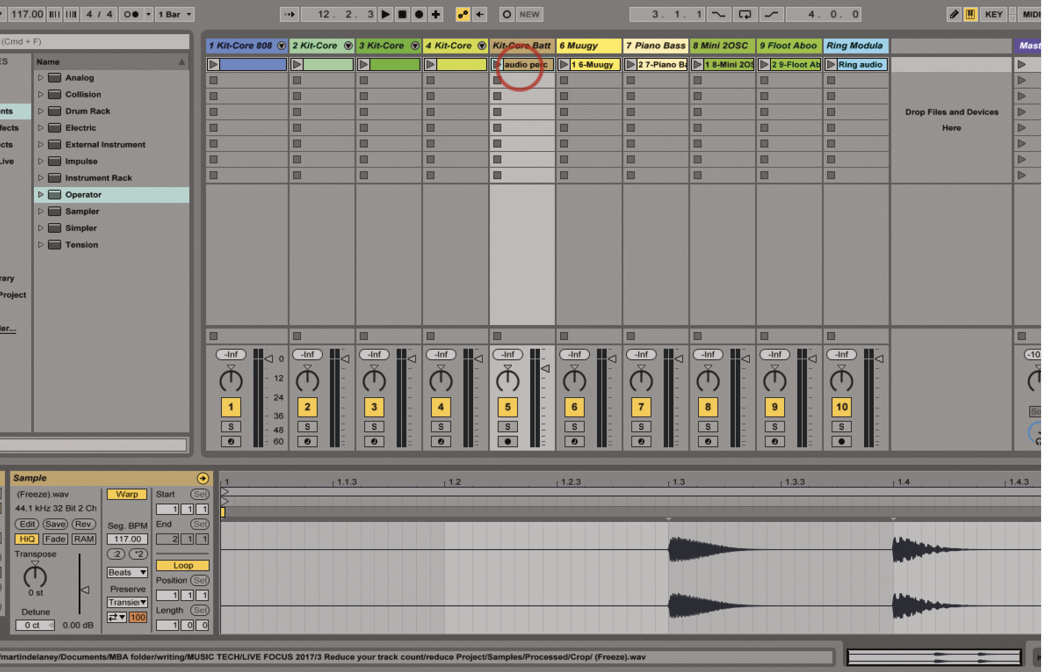
If you create a new audio track, and open Live’s In/Out View, you can choose Resampling as an audio input source. This feeds everything from the Master output back in, so you can capture little submixes – combinations of tracks that you want to merge down into a single clip. I do this a lot with percussion tracks, mixing the relative volume of each part first, then crunching them down into a two- or four-bar looping clip. That can save me about four tracks from a set.
If you absolutely can’t convert or merge anything else, but you’re still desperate to have fewer tracks to look at, then it might be time for group tracks – simply created by selecting the tracks you want to group, then typing Cmd-G. You can combine audio and MIDI tracks in any combination, and apply audio processing to them as a group, which is really helpful for mixing. The good thing about group tracks is that they can contain many clips and devices, while at the top level behaving like a single track. The trade-off is that if you want to change anything, some digging is required; although if you’re using Push, you can fold and unfold group tracks and access their individual elements quite smoothly.
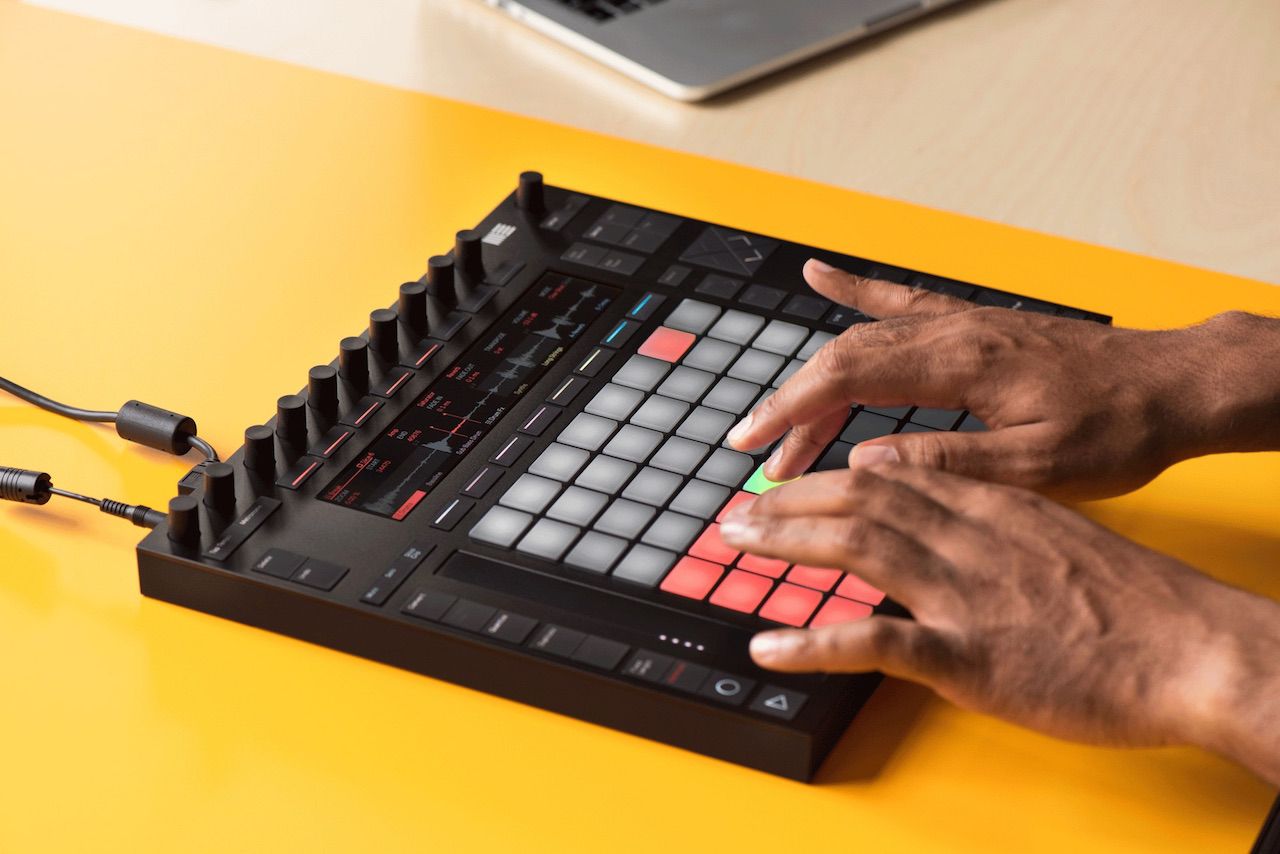
The absolute last resort if you want to go simple is to mix your songs down to stereo mixes, then load them into a new empty Live set and use them DJ-style! Then all you need is a couple of tracks to treat like ‘decks’ and a simple DJ hardware controller. Talking of hardware, I try to keep my live sets down to eight tracks, purely because that’s how all controllers are laid out – banks of eight tracks – eight rows of everything. All the popular grid controllers that work with Live, such as Push and the Launchpad, follow this formula and provide fast shortcuts to move between banks vertically and horizontally.
Sometimes I wish there was a Push expansion module, so I could see more tracks and clips at the same time. Using banks just isn’t the same for me, but for now, we’re kind of stuck with it. I know people who love using a load of tracks, and I do that sometimes, but generally, for me, it’s pretty minimal. Visually, I find it much easier to keep a handle on where everything is if I use fewer tracks. It’s not always appropriate or necessary to make the effort to reduce your track count. It’s more likely you’ll want to do it for live shows, in my experience. Even if you don’t need to do it, though, play along – it’s good practice, and might give you some new insights into how to work with your tracks, your compositions, and your mixes.
Step-by-Step: Reducing tracks in Live
1. We’re aiming to reduce the number of audio and MIDI tracks in a Live set, so we’re more free to rearrange our clips, and maybe to give the computer CPU a break as well.

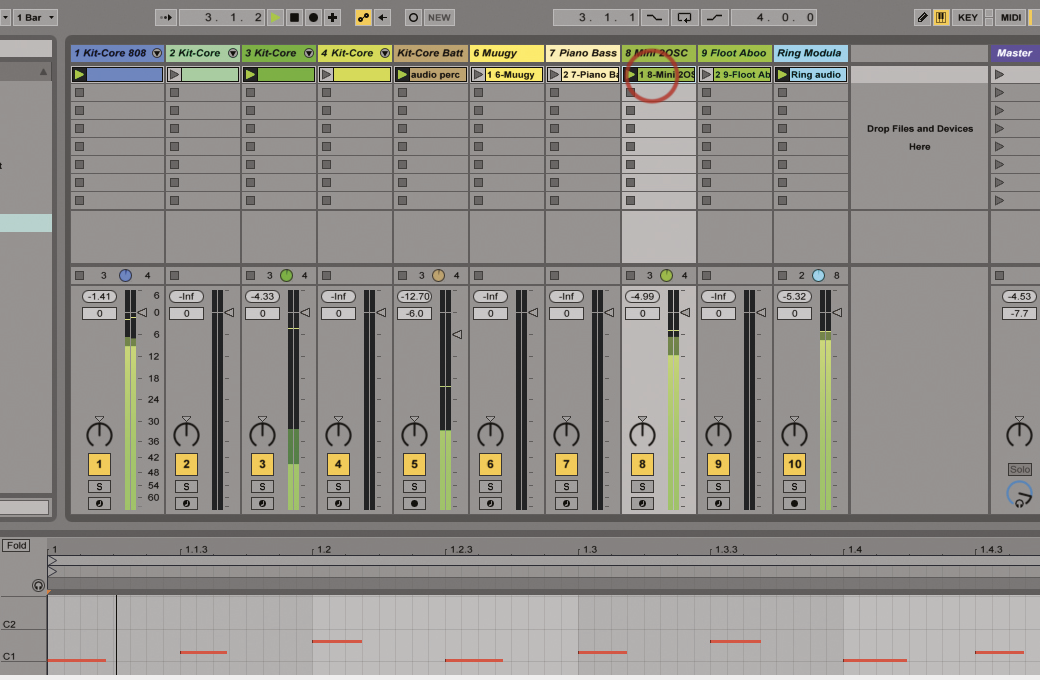
2. We have an example Ableton Live set with 10 tracks in it, a combination of MIDI and audio content, and we’re going to look at some different ways we can strip it down.
3. Before we begin – if you’re focused on keeping a low track count from the inception of your project, you can make a good start by setting some rules for how you’ll compose your parts.
4. Set a limit to the overall number of tracks – or how many tracks play simultaneously, which is not the same thing. I’ve sometimes resolved ‘mixing’ issues by restricting how many parts play at one time.

5. Anyway, moving on… in our example set, we have three bass tracks. We want to keep the different sounds, we need them all. But there’s no need to give up three tracks for this.
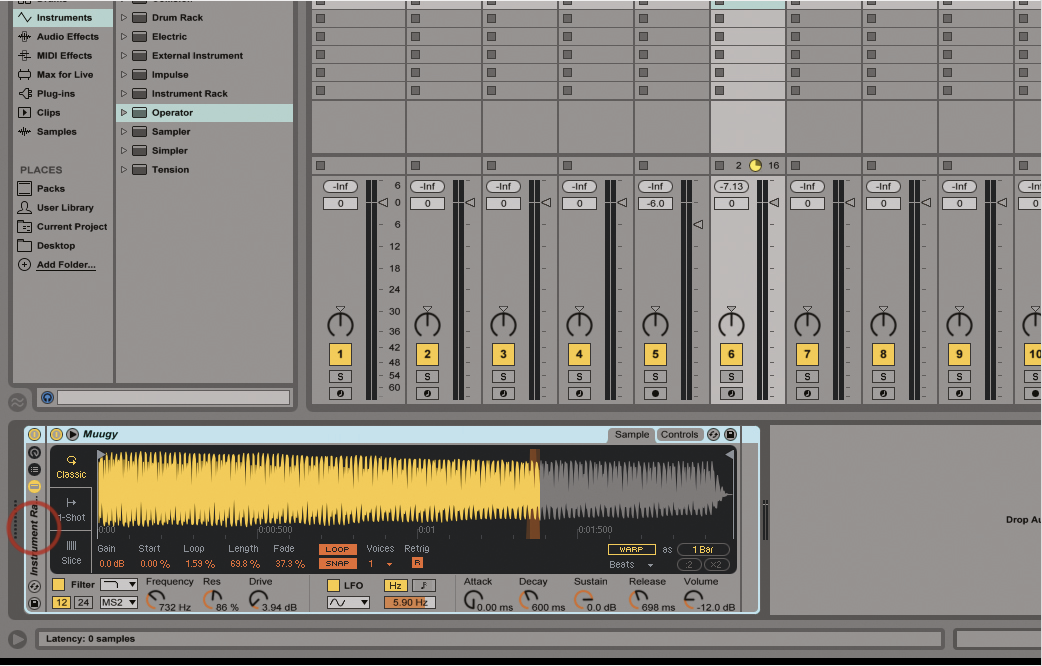
6. Go to track 6 – Muugy, and the Simpler instrument at the bottom. Click to select it and then type Cmd-G, putting Simpler into an instrument rack. It’ll still play as normal, at this point.