Sidechaining in FL Studio 12 – One Size Fits All
Many people find sidechain compression a difficult art to master. It’s a method that’s used to duck one signal’s volume with the amplitude of another – and it’s everywhere in modern music. Leo Konig highlights some effective sidechaining methods using FL Studio… The problem with sidechaining There are quite a few methods of achieving this […]
Many people find sidechain compression a difficult art to master. It’s a method that’s used to duck one signal’s volume with the amplitude of another – and it’s everywhere in modern music. Leo Konig highlights some effective sidechaining methods using FL Studio…
The problem with sidechaining
There are quite a few methods of achieving this in FL Studio, with the most basic one just being to route your drum sound to the sound you want to dip in volume as a sidechain (sidechains in FL are sends at -inf dB). That signal can then be picked up by plugins in the receiving track as a separate audio stream.
Workflow-wise this is pretty easy to do, a 2-click operation even. A common sonic characteristic of this method is extreme ‘pumping“ because the whole drum sound is being used to trigger the compressor, that means depending on your threshold, the tail of your drum will still compress the signal.
In that case using attack/release settings to shape the compression is close to impossible, as shorter release times will just distort the compressed audio and longer attack times will make the pumping feel less accurate.
Due to this: another method has been found: Kick drums are usually too long and do not allow the receiving dynamics unit to respond quick enough. So, instead of the original drum sound being used to trigger the compressor, one could use an extra channel that has a really short burst of white noise and layer it with the drum sound, making sure not to route it to the master so it doesn’t actually make an audible sound.
Then you can use that signal as your sidechain trigger. Commonly referred to as ‘ghost sidechaining’ this method has a few benefits over the other: using very short simple signals, you can make the compressor’s gain reduction envelope shape the compression very reliably.
This comes at the cost of having to manage the MIDI going to your sidechain trigger channel in addition to the MIDI of your original drum sound and making sure they line up correctly. So it ends up taking more time.
A third method is to just not use a compressor at all and rather steer the ducking from a dedicated envelope (like Envelope Controller) linked to a gain plugin (Fruity Balance). This gives you even more control over what’s happening, but it is also limited in speed by the PPQ you’re working at since an Envelope Controller counts as internal automation.
The major downside however is that once again have to manage the MIDI of both signals, envelope and drum sound.
Sidenote: PPQ is the resolution at which DAWs process automation data.
A solution
What if there was a way to sidechain compress with which you could have your cake and eat it too? A project-wide solution that could combine the pros of these methods with effectively zero downsides? I’ve come up with one, and I use it in my day-to-day work all the time.
The beauty of it that once it’s set up it works in just 2 clicks like the first method, but it also incorporates the more refined control that the second method offers.
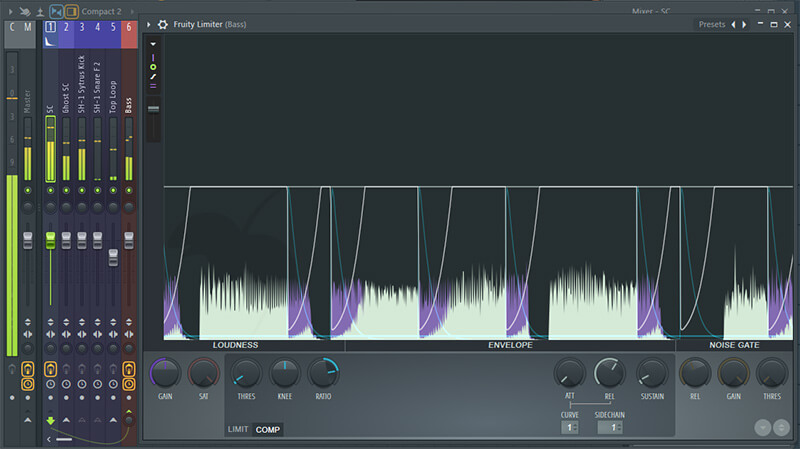
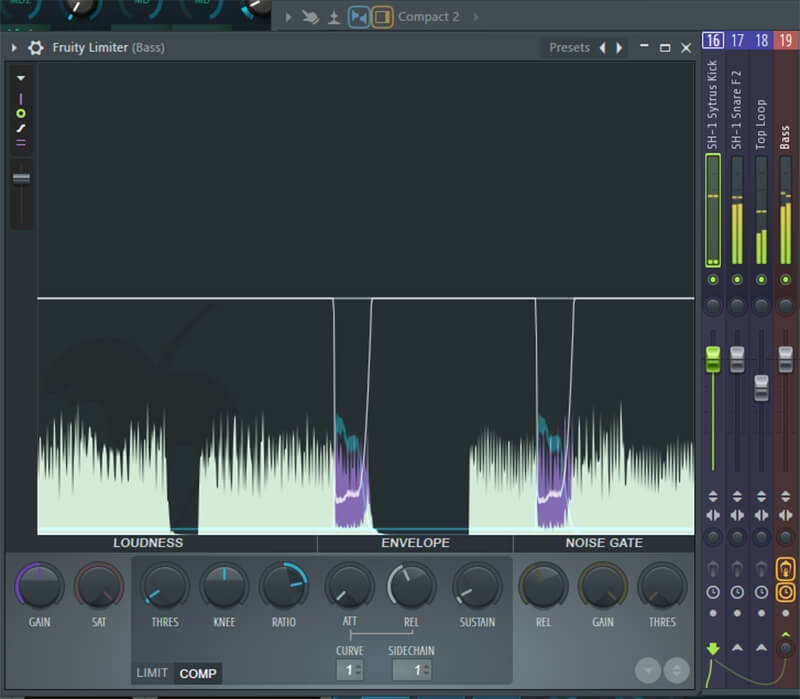
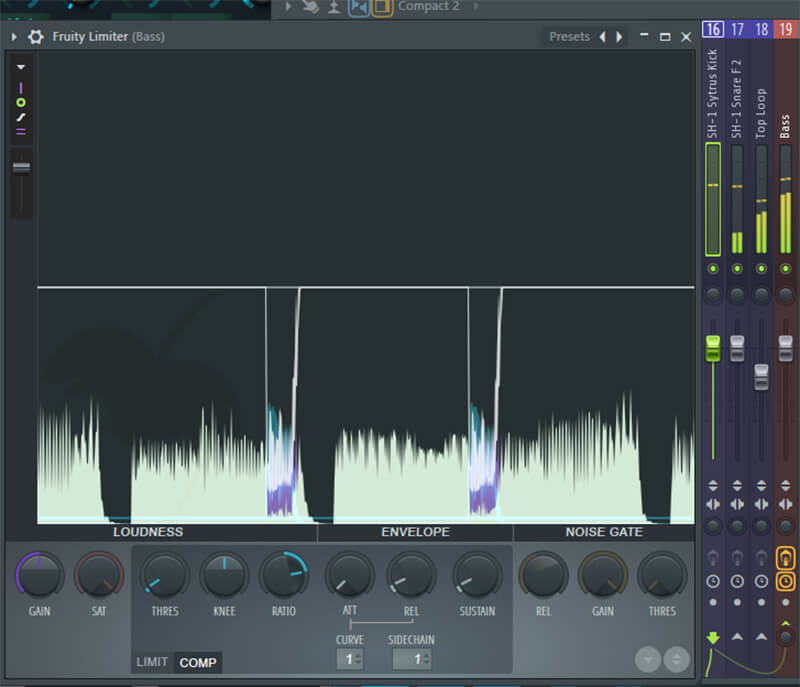
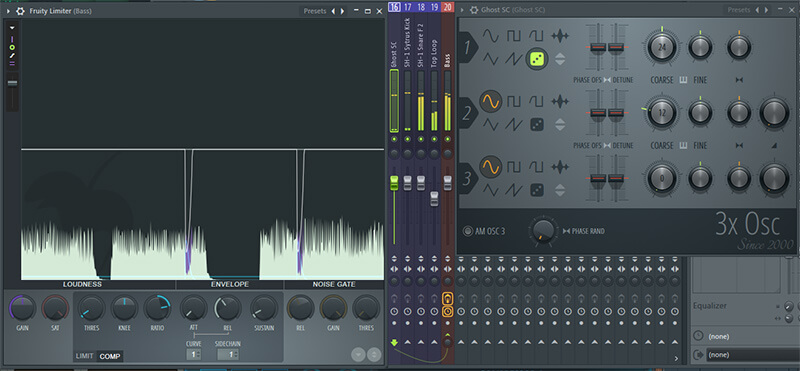
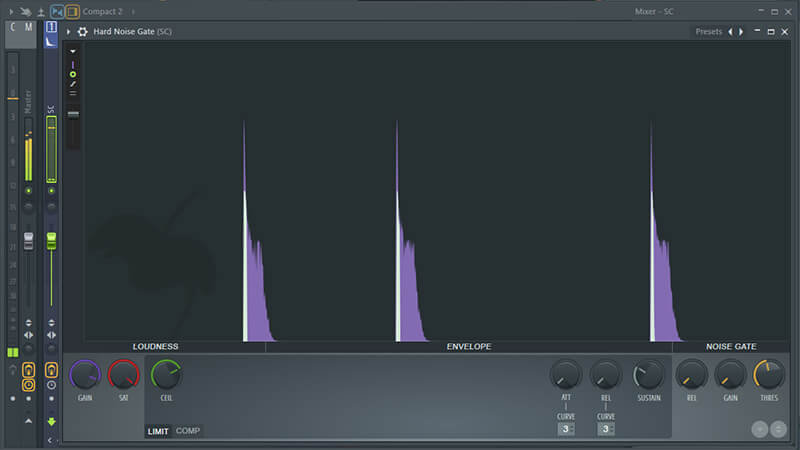
What you will need is a set of two Fruity Limiters on the first mixer track in your session, for convenience reasons. If it’s the first track that is your sidechain signal and you send it anywhere, it’s always going to be at the top of the list of inputs in the receiving dynamics plugin.
Make sure the first mixer track does not go to the master. In the ‘limit’ tab of both Limiters, take down the attack and release to 0. You will not need the limiter function for this. Then, go into the compressor tab of the first one, set attack to be roughly 40 ms, release to be roughly 50 ms, ratio to be 10:1 or higher and pull down the threshold until it clamps down a respectable 30dB of gain reduction.
Use the Gain knob to drive the signal up to 0dB. You will end up with a very peaky signal that visibly resembles a mirrored exponential graph.
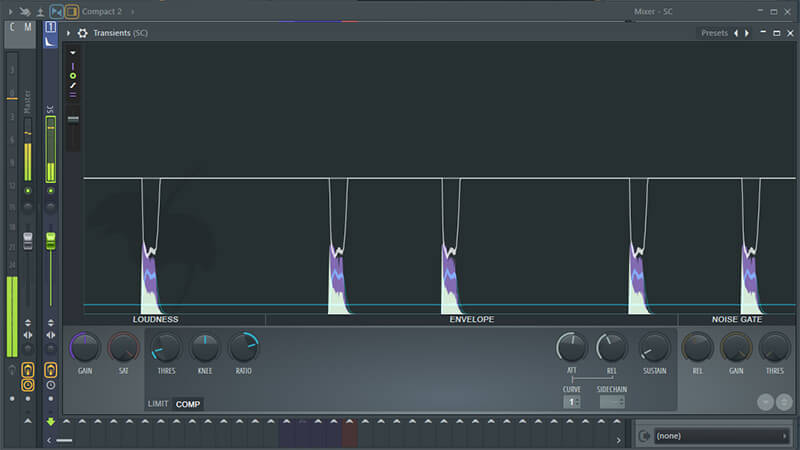
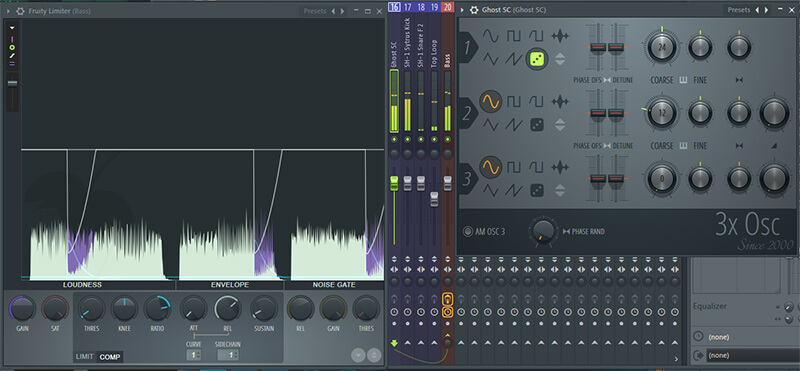
That signal then goes into the 2nd Fruity Limiter, where you use the gate section. Turn the release all the way down, don’t worry – you’re not actually hearing the signal, then pull the threshold up so it gets rid of any tail that the drum might have had. The reason you need a second plugin for this because you can’t make up the gain reduction from the first one before the gate section- the gain is post-dynamics. You now have, for all intents and purposes, a click distilled from your original drum that always plays with your drum sound.
You can now set that first mixer track up as a sidechain for anything that needs some well timed gain reduction. Because you now can just send anything to mixer track 1 and it will trigger all sidechain enabled plugins linked to it after being transformed into a click. And since the signal it sends out has been reduced to a click, the receiving compressor also has full-on control over the gain reduction envelope.