The Control Room in Cubase 9.5
In our last tutorial, we looked at the ins-and-outs (literally!) of routing in Cubase. This time, we take things a step further with a look at Cubase Pro’s Control Room feature… In a traditional studio (for want of a better term) there are normally two working areas: the studio itself, or live room, where the […]
In our last tutorial, we looked at the ins-and-outs (literally!) of routing in Cubase. This time, we take things a step further with a look at Cubase Pro’s Control Room feature…
In a traditional studio (for want of a better term) there are normally two working areas: the studio itself, or live room, where the performers do their thing, and the control room, where the engineers and producers do theirs.
A significant slice of most studio mixing consoles is given over to managing the various signals that need to be thrown around in a setup of this kind: multiple monitor feeds in the control room, cue mixes in the live room, talkback mics, auxiliary input signals and so on.
It’s possible to create such a setup using Cubase’s standard mixer and the capabilities of your audio interface, but things can get quite clumsy when doing this. For example, you can use standard pre-fade channel sends to create cue mixes that can be routed to the performers in the live room, but Cubase doesn’t provide a convenient means to adjust such a cue mix’s master send level; or, you can hook-up a talkback mic to one of your audio interface’s inputs, create a track in Cubase to handle the signal, and switch that track on and off as required, but this is nothing like as convenient as using the talkback system on a mixing console.
Ins and outs
All of these difficulties – and more – are resolved by enabling and configuring Cubase’s Control Room. This system adds a similar set of capabilities to Cubase as those found in the master and monitor sections of a conventional studio mixing console, and is invaluable if you’re working with other musicians or performers.
For inputs, the Control Room supports a single talkback mic channel and up to six External Input channels, intended for bringing in signals from devices such as external CD/MP3 players, decks, and so on. For outputs, the Control Room allows up to four cue mix channels, a control room headphone channel, and up to four control room monitor channels.
With the exception of the talkback mic, which is always mono, each channel can be configured for mono or stereo operation, and External Inputs and Monitor Outputs also support multi-channel surround configurations.
Monitors and the main mix
When you create a new empty project within Cubase, a default stereo output bus is created automatically. If you look at this bus in the Audio Connections panel you will see that it has a red speaker icon next to it; this signifies that the bus has been assigned as the Main Mix bus, in other words the bus that carries Cubase’s final, mixed audio signal to the outside world – the equivalent to the main mix outputs on a mixing desk.
This Main Mix is special as it is passed internally to the Control Room, where it appears as one of the possible monitoring sources (alongside external inputs and cues). As a result of this, when using the Control Room it isn’t always necessary to have the Main Mix output bus routed to audio device output ports, because it will be passed along to the active Control Room monitor output as well.
Control room controls
Managing the Control Room channels is all done via the CR tab of the right-hand zone of the Project and MixConsole windows.
The controls are arranged into sections that can be expanded and collapsed by clicking on their headings. The exact controls that Cubase displays will depend upon the Control Room’s configuration; if you only configure a single monitor output channel then controls for switching between monitor channels will not be shown.
Channel processing
One of the really cool things about using the Control Room is that it allows you to insert effects. As well as allowing meters to be added to those channels, this could also mean a bit of compression on a cue mix, an EQ on the headphone output to correct for frequency-response inaccuracies in the cans, a hard limiter on a monitor output to protect the speakers from unintended high levels, and so on.
The Control Room is a very powerful feature of Cubase, and consequently can be a bit confusing – and as a result is often overlooked. However, if you’re working with performers, and you have the audio hardware and I/O to support it, it’s well worth the effort of getting it up and running; to get you started with it, let’s work through creating a typical Control Room configuration.
The Control Room: step-by-step
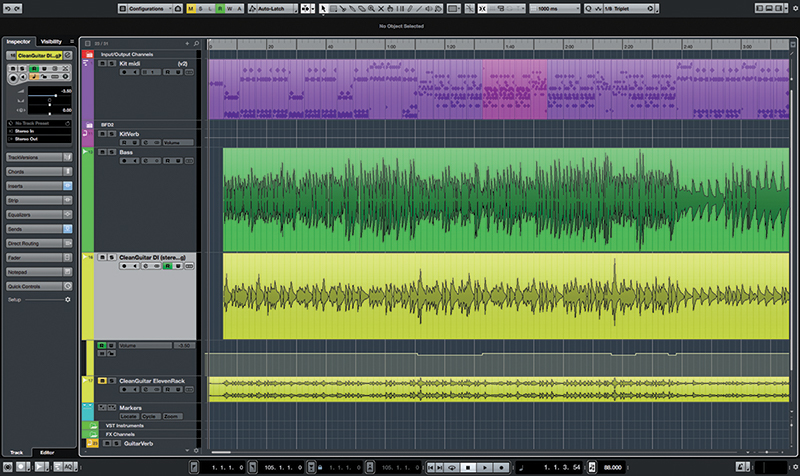
1. We’ll need something to act as a sound source for this walk-through, so launch Cubase and either open an existing project, or create a new empty project and import some example audio to a new track.
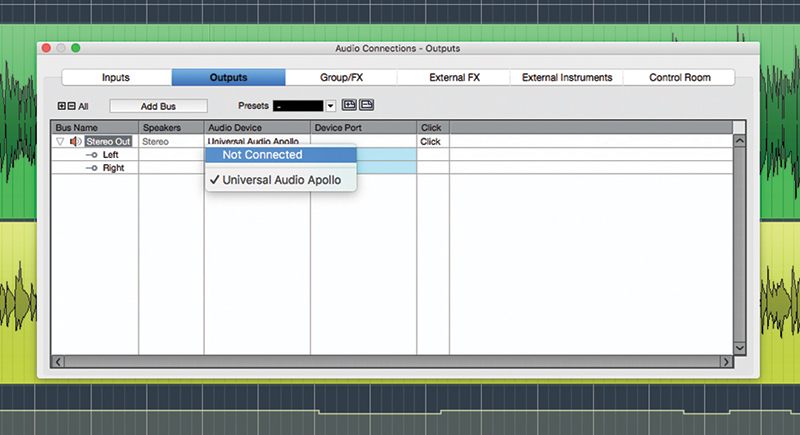
2. Open the Audio Connections panel (Studio > Audio Connections or press [F4]). Switch to the Outputs tab and locate the Main Mix bus, marked with a red speaker icon. Set this bus’s Audio Device to Not Connected.
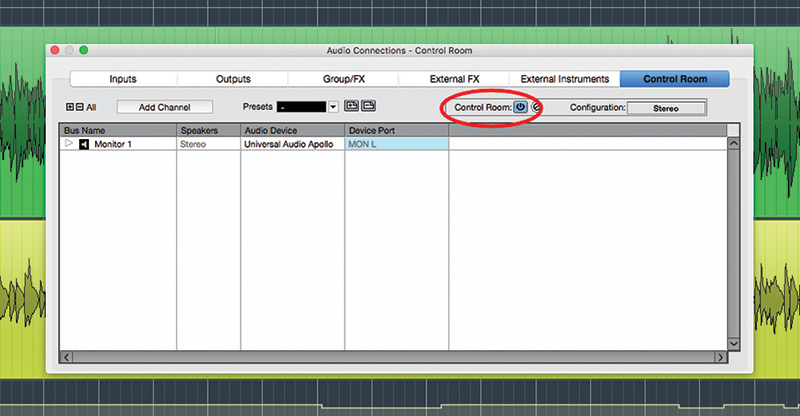
3. Switch to the Control Room tab of the Audio Connections panel. In the upper-right portion of the panel there is a box that says Control Room with a power button alongside – click this power button.
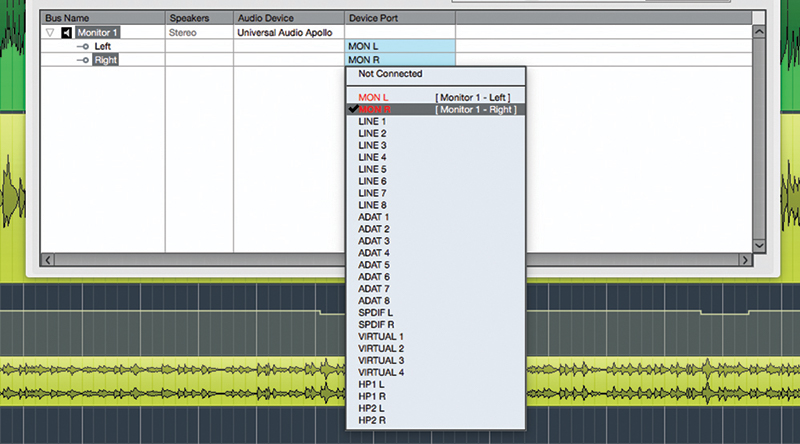
4. Notice that Cubase has created a new Control Room Monitor channel called Monitor 1. Expand this to see its constituent busses, and route these busses to the audio interface outputs that drive your main studio monitors.
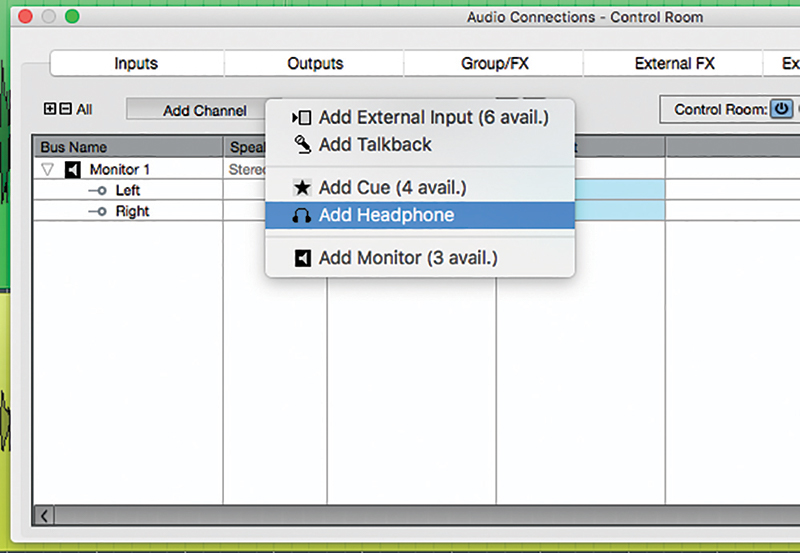
5. A Headphone channel allows you to monitor different signals in the cans than is being sent to the active monitor output. Add a Headphone channel now by clicking the Add Channel button and selecting the Headphone option.
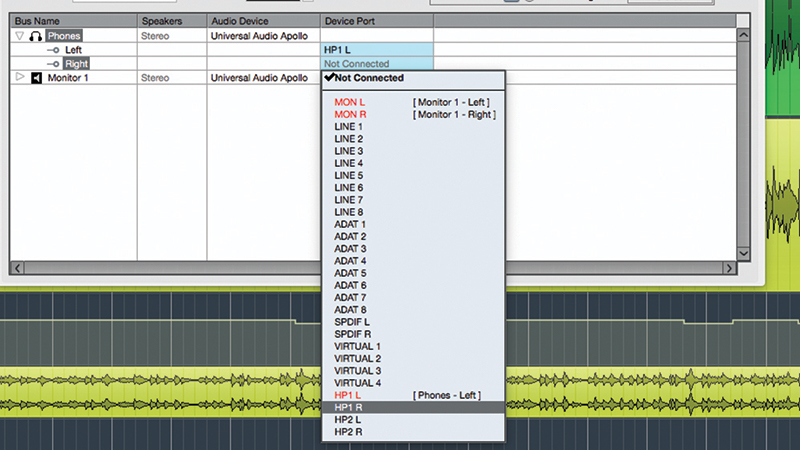
6. Cubase has created a new stereo bus called Phones. If your audio hardware has a dedicated headphone output port then route the Phones busses to this output; alternatively, route them to a headphone amp or similar.
![]()
PORT PLANNING Each Control Room channel has to be routed to physical input or output ports on your audio interface, and those ports will then be locked-off. It’s important to plan ahead to ensure your Control Room configuration doesn’t use up ports you may need for other tasks.
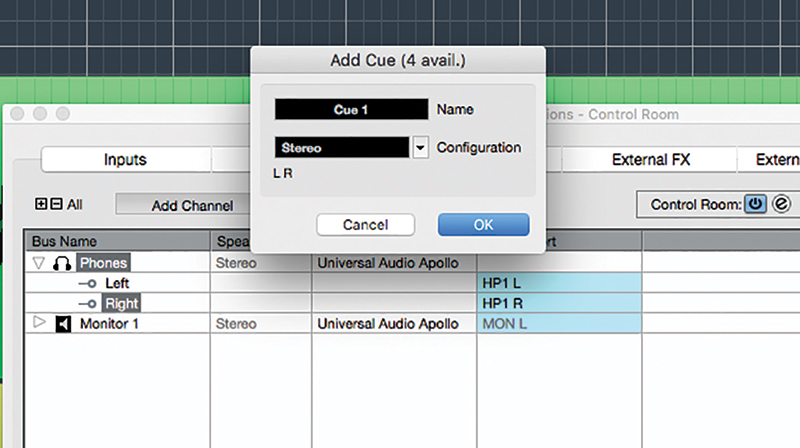
7. Click the Add Channel button again, and select Cue from the menu. A pop-up panel opens from where you can name the Cue channel and choose between mono or stereo configuration. Click OK to close the popup.
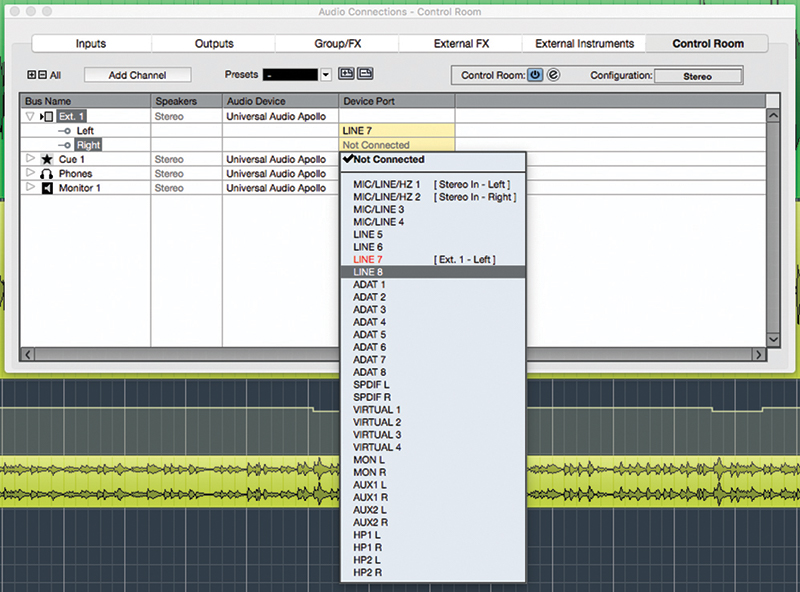
8. Route the new Cue 1 busses to suitable output ports. Click Add Channel again and add a stereo External Input. Hook up an external player to your audio interface and route those input ports to the new External Input.
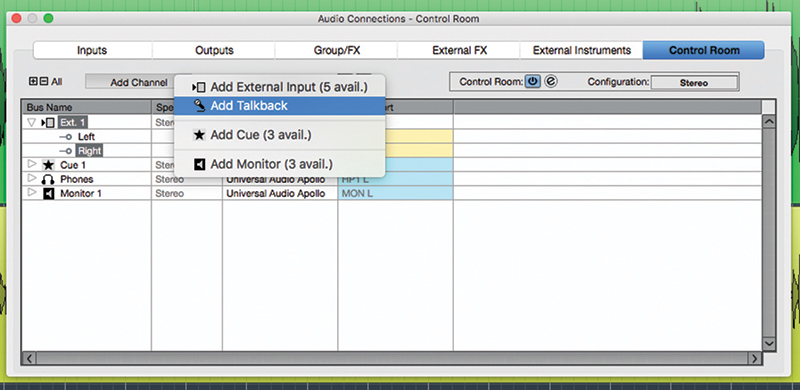
9. Finally, we’ll add a Talkback channel. Hook up a microphone to your audio interface and then use the Add Channel menu to create the Talkback channel. Route the mic’s input port to this new Talkback channel.
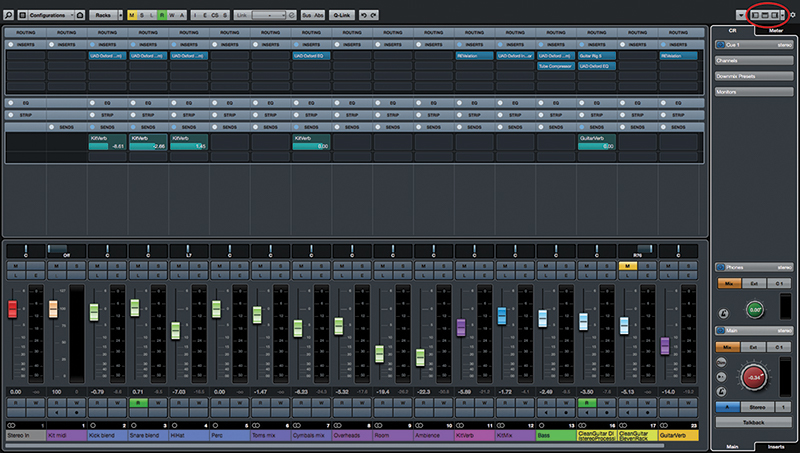
10. Close the Audio Connections panel, open the MixConsole window, and open the window’s right-hand zone by clicking the right-most zone button at the top of the window. Select the zone’s CR tab.
11. The CR tab shows sections relating to the Control Room channels that you have created. The Main section at the bottom is always included; click its section title to expand it and reveal a few additional settings.
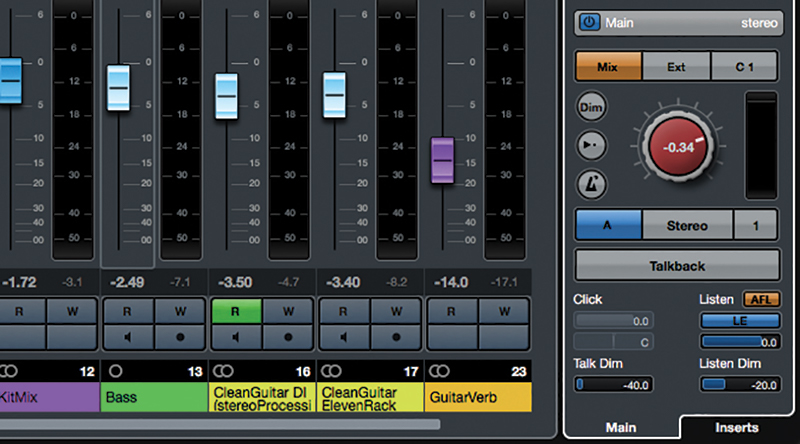
12. Roll your mouse over the various buttons in the Main section to see a tooltip explanation of their functions. Start playback of Cubase and your external player, and experiment with the buttons to hear what they do.
![]()
DOWNMIX PRESETS The monitor section of the Control Room can define up to four Downmix Presets. These determine how the source being fed to the active monitor output is handled when source and output have different channel configurations.
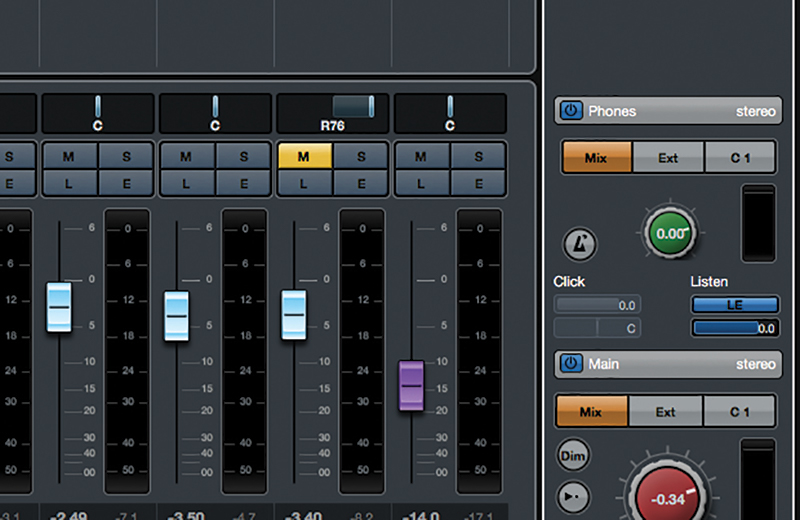
13. Click the Phones section to expand its additional options. This section is very similar to the Main section, but determines the signal being fed to the headphone output. Again, roll the mouse around to see what’s what.
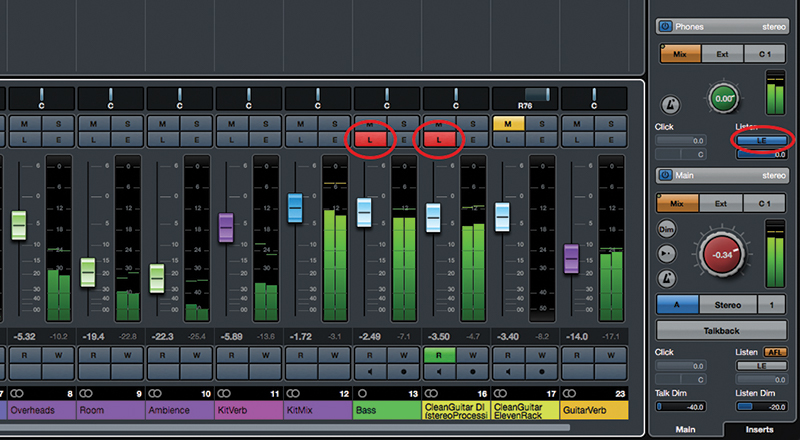
14. Both the Main and Phones sections feature an LE (Listen Enable) button. Only tracks that are set to Listen mode can be heard. This allows you to, for example, solo a signal in the cans whilst leaving the monitors unaffected.
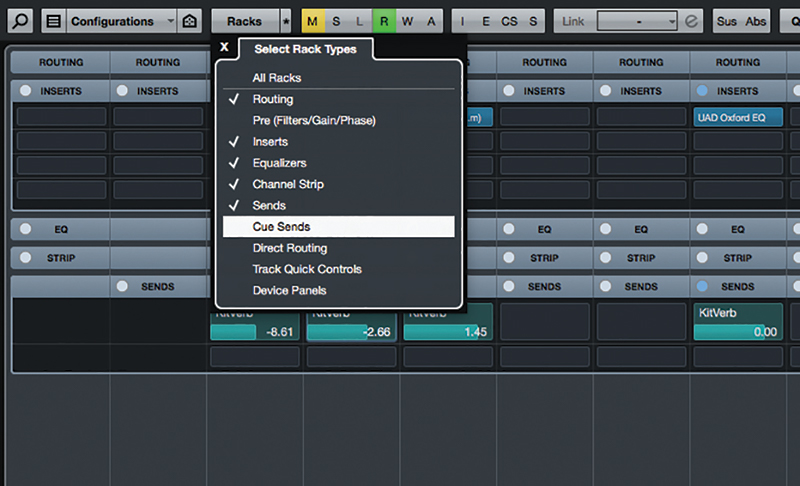
15. Click the Racks button at the upper-left of the MixConsole window, and enable the Cue Sends option. The Cue channels will now be shown on the mixer; these work in much the same way as Sends.
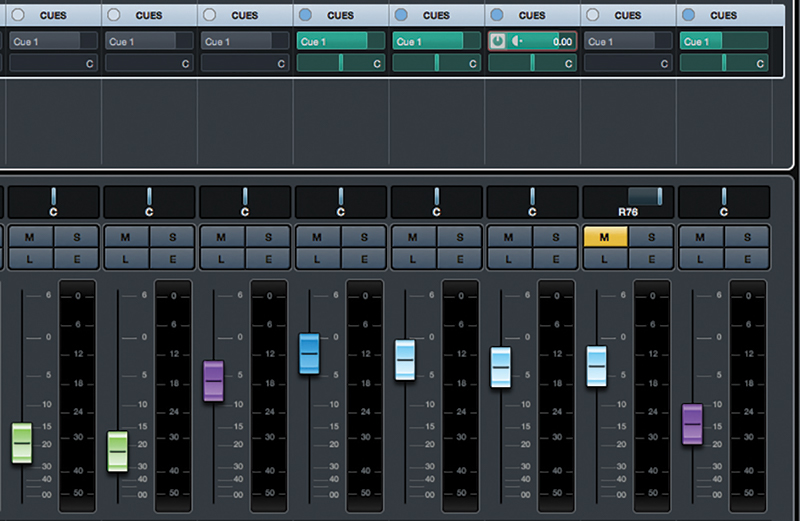
16. To enable a Cue on a track, roll the mouse over the track’s Cue section and click the Power button to enable it. Dragging the upper bar sets the level, and the lower bar the pan. Typically, Cues should be pre-fade.
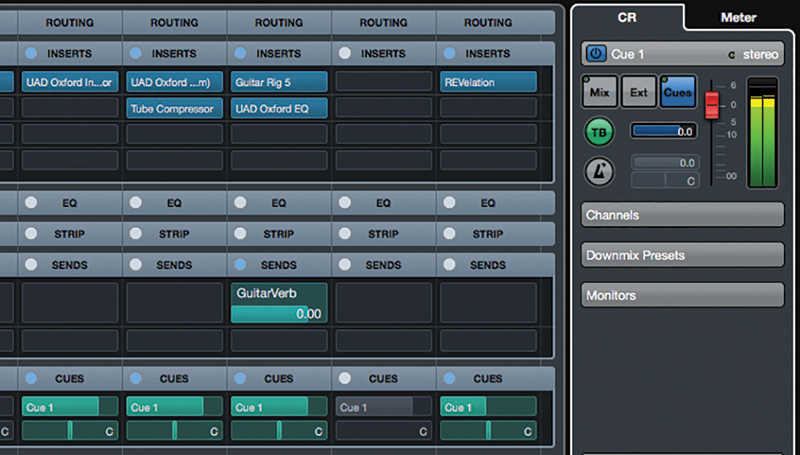
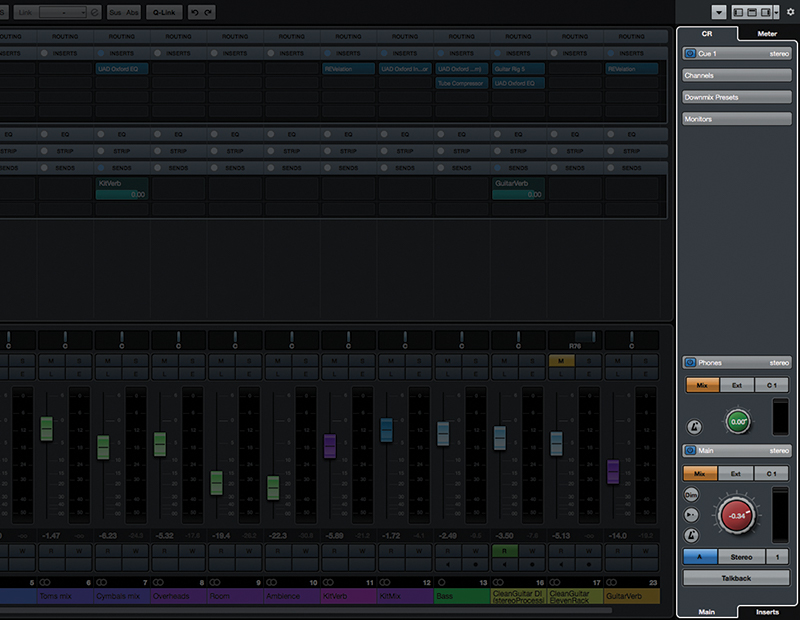
17. Click the Cue 1 section of the Control Room panel to expand it. From here you can change the source being fed to the Cue output, adjust its master level, and direct talkback and click to it.
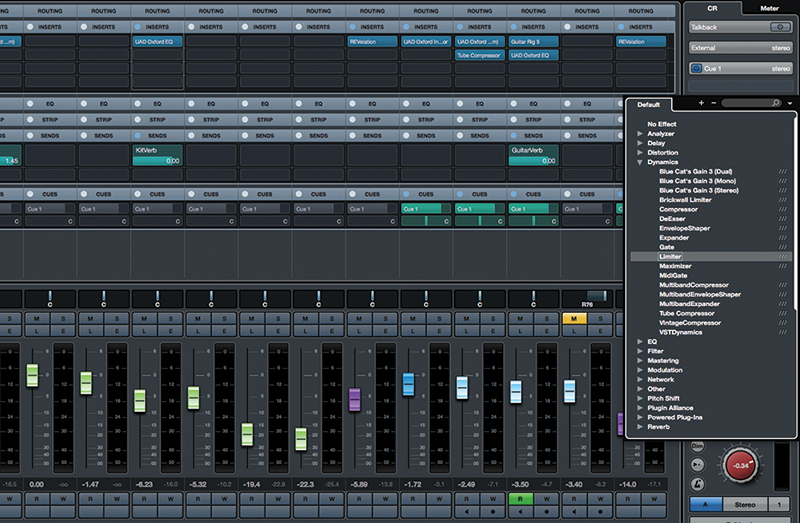
18. Click the Inserts button at the bottom of the Control Room panel. Now, each section shows a stack of insert slots that can be used for processing and/or metering the various Control Room signals.