Track Alternatives in Logic Pro X
Logic Pro X’s Track Alternatives are a great tool for experimentation, but also a superior way of working with multi-track recordings, says Mark Cousins… Logic Pro X is undoubtedly one of the most complete music production applications going, but every now and again you glance across at a rival DAW and see a feature that […]
Logic Pro X’s Track Alternatives are a great tool for experimentation, but also a superior way of working with multi-track recordings, says Mark Cousins…

Logic Pro X is undoubtedly one of the most complete music production applications going, but every now and again you glance across at a rival DAW and see a feature that wish you could use as part of your production workflow.
Take Pro Tools’ Playlist feature, for example: a tool that might not jump to the top of most producer’s ‘most desirable’ features, but if you’ve worked with Pro Tools you’ll soon find it to be an indispensable part of your workflow, especially when it comes to working with multiple takes.
For years I’ve waited for Logic Pro to implement this kind of functionality, so the introduction of Track Alternatives – a feature clearly inspired by Pro Tools’ Playlists – is an exciting development.
As the name suggest, Track Alternatives let you create one or more alternatives to tracks that reside in your Logic Project. In a simplistic way, Track Alternatives can be a useful way of experimenting with an alternative edit of your existing material – either audio or MIDI – duplicating your original track and then editing it, safe in the knowledge that you can return to its original form at any point. While it’s always been possible to duplicate regions onto parallel track lanes, or simply copy them elsewhere in your project, Track Alternatives are a much more elegant way of negotiating the same task.
Finding an alternative
The easiest way to conceptualise Track Alternatives is as hidden track lanes that sit behind the currently assigned track. You can view alternatives using the menu option Track > Show Track Alternatives, with the different variations selectable from a drop-down menu to the right of the track name.
In addition to the menu, you’ll also find a variety of options including the ability to create a New Alternative, Duplicate an existing track, or explode the view to see all the current Track Alternatives. Once expanded, it’s then easy to comp between the takes, editing the regions and then dragging them onto the top track lane.
The big benefit with Track Alternatives, however, is when you start using them as a means of dealing with multiple takes. For a long time, Logic Pro X users have had access to the Quick Swipe Comping feature, which is arguably designed as one-stop solution for multiple take (rather than multiple track) recording.
With Quick Swipe Comping different takes are stored as part of a Take Folder, with the top layer (or comp, in other words) formed by swiping between the different takes. For a single track or stereo recording – like vocals, guitar or piano – the Quick Swipe Comping is quick and intuitive, but if you want to deal with a multitrack session (like a drum kit recorded with eight or so separate mics) the workflow doesn’t gel.
Beyond quick swipe
When it comes to multi-track recording, therefore, Track Alternatives make much more sense than Quick Swipe Comping. Each separate take becomes its own Track Alternative. Record take 1 therefore, and then create a New Track Alternative, recording your second pass into the newly emptied track lane.
Once you’ve finished your recording, you can then simply switch between the different Track Alternatives – labelled A, B C and so on – to audition the different takes, arguably starting to form some understanding of how you’re going to edit together the final comp.
For the Track Alternatives to work efficiently, though, it’s important that you use them in addition to another Logic Pro X feature – Track Grouping. The Track Grouping feature is most commonly used for mixing, whereby a number of different mixer channel strips are locked together as part of the same fader group.
Push one fader up, therefore, and the other faders in the same group will be lifted by the same amount. As well as dealing with fader levels, though, Groups can also be locked together so that editing decisions – like trimming a region or applying crossfades – are performed en-masse. Rather than having to replicate an edit across multiple tracks therefore, all you need to do is edit one of the regions assigned to the Group.
Track alternatives: step-by-step
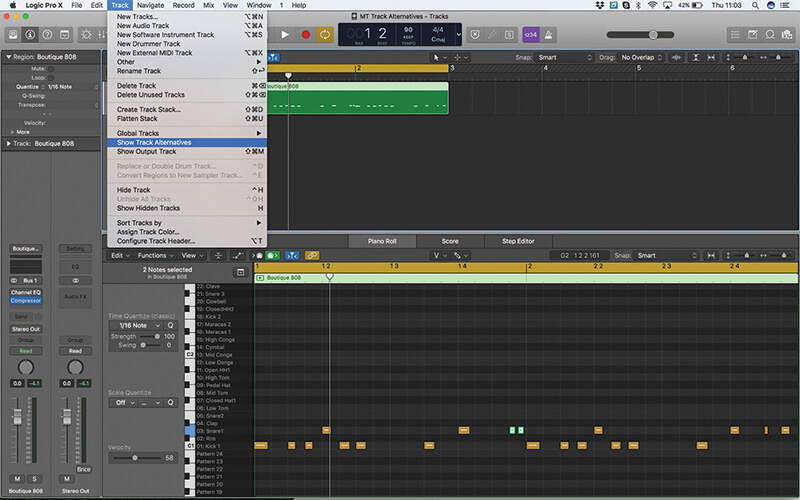
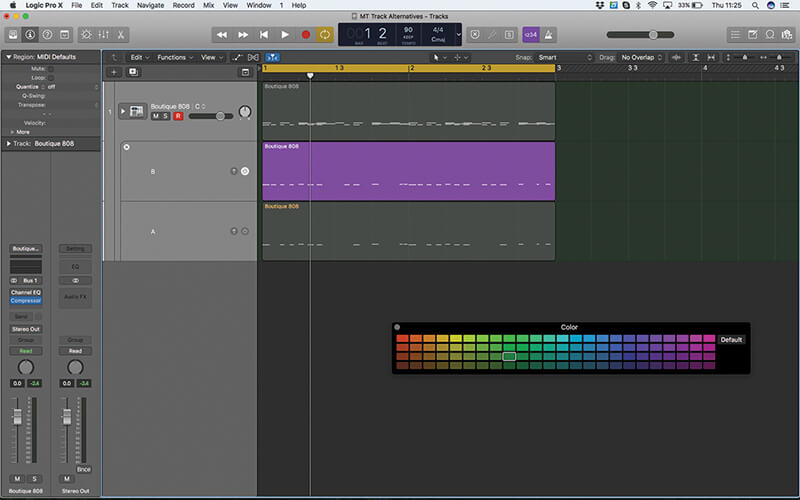
1. To view the Track Alternatives, use the menu options Track > Show Track Alternatives. Once active, you’ll notice a small arrow next to the track name that can be used to open the Track Alternatives menu.
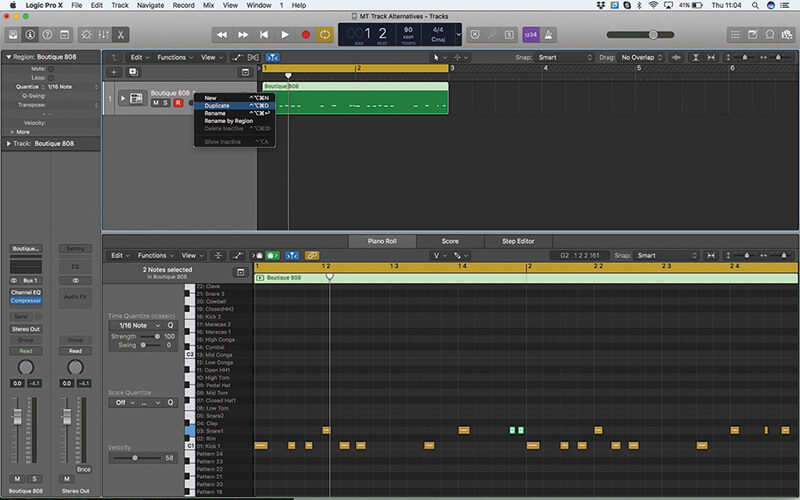
2. Let’s start our exploration creating a Duplicate version on the MIDI region in our arrangement, using the Duplicate option in the Track Alternatives menu. Duplicate makes a complete copy of the current track, now called Alternative B.

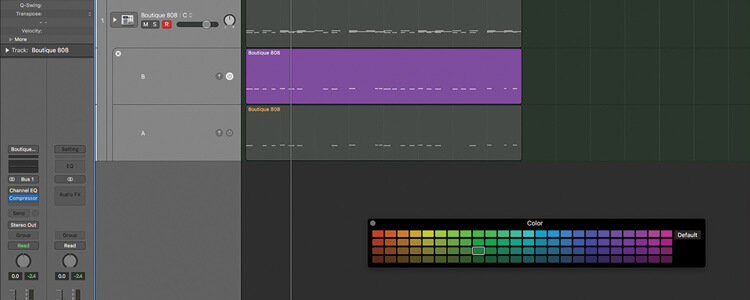
3. You can move between the two Alternatives (A and B) using the Track Alternatives menu. We’ve edited Alternative B, adding an additional Rim Shot to the basic drum pattern. Alternative A is left as it is.

Grouped edits are activated by the Group Setting dialogue box, which also includes an option to activate Track Alternatives for grouped tracks. Once the grouping is activated, all Track Alternative functions are applied simultaneously to all the tracks in the group.
4. Using the menu option Show Inactive will ‘explode’ the current track, displaying the current Alternative Tracks. Use the power icon to temporarily audition one of the other Alternatives instead of what’s currently on the track.
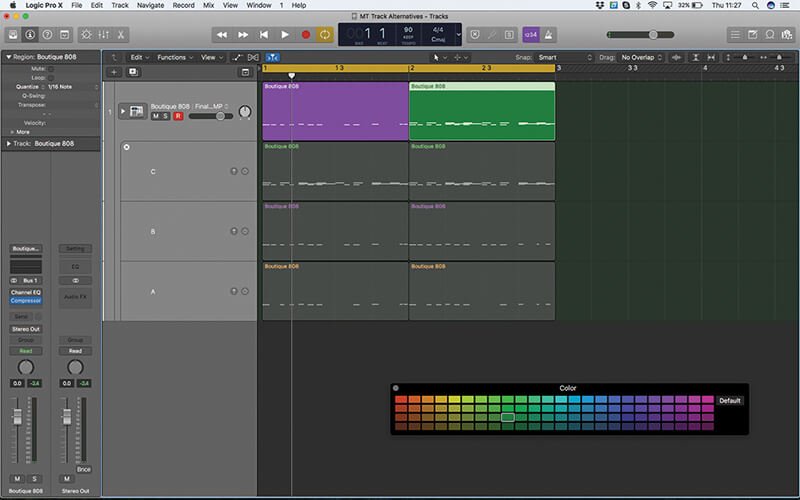
5. Create a New Alternative if you want to piece together a comp for all the current material. With Show Inactive enabled you can simply drag-and-drop regions from Tracks Alternatives to your main comp track.
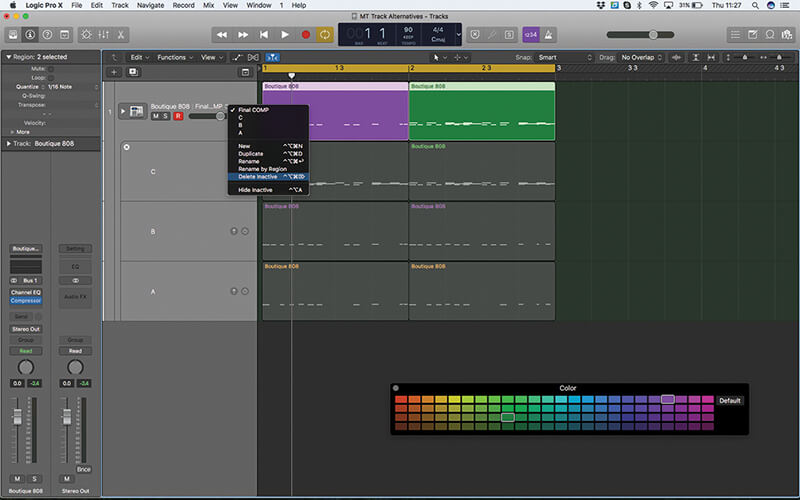
6. If you want to keep your song clean and tidy, try using the Delete Inactive feature as part of the Track Alternatives menu. Now only the top active lane will remain, and the previous Alternatives will be removed.
Mark Cousins continues his walkthrough of Track Alternatives with a look at their use with multi-track recordings
