Using ChromaVerb in Logic Pro X
Logic Pro X’s ChromaVerb is a technicolour reimagining of synthetic reverb. Mark Cousins discovers why ambience creation has never sounded this good… Of all the effects and signal processing we turn to, it’s probably reverb that gets the least attention in respect to tweaking the parameters, with most users simply dialling-in a preset and then […]
Logic Pro X’s ChromaVerb is a technicolour reimagining of synthetic reverb. Mark Cousins discovers why ambience creation has never sounded this good…


Of all the effects and signal processing we turn to, it’s probably reverb that gets the least attention in respect to tweaking the parameters, with most users simply dialling-in a preset and then continuing with the mix. Actively shaping your reverb – so that it fits the unique sound and properties of the track you’re mixing – can make a tangible difference to the sonic effectiveness of your music.
With that in mind, Logic Pro X’s new ChromaVerb is a welcome addition to the application, specifically because it’s designed from the ground-up as an intuitive tool that invites itself to be actively melded around the sounds it’s processing – from the highly animated ‘raindrop’ display, through to the clear, easy to understand parameter set.
Room designer
Before we delve into the specifics, let’s first understand the broad overarching principles of shaping reverb. For most novice users, the obvious example is the size of the reverb, alternating between small rooms that might be used on instruments like drums or rhythm guitar, and a more spacious setting used across an orchestra or synth pad.
Most commonly, engineers think of ‘size’ as being largely defined by the length of the reverb with longer reverbs creating larger spaces. Tuning the length of the reverb, therefore, is at least the one parameter all engineers turn to as a means of actively shaping the dimensionality of their mix.
Just as important as the length of the reverb, though, we also need to think about its relative density and colour, as these qualities can have a big impact on how the reverb sits in the mix. As a simple contrast, reverb can be bright and sparkly, or dark and moody, as well as a whole host of colours in-between.
In the real world, these contrasts are shaped by the material properties of a room (so that a heavily carpeted lounge will sound different to a bathroom covered in tiles), and in the virtual world, just like in interior design, we need to think about the room furnishings that our music resides in. Equally, the shape of the room can also define its relative density, moving between a reverb that sounds like a collection of fluttering echoes, and a smoother reverb that wraps the input in a ‘blanket’ of sound.
Finding space
Moving back to ChromaVerb let’s look at the primary building blocks that allow us to shape the properties of the reverb we’re using. The obvious starting point is the room algorithm you choose, which can be selected from a list at the top of the interface. The algorithm names should be a clear guide to some of the attributes we’ve already identified – with settings like Dark Room, Smooth Space and Reflective Hall.
In effect, the Algorithms are the starting point to the sound of your reverb – you can make the algorithms darker, brighter or more diffuse, of course, but it makes sense that where you start bears some similarity to the eventual sound you want to achieve.
One key aspect of ChromaVerb, and a big way of shaping the colour of the reverb, is the Dampening EQ. Rather than being a static effect, it’s important to understand that the Dampening EQ affects the reverb over time, effectively setting a frequency-based reverb time.
In the real world, different materials in the room will tend to absorb and/or reflect differing frequencies, changing the colour of the reverb over time. The Dampening EQ is a great way of shaping the colour of the reverb as tail progresses – cutting the low-end for a progressively brighter tail, for example, or notching out mids so that the reverb doesn’t cloud the input.
Technicolour reverb
With the primary building blocks in place – namely, the algorithm and dampening EQ – then comes the task of more refined adjustments to the reverb. The beauty of ChromaVerb, though, is the vibrant way this is visualized in the Dampening EQ screen, with the reverb’s reflections displayed like raindrops. For a start, it’s easy to visualize the colour of the reverb by the relative colour of the droplets, moving across the entirety of the audio spectrum.
Notice, for example, how the spectrum of the input literally changes the colour of reverb produced, and equally, how the shape of the Dampening EQ also affects the relative balance of those colours. Even parameters like Density are also reflected in the display, making it easy to understand how changes in the reverb’s settings influence its output.
The walkthrough details each of the parameters and how these contribute to the different styles of reverb ChromaVerb produces. What you’ll quickly appreciate is how malleable reverb becomes once you start playing with ChromaVerb’s interface. What’s really interesting, though, is that you’ll start to notice the finer details of reverb in an increasingly perceptive way, so much so that your relationship with other reverb plug-ins, and the sounds they produce, will also change to be more critical and questioning.
Put simply, ChromaVerb isn’t just a ‘good’ reverb. Used correctly, it will change how you see and hear the effect as an intrinsic part of your music.
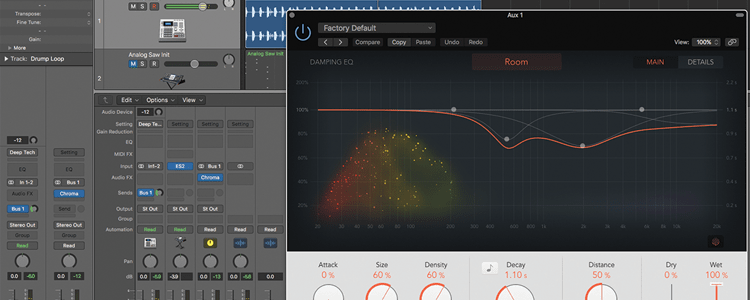
Using ChromaVerb: Step-by-step

1. On the drum track, create a bus send. ChromaVerb can then be instantiated across the newly-created aux fader, ensuring that the balance is to 100% wet. Use the bus send to establish the amount of reverb on drums.
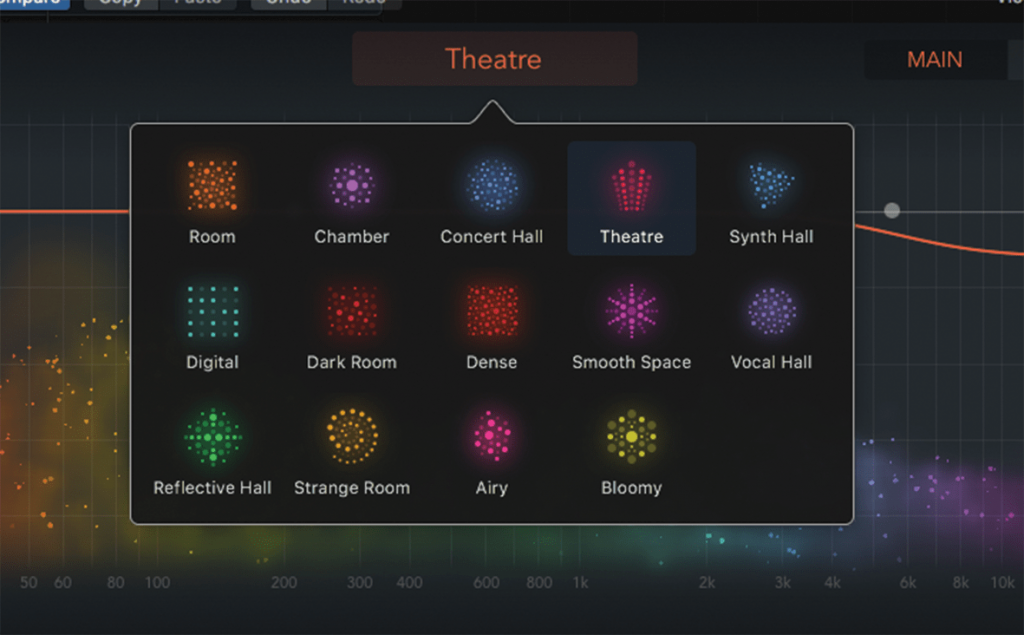
2. Start by selecting an algorithm appropriate to the sound you’re processing. In this case, we’ll pick the Theatre setting. Notice the clear timbre, and a soft diffusion that gives the drums a pleasing ambience to reside in.
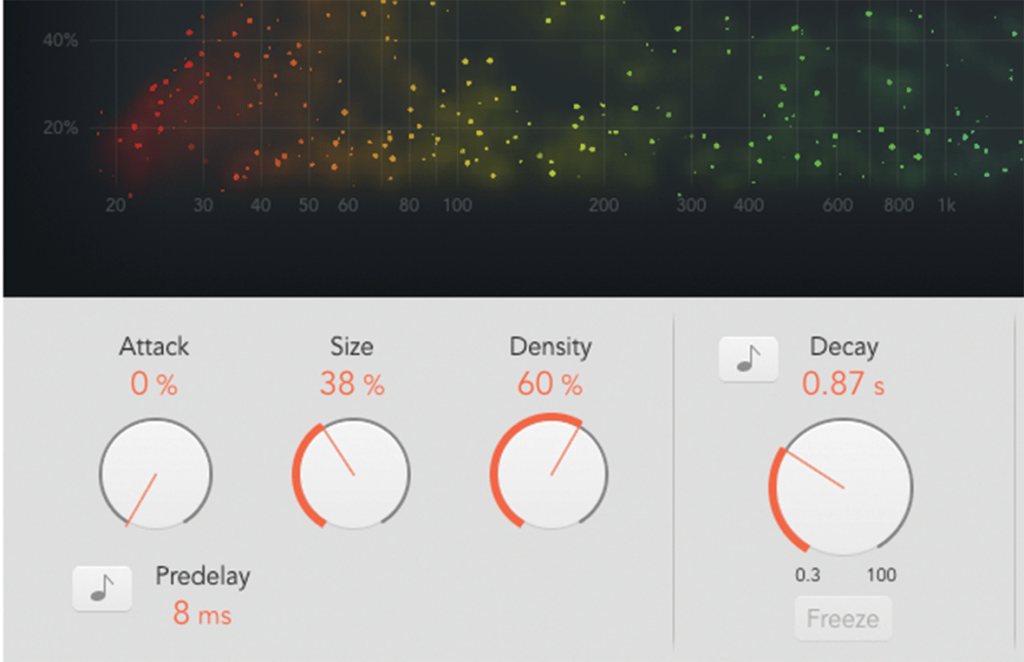
3. The scale of the reverb is set in two ways – using the Size and Decay parameter. For smaller spaces, which benefit drums, try reducing both the Size and Decay, to around 40% and 0.87 seconds respectively.
![]()
Freeze Try using the Freeze option on the Synth Pad chords. Pressing the Freeze button on a given chord will ‘suspend’ the reverb until you un-freeze it. Freeze is a great parameter to automate, making infinite reverb a dynamic part of your mix that will attract the listener’s attention.
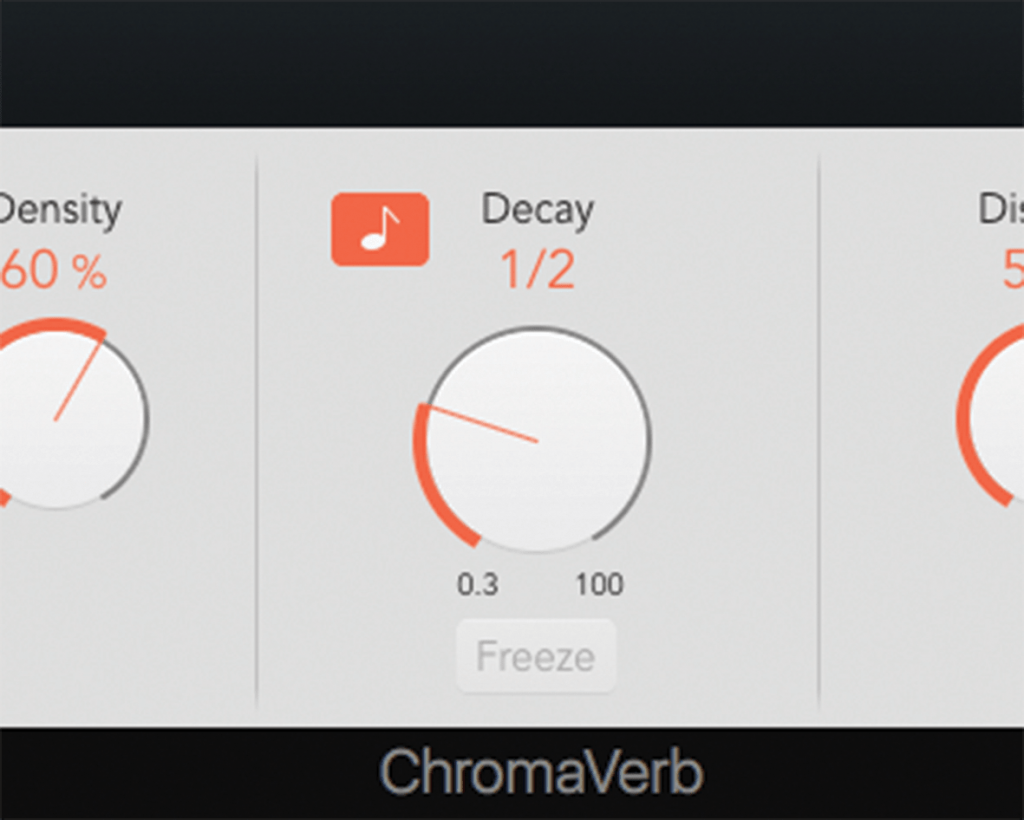
4. The Decay parameter also includes a tempo-lock option, which sets the exact length of the reverb tail to a subdivision of the tempo. This isn’t 100% essential, but could prove itself useful for a tighter mix.
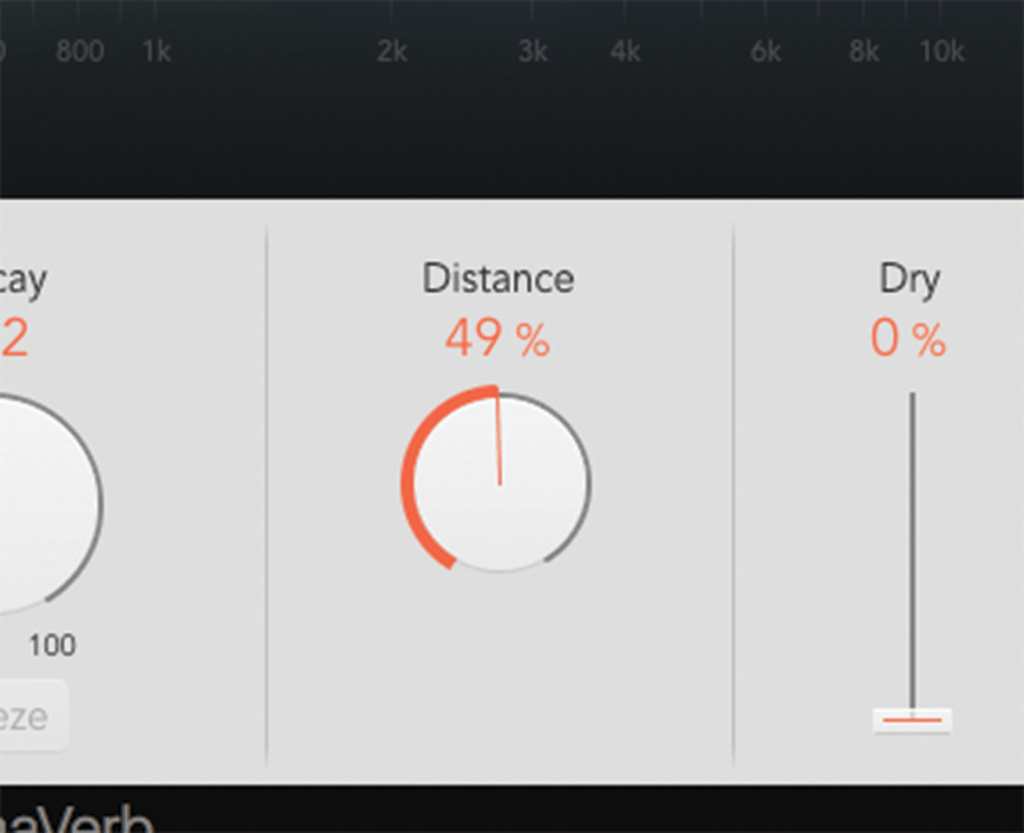
5. Along with Size and Decay, Distance helps define the scale of the effect. Think of Distance as the virtual equivalent of moving a pair of microphones backwards in the space, ‘blurring’ the reverb and making it sound less diffuse.
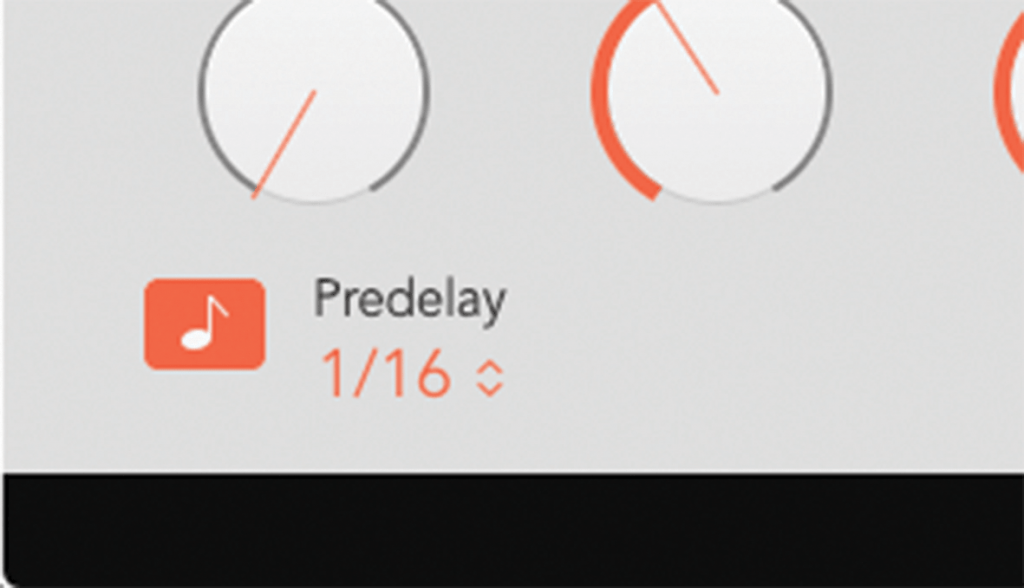
6. Use pre-delay to create a distinction between the dry sound and its reverberated version. One interesting effect uses a tempo-synced Pre-Delay (activated using the music note) set at 1/16th, creating a tempo-based reverb.
Continue learning how to use ChromaVerb here!
