Deeper mastering using Ableton Live
Following up on our last tutorial about mastering in Live 10, it’s time to dig a bit deeper, and highlight two of the most important and most-used of Live’s mastering devices – Multiband Dynamics and EQ Eight.
In our last Live instalment, we presented an overall guide to mastering with Ableton Live 10, and underlined the point that it has all the tools you need to get a great result. But to really seal the deal, and fine-tune with finesse, we need to go deeper on a couple of the devices and techniques that were referred to. So here in part 2 of our Live mastering tutorial, we’re going to talk about the Multiband Dynamics device, EQ Eight, and how and when to use them to get your songs ready for airplay.
The right dynamic
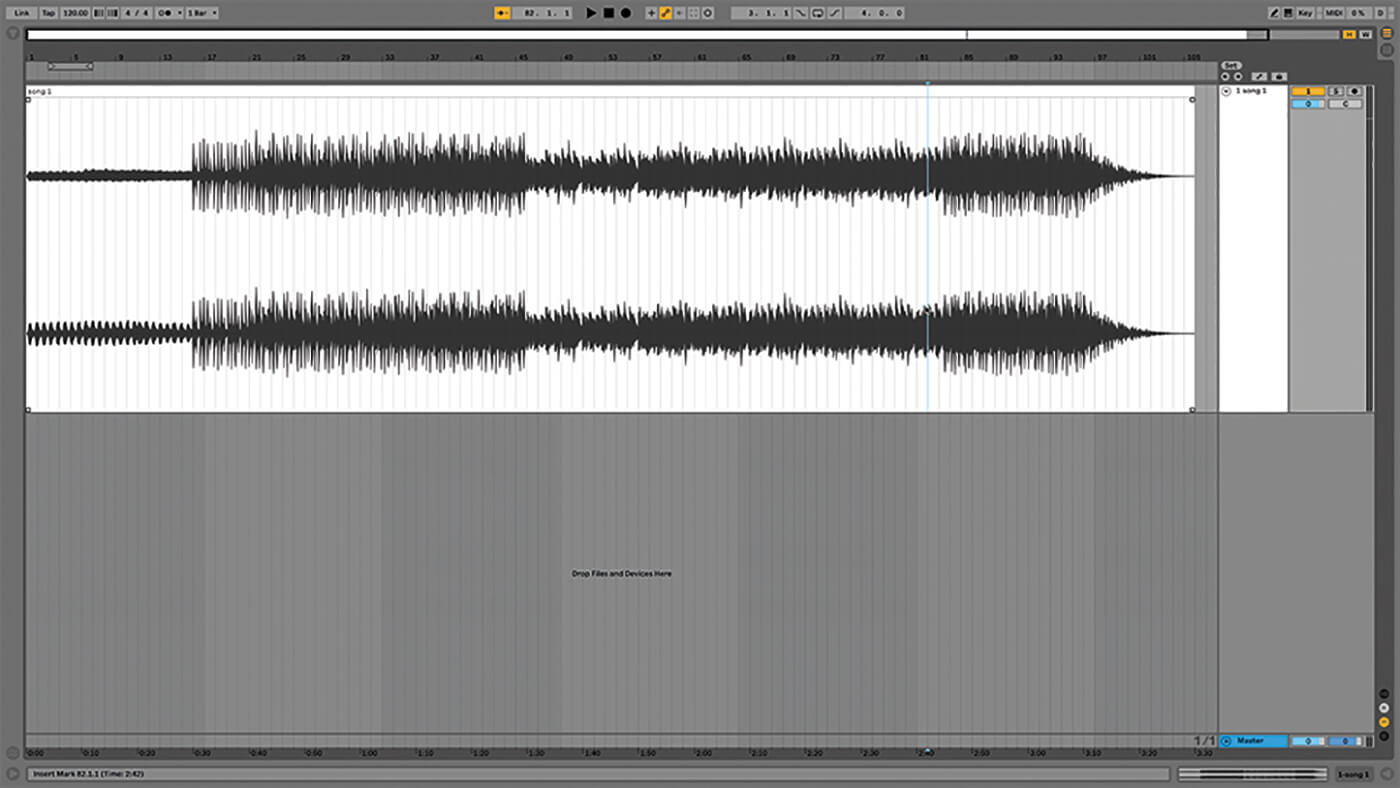
We have provided a stereo track tailor made for this tutorial, it has some beats, loud bass, and synth effects. If you don’t have Live 10, go into the project folder and take the song file out of the Samples folder and open it in your version of Live (otherwise download the Live 10 demo from ableton.com).
If you look through Live’s Mixing & Mastering presets, you’ll see that the most-used devices are Compressor, EQ Eight, Limiter, and Utility. This makes sense, as they are the most useful tools, after all. But amongst those essential rack presets you’ll also find others such as Glue and Multiband Dynamics.
As a general rule of thumb, we’d recommend you not to warp a track that you’re mastering unless there’s a specific request to change tempo, which isn’t usually something that you should be dealing with at this point. Multiband Dynamics is like having three compressors in one, covering low, mid, and high, between them: you could replicate this by making a rack containing three separate compressors, but it’s more convenient to use, and easier to visualise with Multiband Dynamics.
The thresholds, levels, and frequencies of each band are adjustable, making this a powerful tool for improving stereo mixes. You can start from scratch, building your own settings, or use the device presets, or audio effect racks that include it. It’s quite easy to hear the differences between the presets; they can be a fast way to get close to your desired result and edit from there.
Stereo imaging
Anything with a Dry/Wet mix can be really helpful with mastering, where you can set a more extreme amount of compression, then dial back the Wet mix to retain more of the original unprocessed sound. Mid/Side processing is the term used to describe when the centre, mono, portion of a stereo signal is separated from the ‘outer’, stereo section – the parts that are not common throughout the stereo image.
In Live this is achieved through EQ Eight, and the Utility device pairs up very well with that. EQ Eight handles the EQ or filtering of the Mid and Side sections, while Utility can make further changes to the stereo image – by defining how much of the mix is mono, and editing the stereo width of the remainder. Try putting this before EQ Eight if you’re going to use M/S processing.
Never break the chain
The final item in your mastering chain should always be a Limiter, that’s your last chance to boost and optimise the volume, making sure that your rendered stereo file will be as ‘loud’ as possible – or rather, will have the best possible dynamics; and in this case, ‘best’ means most appropriate for your project, usually a decision based on genre. There’s another way to make big changes at the mastering stage – by using more ‘characterful’ devices that make their own imprint in terms of tone, a bit of saturation, or even full-on tape emulation. It’s best to use these only if it suits the specific project.
Live 10 has the Pedal and Echo devices, which can both come into play here, although sometimes it’s more convenient to use third-party plug-ins if you’re after a specific quality of sound. For those occasions, you can use more unique plug-ins such as PSP Vintage Warmer, Waves Kramer Tape and J37, and most recently we’ve used the IOx Audioware Onyx 340i Tube Limiter running inside the Reason 11 plug-in host – across an entire album, no less!
In an ideal world, mastering shouldn’t begin until you have a decent mix to start with, and having a vision of where you want to end up sonically; in reality of course it’s not always that simple, but we can dream. The settings referred to in this tutorial fit with the type of music we’re making, and how we’ve been listening to our project. It’s important to remember that you all have different needs. Live does have everything you need to successfully master your music. Of course there are other plug-ins that either smooth the workflow, or add a specific character beyond what Live’s devices provide – or they just add it faster. Either way, the tools are there, so get working!
Deeper mastering in Ableton Live 10: step-by-step
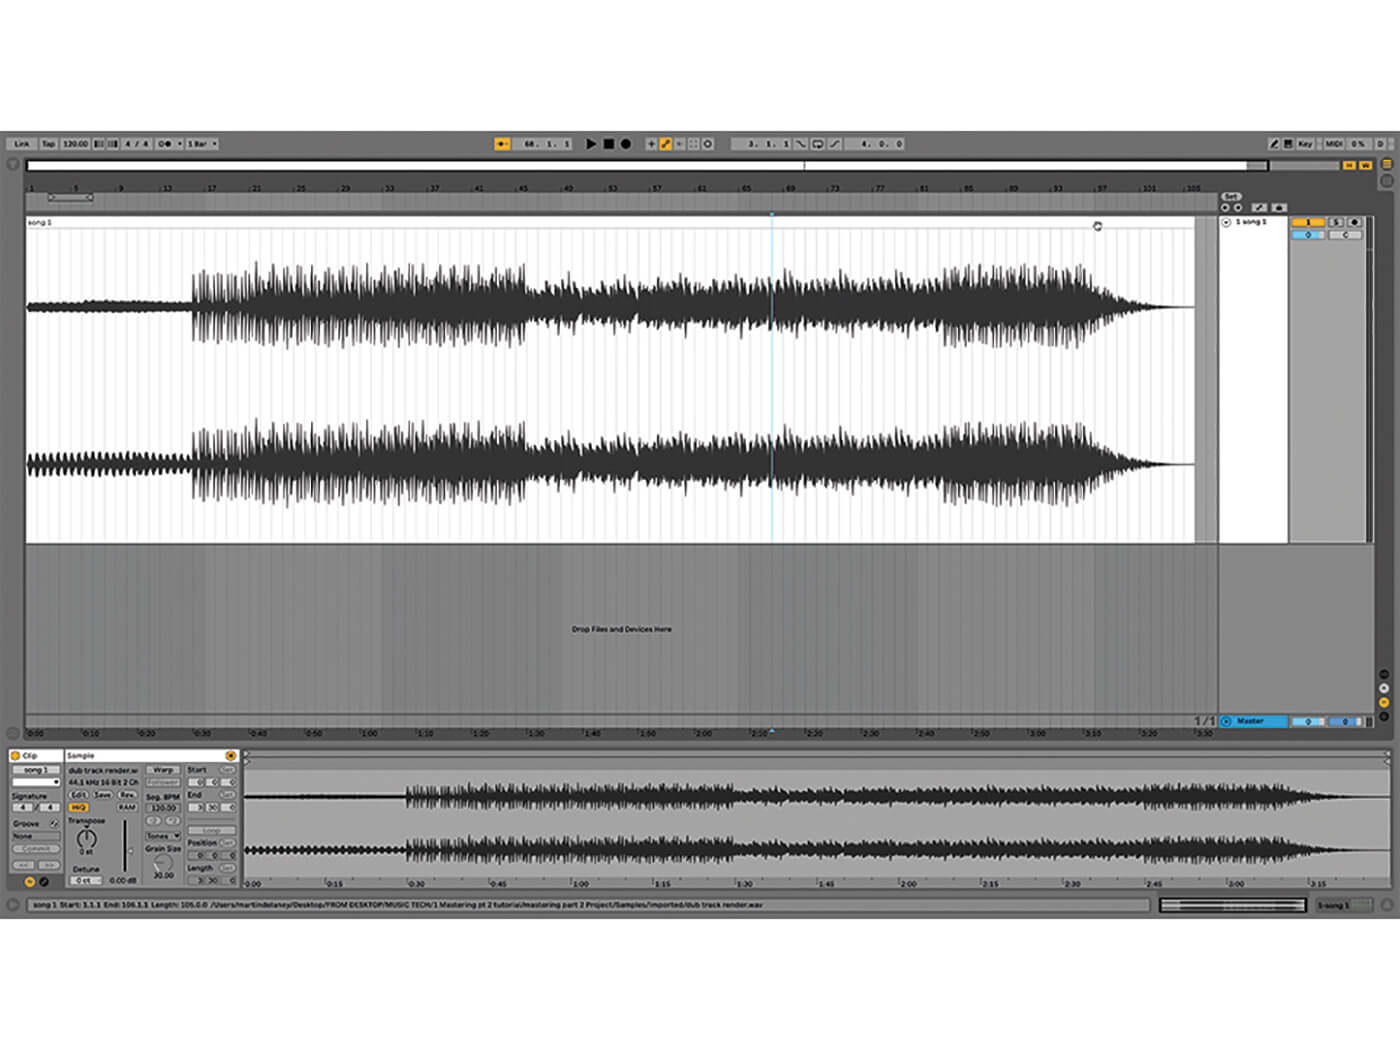
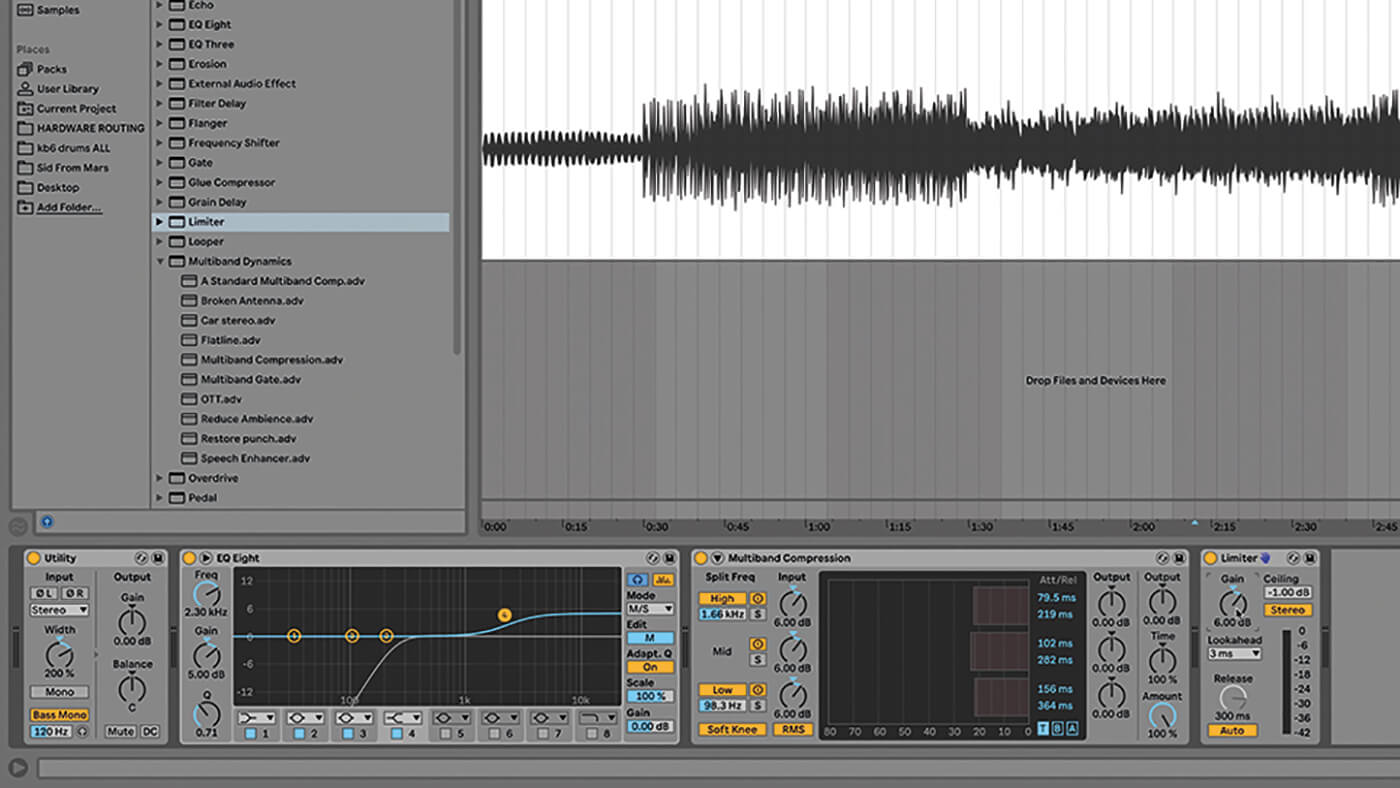
1. For this tutorial we have a Live set containing a stereo file in the Arrangement. It’s an example we made to illustrate how Live effects can be applied in a ‘mastering’ situation. Live 10 is required, otherwise extract the sample file from the project folder.
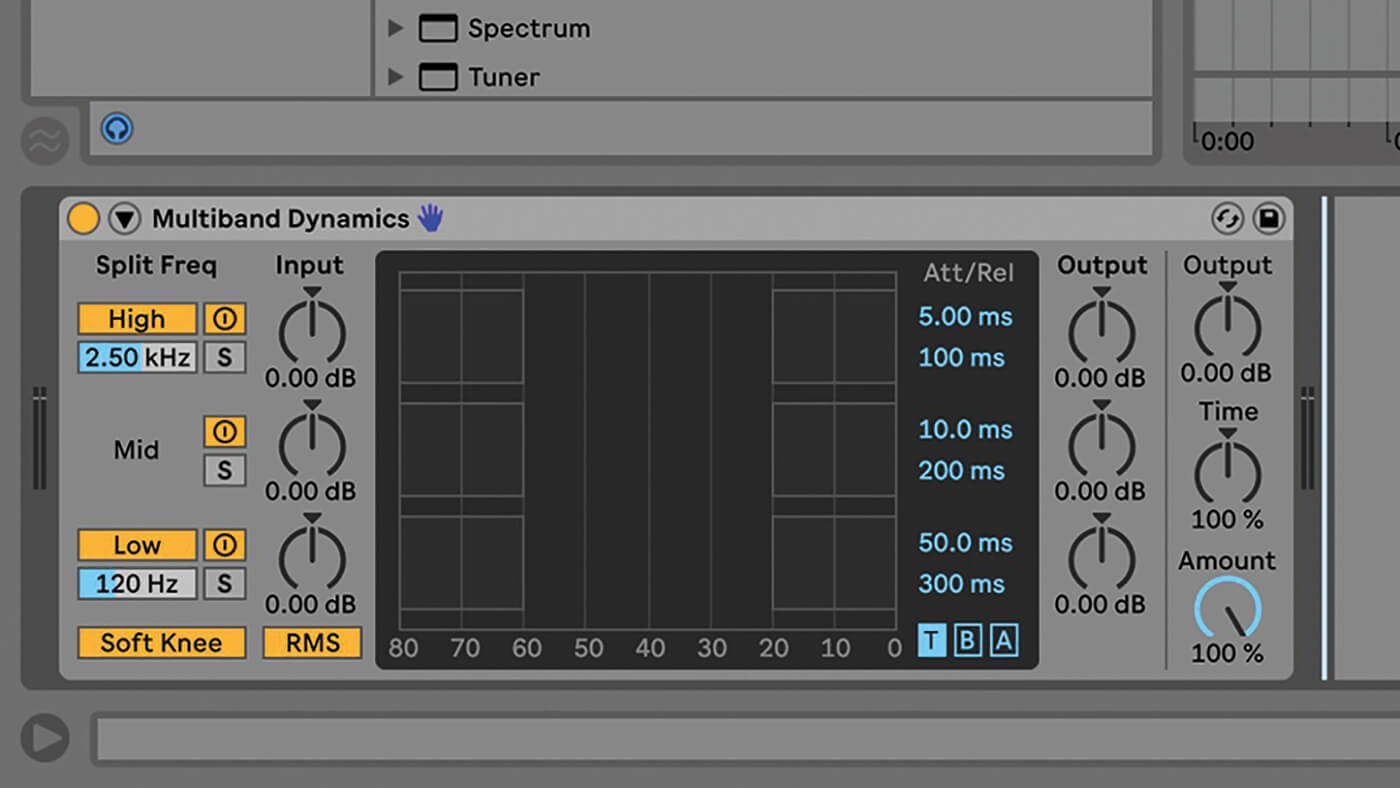
2. Multiband Dynamics is included with Live Standard and Suite, so it’s available to most Live users. It’s not essential to use it for mastering, but there are times when it’ll come in very handy, dividing your stereo mix into three bands for more precise control.
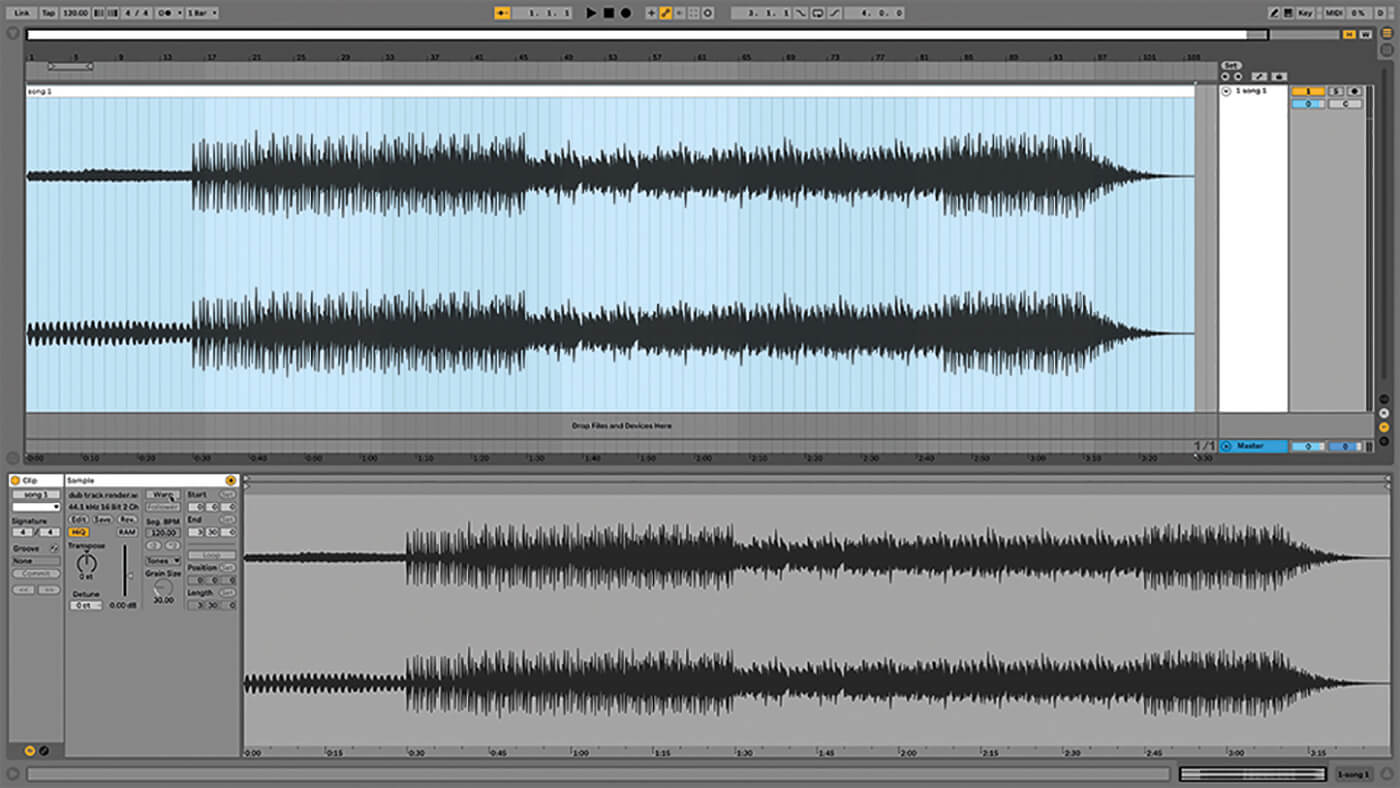
3. Let’s look at the stereo track – listen through before starting anything. It’s a straightforward instrumental piece, rendered as a stereo file. It is of course unwarped – there’s no reason to warp songs at this point unless you actually want to change their tempo.
4. Last time we talked about using Live’s Limiter effect to boost the level of a mix without incurring distortion, and how this limiting could be applied at different levels, for a more or less dynamic result, and how we could visualise this using freeze/flatten.
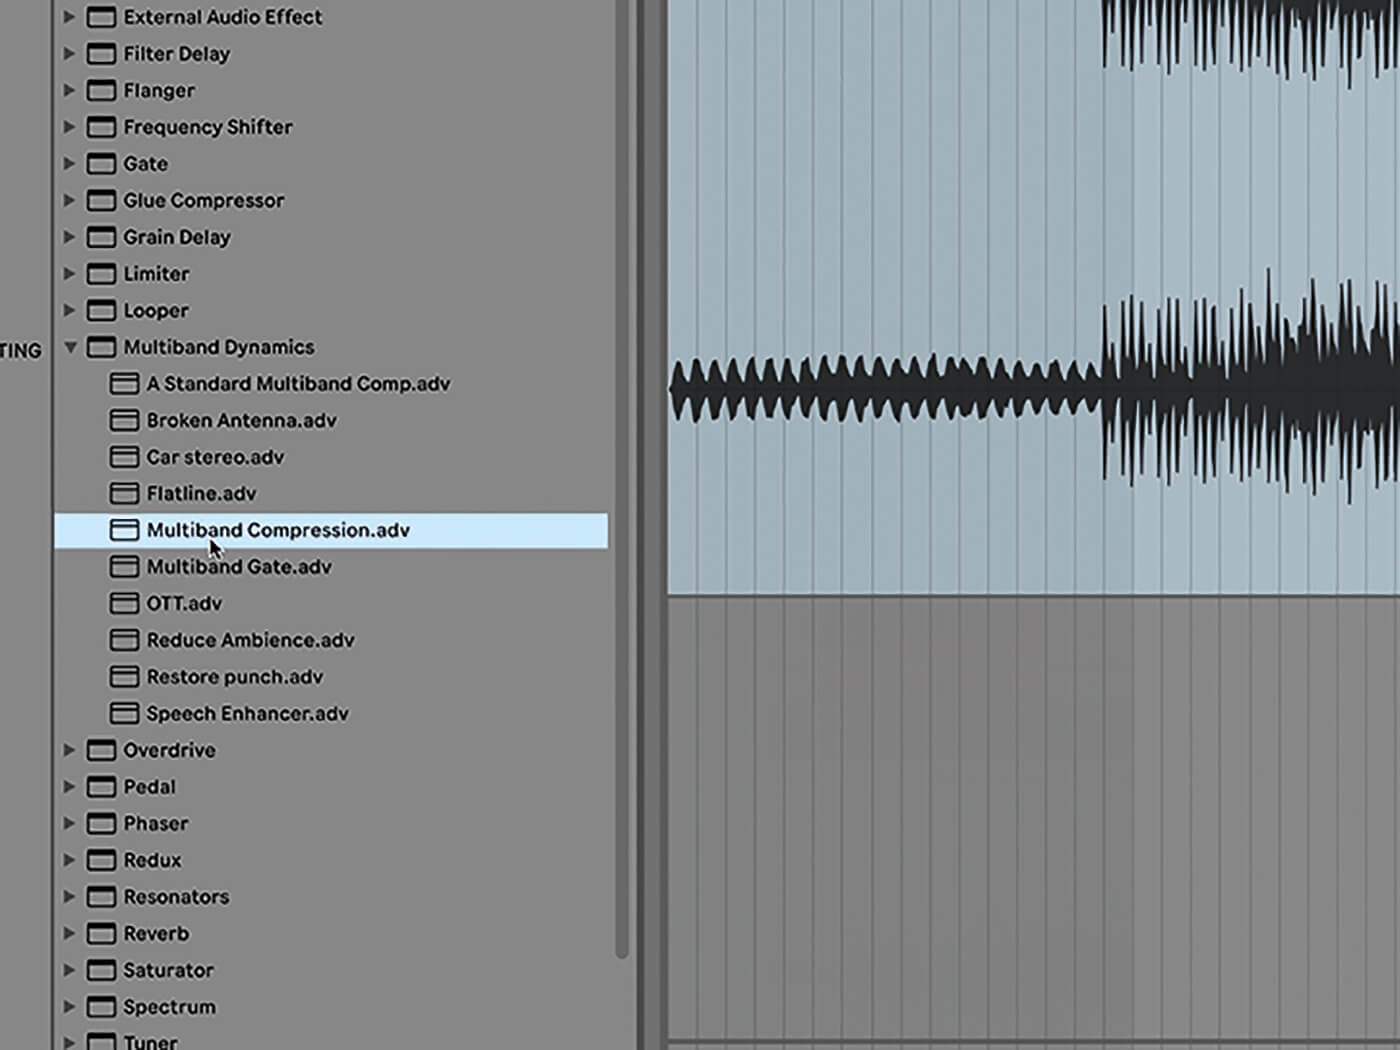
5. Multiband Dynamics is more complex to use, but can have a more transformative effect on the mix if needed. Fortunately it comes with some very useful starting-point presets. If we’re using Multiband Dynamics, we usually start with the Multiband Compression preset.
6. Let’s be super-clear that the relevance and specific settings of Live devices and racks will vary according to your material. We’re referring specifically to the example track provided, you can’t just take settings from one mix and apply them to all others.
![]()
FACTORY FRESH Go into Live 10’s Browser, Audio Effects, Audio Effect Rack, Mixing & Mastering, and you’ll see the included factory preset racks that might be useful for our purposes. These are well worth poking around in, you’ll get some good ideas about building racks of your own.
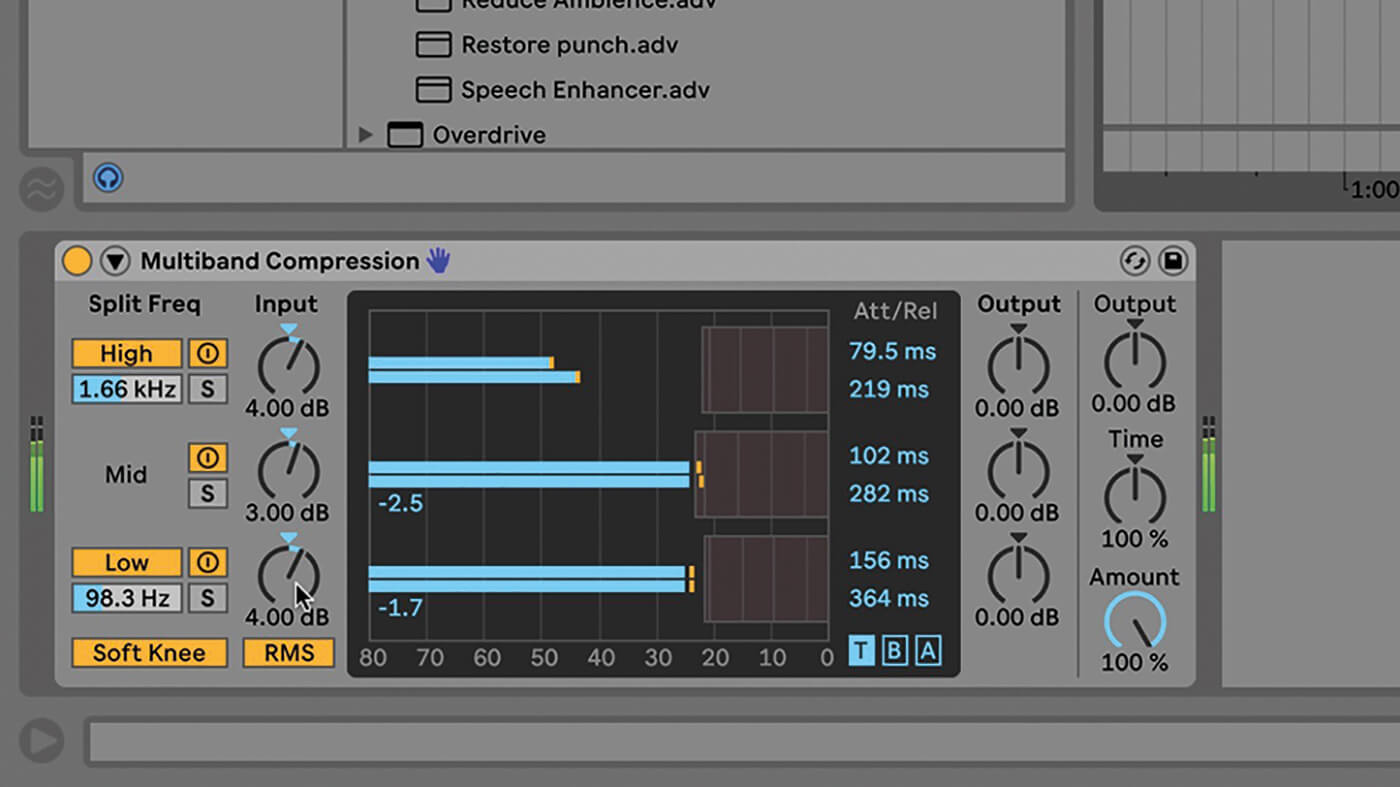
7. Load that preset onto the track, and A/B it by using the device on/off button. The track sounds over-boosted, so reduce the High and Low Inputs to 4.00 dB, and Mid to 3.00 dB.
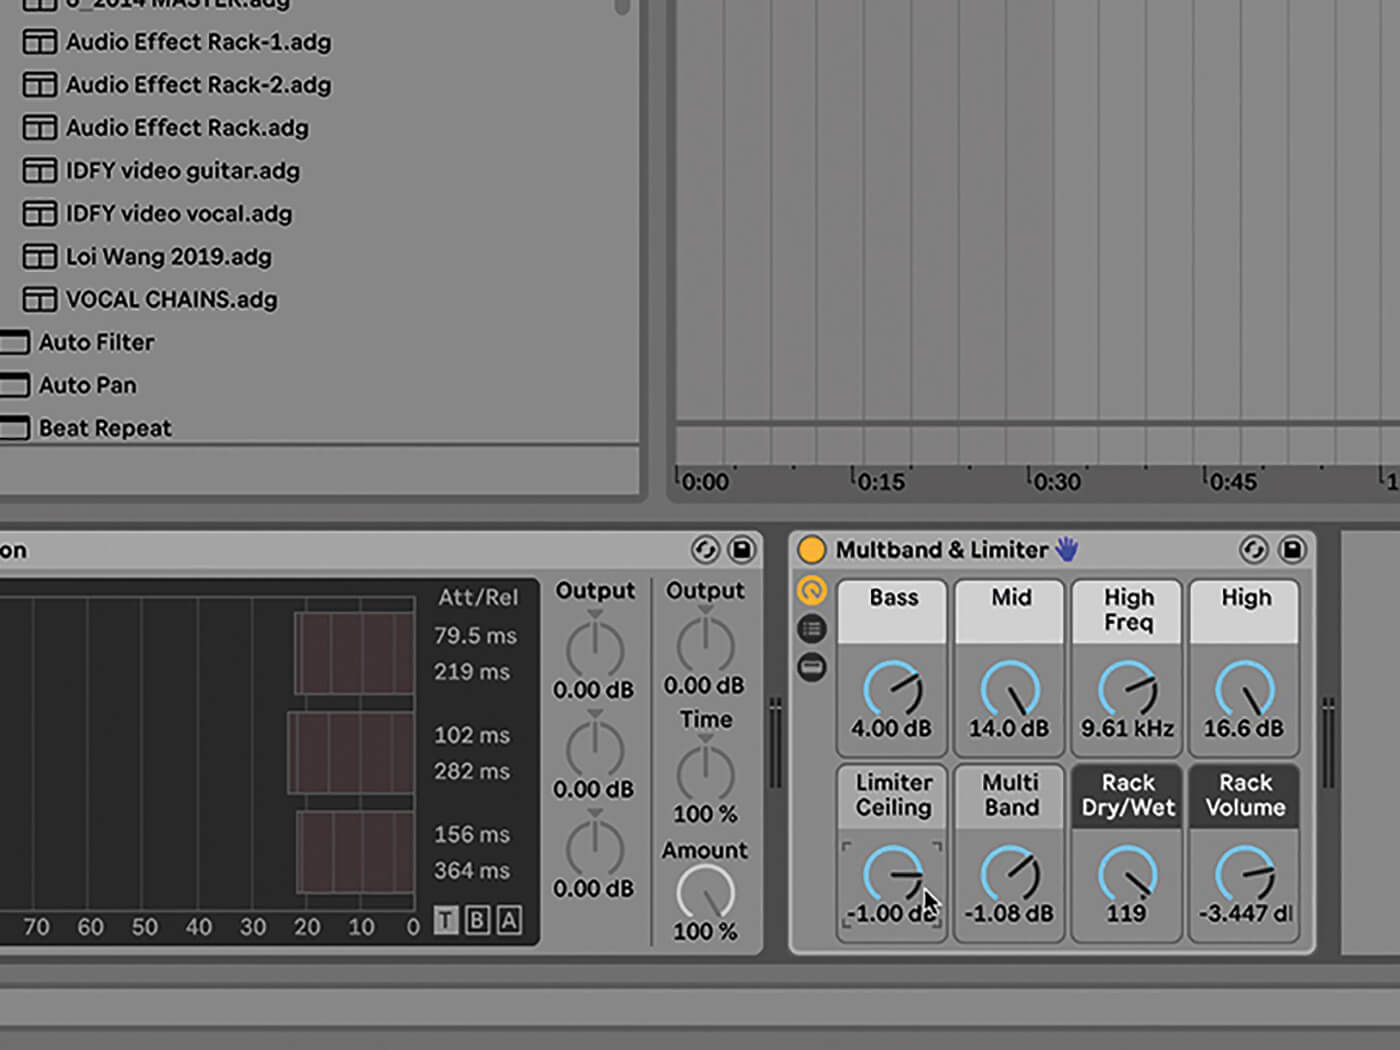
8. Deactivate that device, then load Audio Effect Rack/Mixing & Mastering/Multiband & Limiter, loading a simple effects rack. Compare that to our first preset. Again, to our ear it sounds a bit overdone, so roll back the bass and mid macros, and set Limiter Ceiling macro to -1.00 dB.
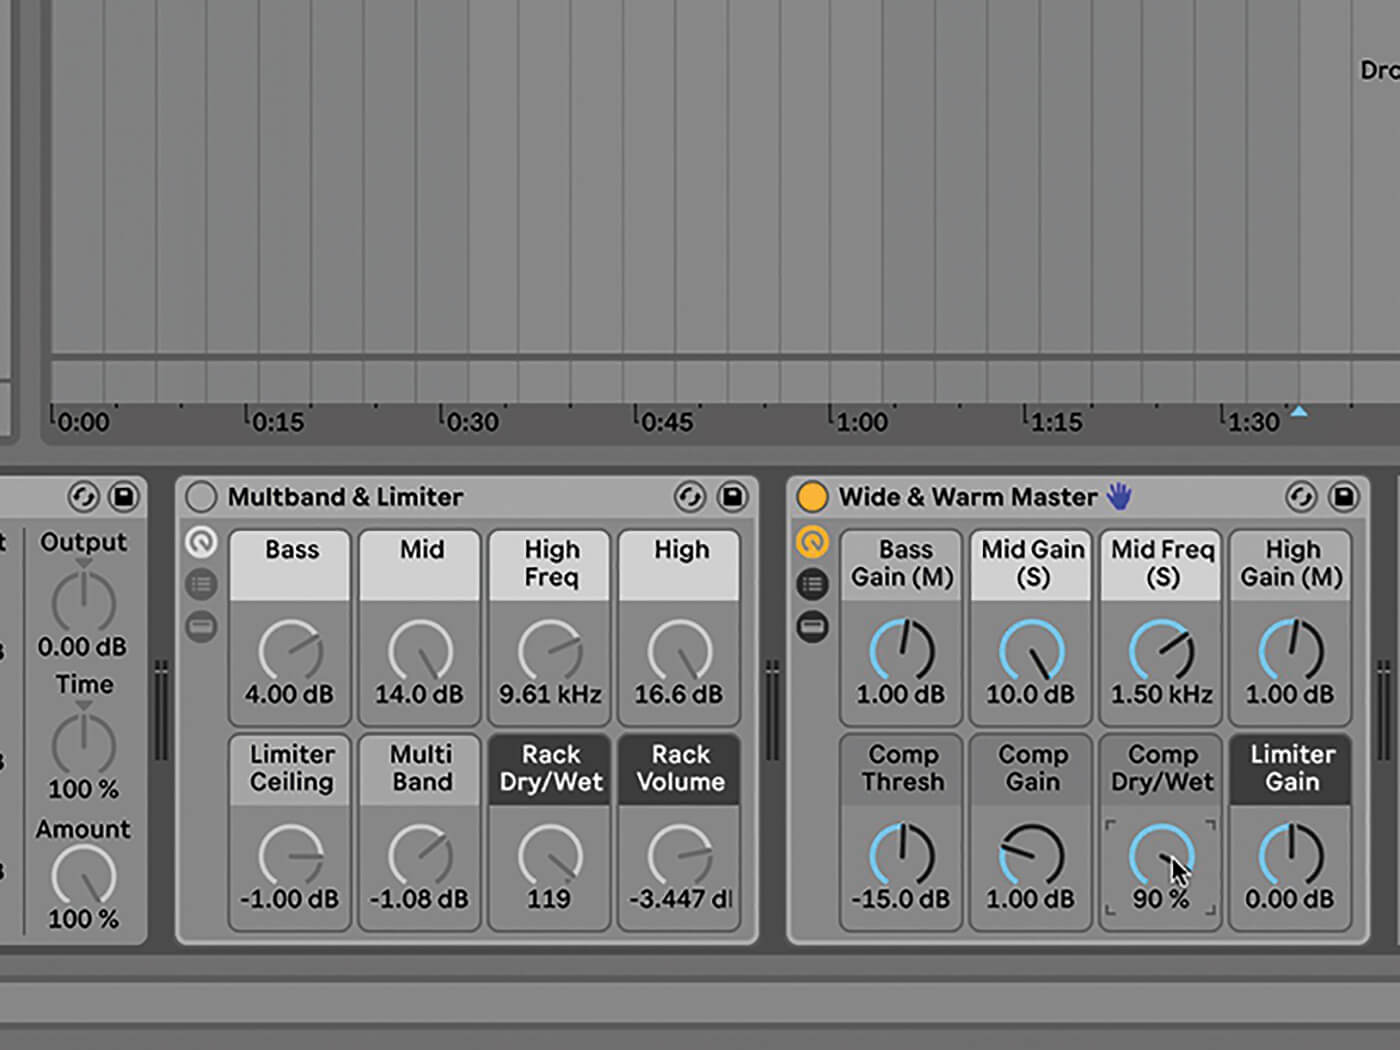
9. One more, Audio Effect Rack/Mixing & Mastering/Wide & Warm Master. You should be able to hear some differences between each of these presets. This one wasn’t so extreme, and if anything what it most needed was some tweaking with the Comp Dry/Wet macro.
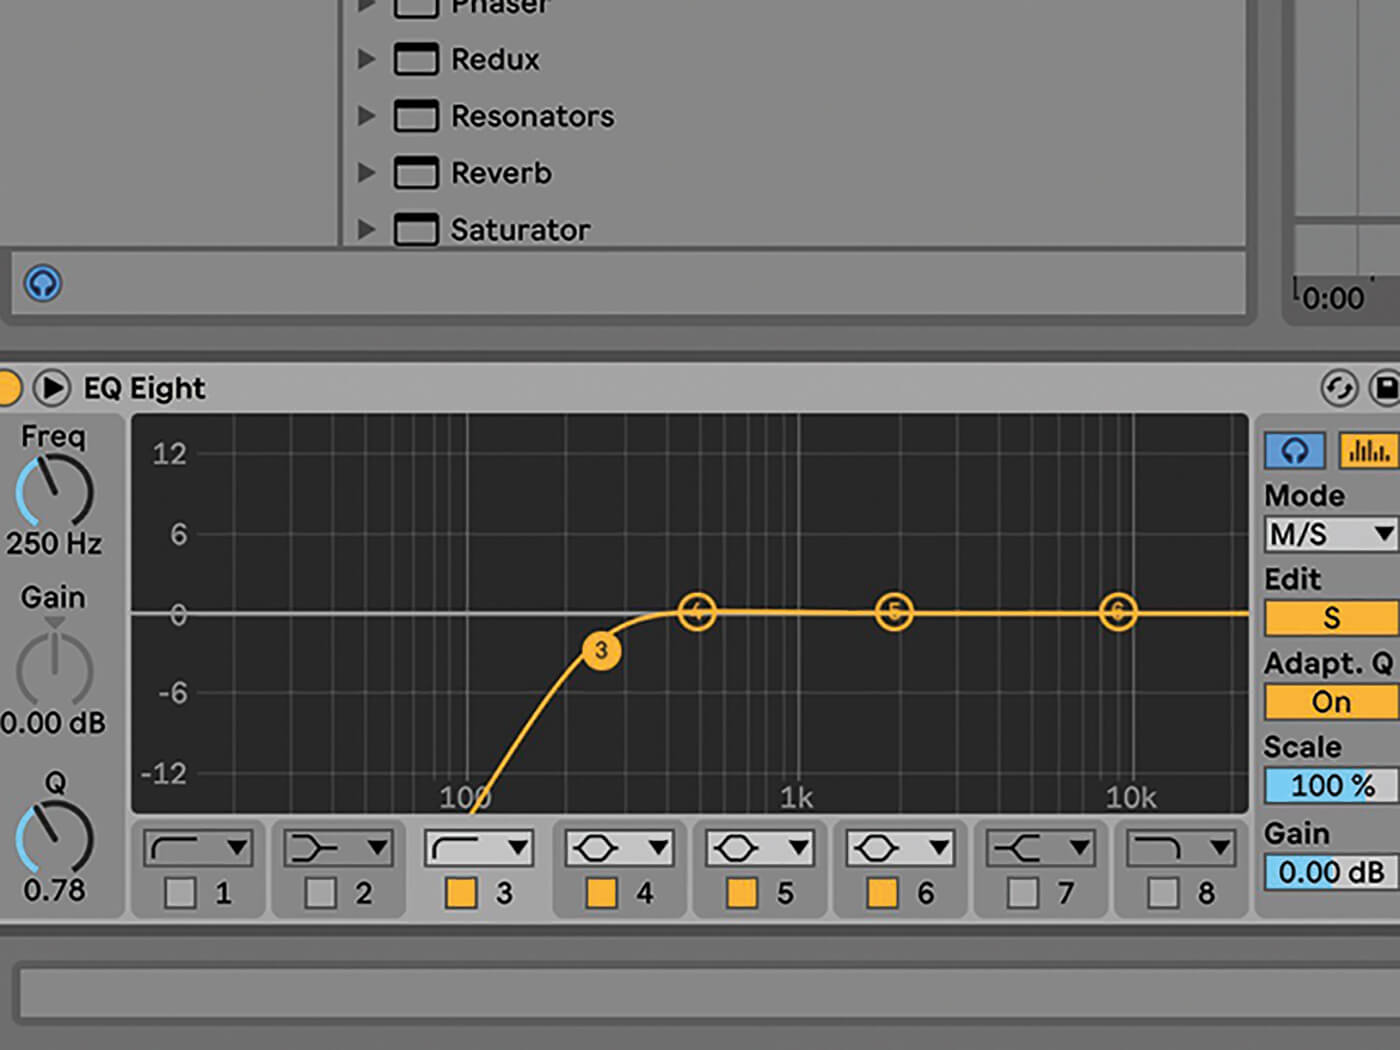
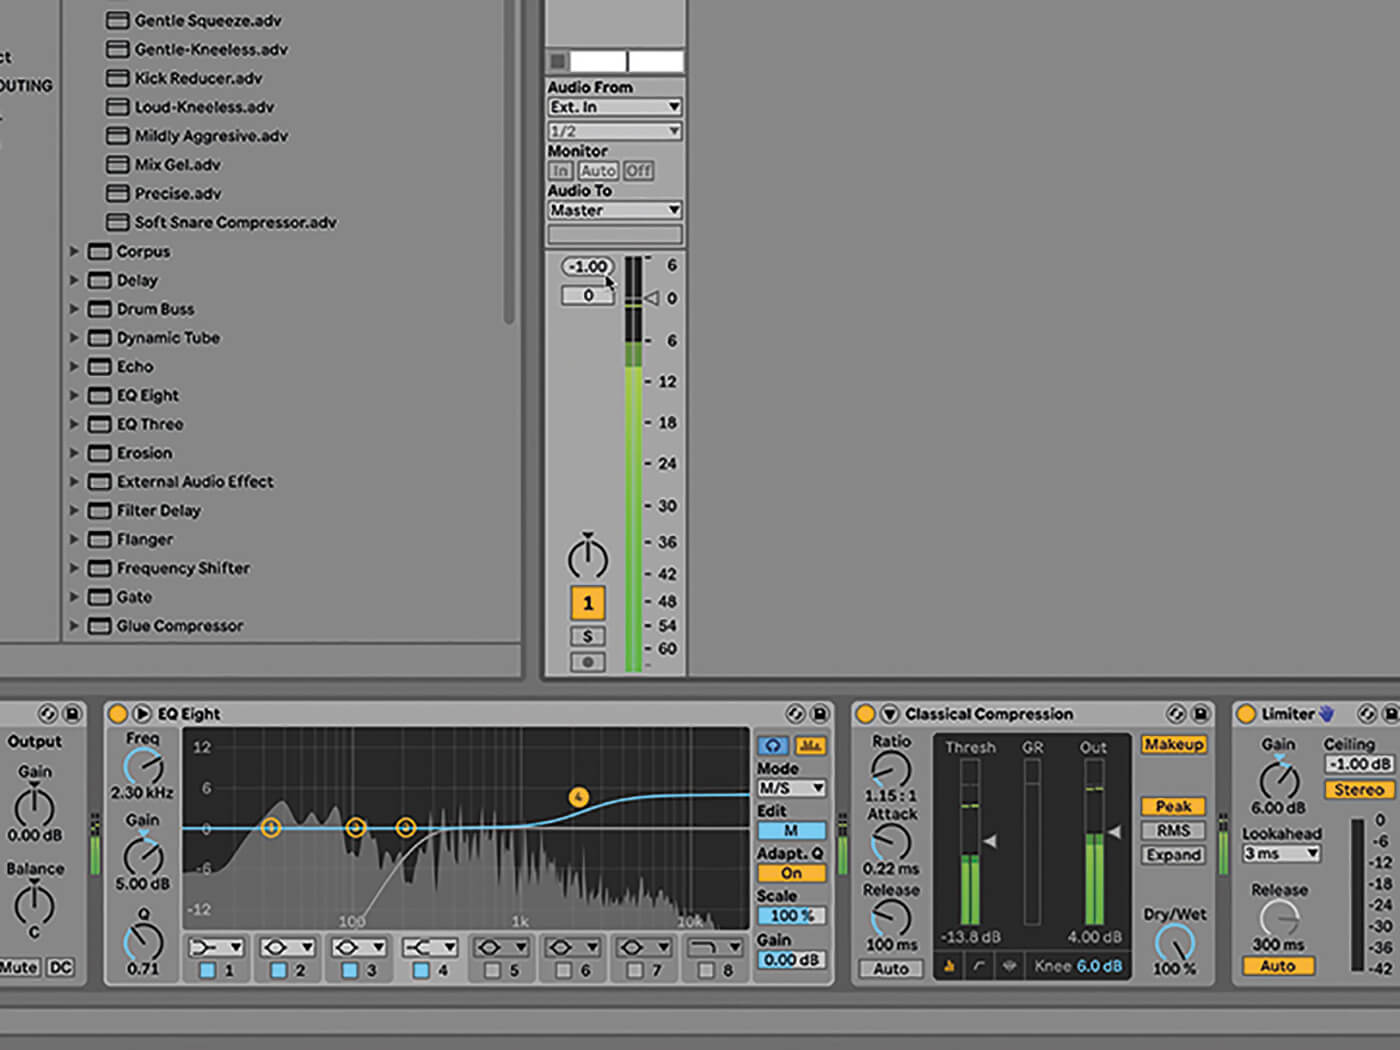
10. Turn off all those effects for a minute, as we load EQ Eight onto the track. Set the Mode to M/S. From the edit button below that, choose S for Side, and roll off a lot of the bass, going as far as 250 Hz.
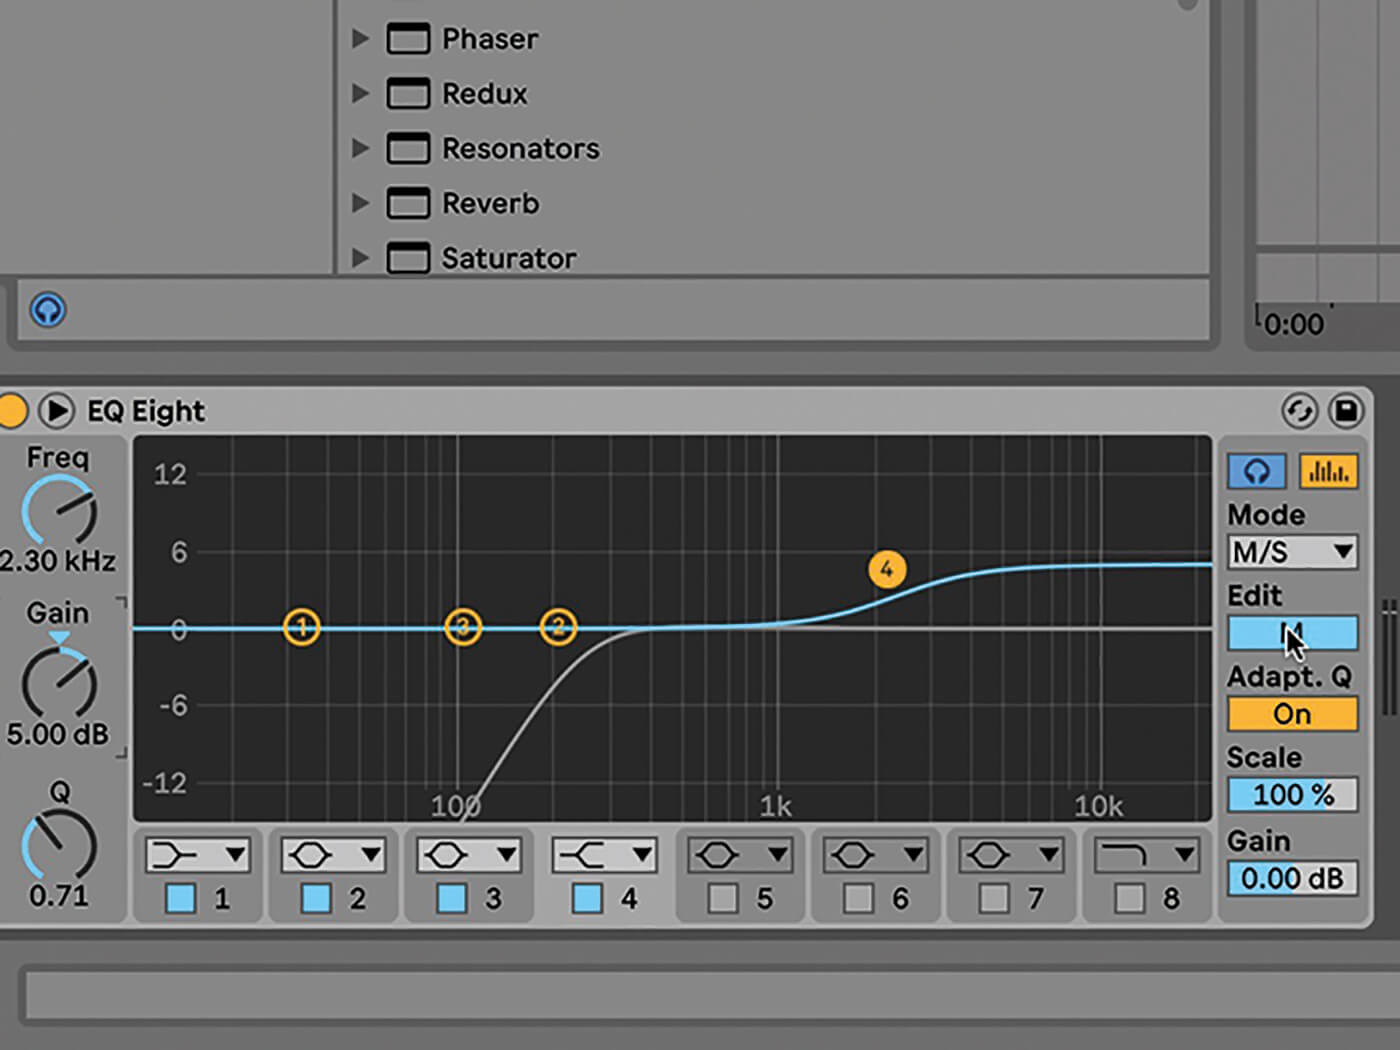
11. Choose M for Mid, and boost Node 4 at 2.30 kHz, with Gain at 5.00 dB. Using the EQ like this relates to other devices in the track. If you put this before Multiband Dynamics, you might have to adjust them to compliment each other.
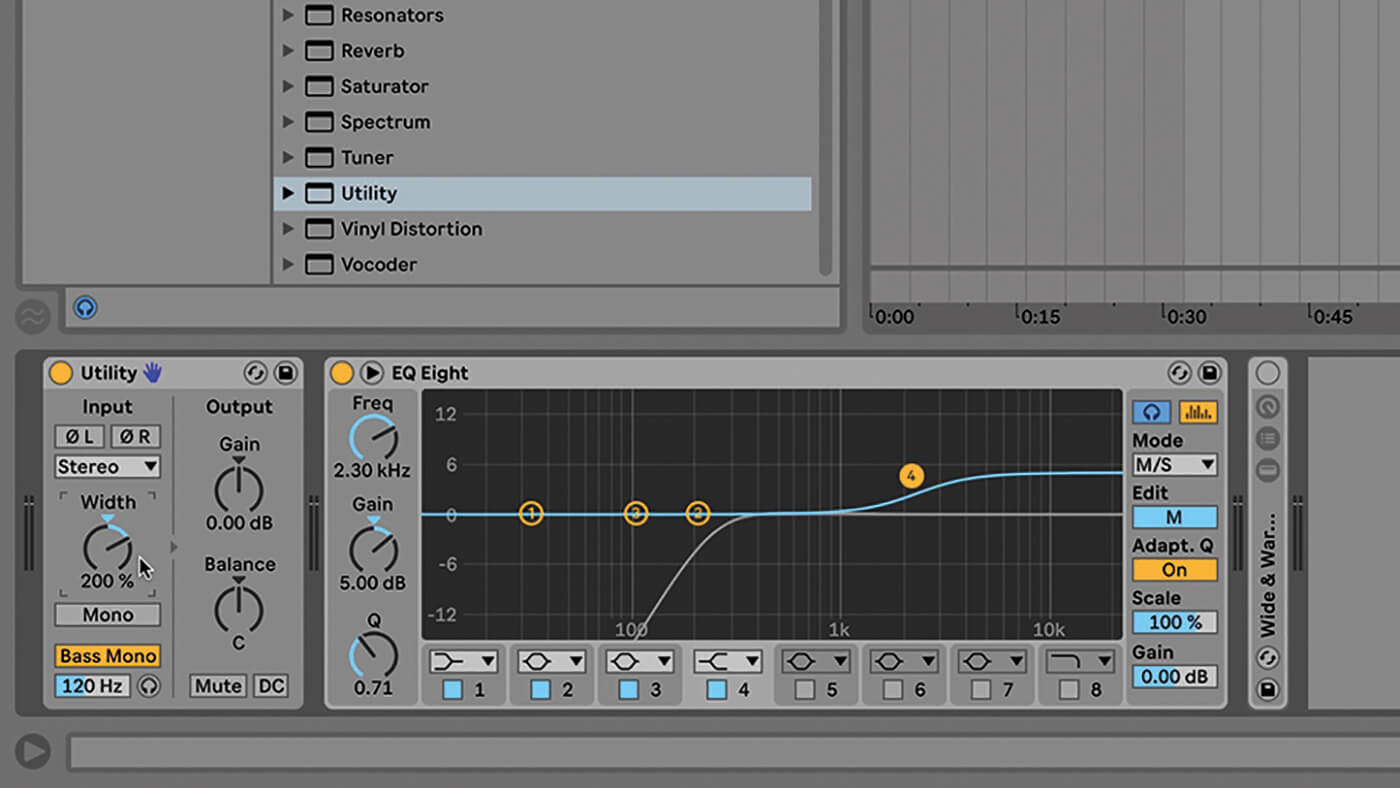
12. You might also add the Utility device before EQ Eight, to set everything below 120 Hz to mono, while widening the stereo image to around 200%. Weparticularly enjoy the Bass Mono function and the fact that it can be solo’d as well.
![]()
SELF-SUFFICIENT If you’re mastering your own music, you have the absolute luxury of being able to skip back and forth between your mix and your master. If fact if you’re only dealing with one track, you might as well just do the mastering inside the original project!
13. Turn the Multiband Compression device back on, it works well with these devices. Add a Limiter at the end, and set the Gain to 6.00 dB, and Ceiling to -1.00 dB, so that the Gain Reduction indicator shows a little activity, but not too much.
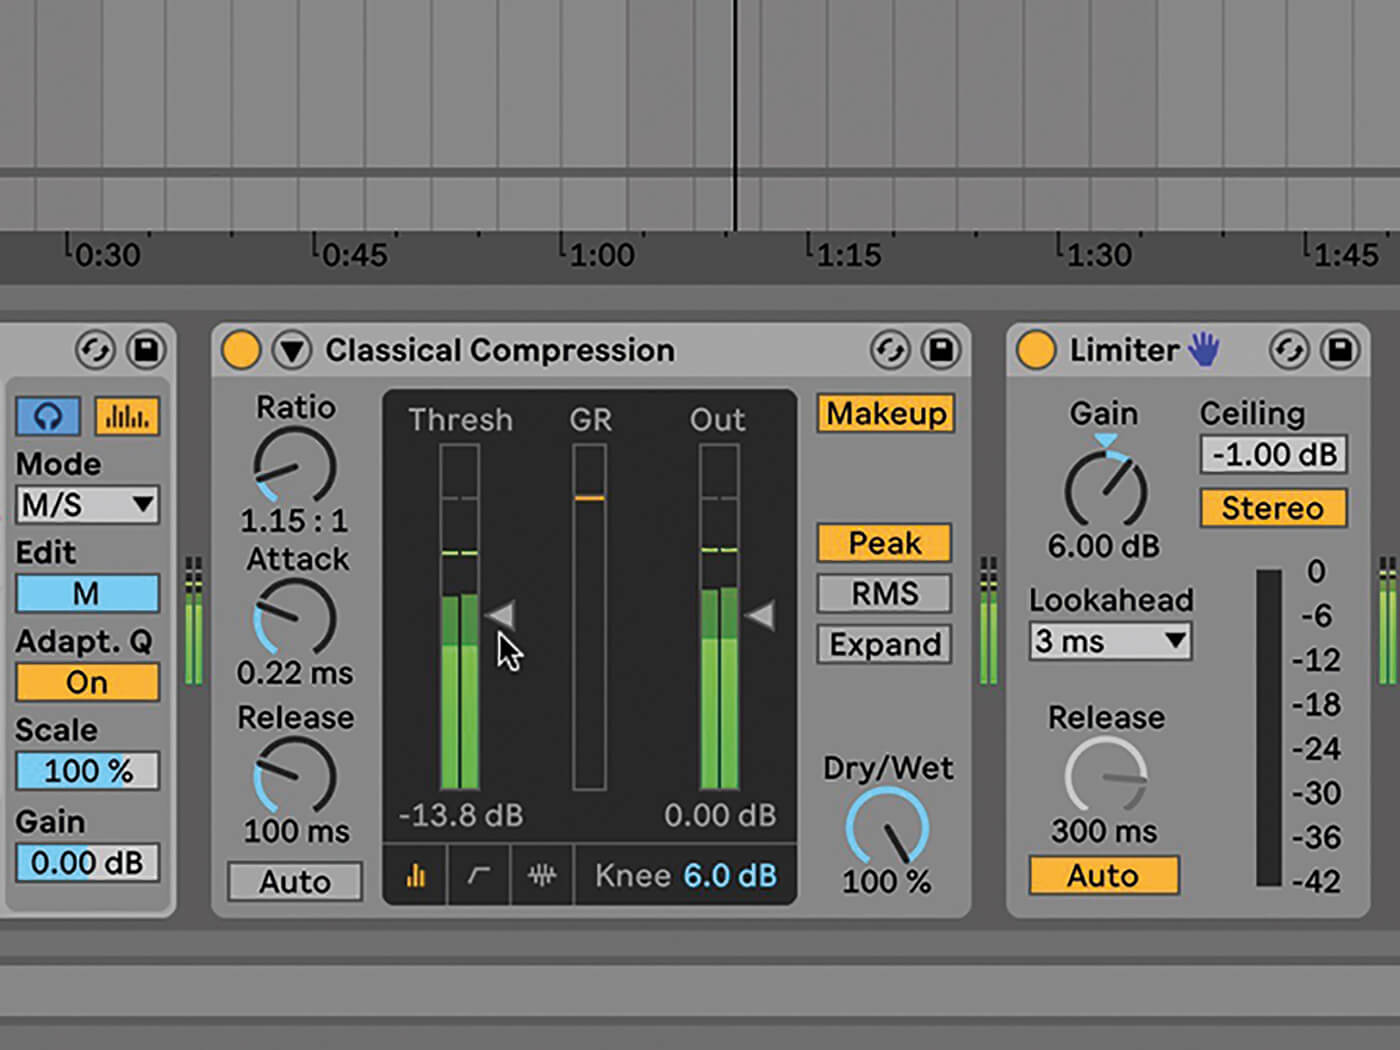
14. If you don’t think you need Multiband compression, the regular Compressor audio effect device does a great job. Load the Classical Compression preset and make sure Multiband Dynamics is off. Try lowering Compressor’s Threshold by 4 dB, and more Gain Reduction will take place.
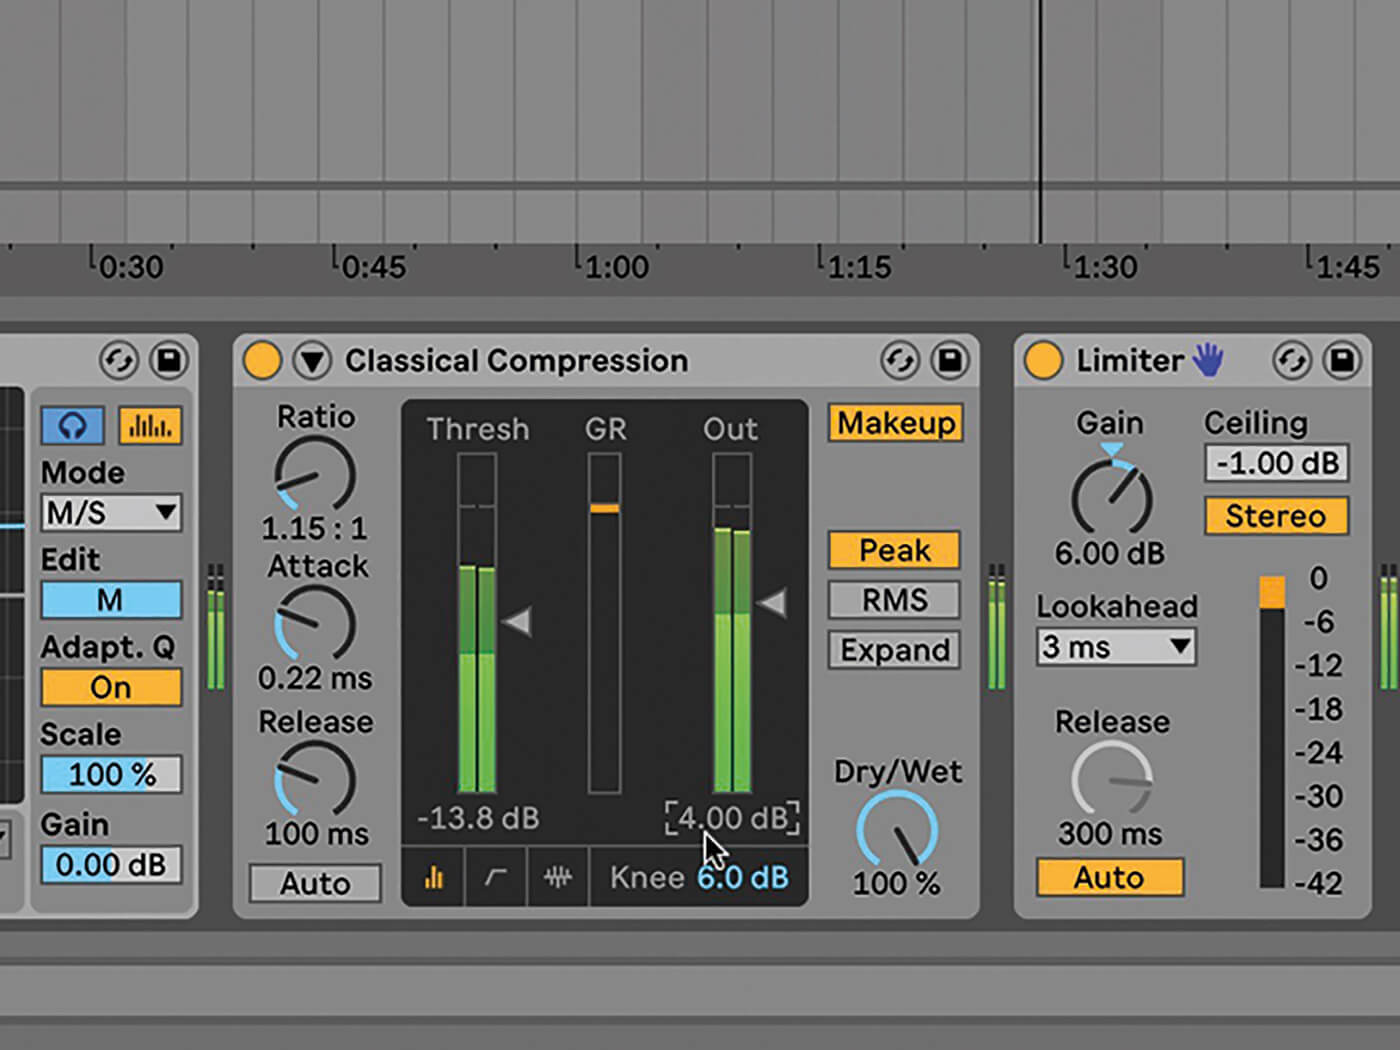
15. Raise Compressor’s Output Gain by the same amount to restore volume levels lost in the Grain Reduction process. Now you should have a more compressed track, that retains or increases the original level. If you don’t restore that here, do it in Limiter.
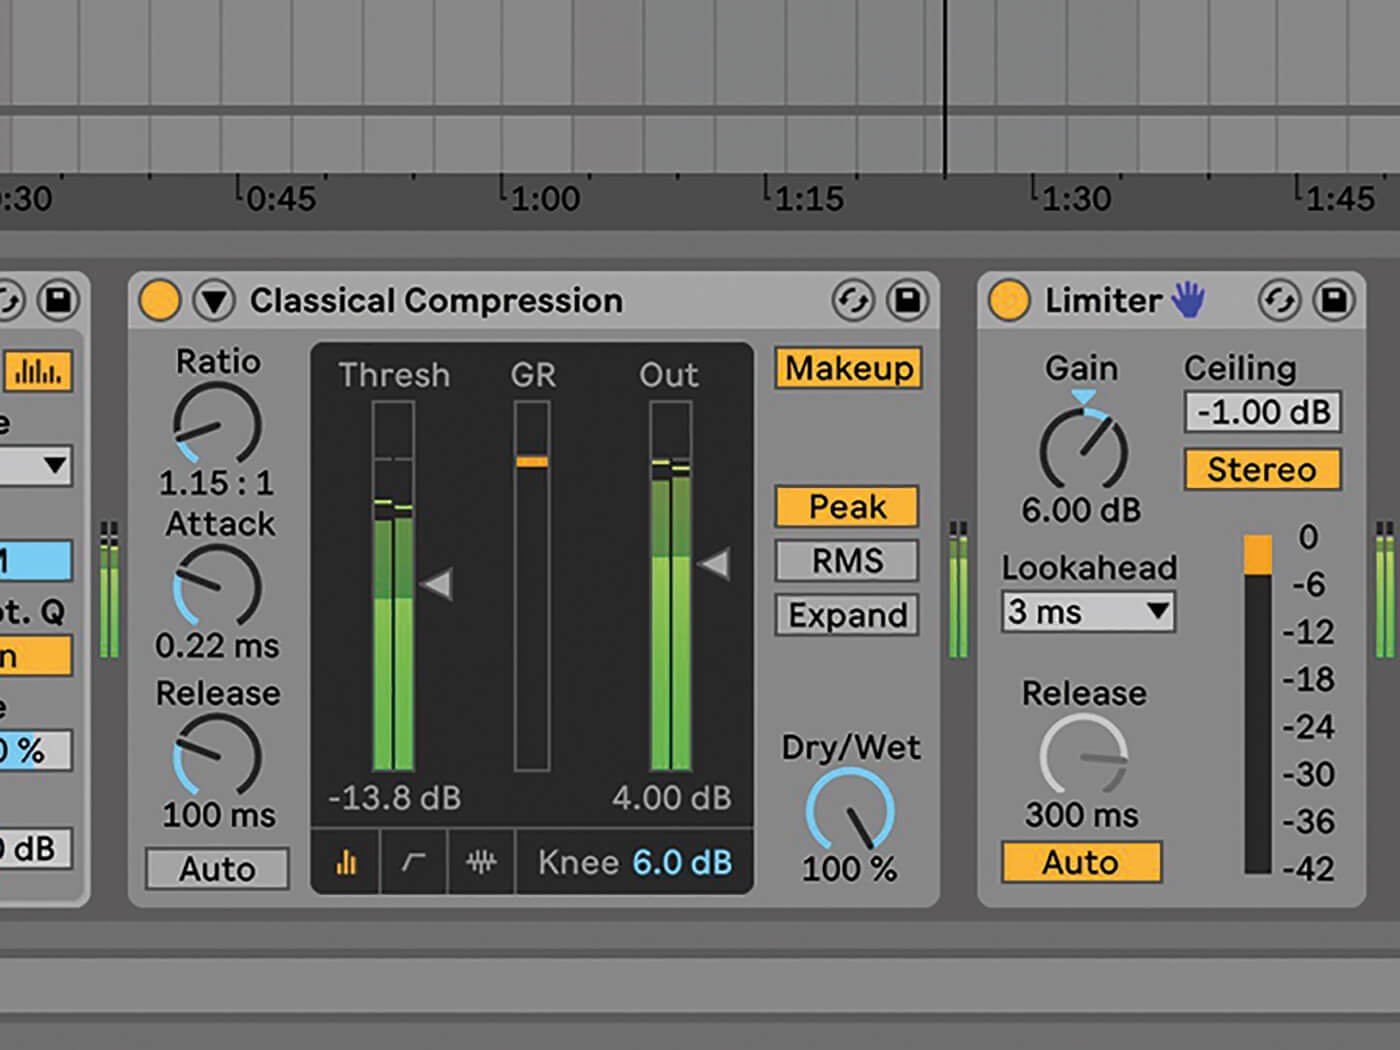
16. Managing volume through this entire process is critical. We absolutely do not want anything maxing out – there must be no red peaks in the chain! On the other side of that, we want to make sure that Limiter is active and some gain reduction is happening.
17. A big part of mastering is about achieving the maximum ‘best’ volume, the rate of compression and limiting that makes your mix sound ‘loud’ and ‘professional’ without compromising the sonic intentions of your project.

18. For that reason, when it comes to exporting our mastered files from Live, we make sure that ‘Normalize’ is disabled in the Export Audio/Video Window – otherwise that’ll bring the track volume back up to 0 dB, which is not desirable at this point.
For more Live tutorials and workshops, check here.