Compression and limiting demystified in Ableton Live
They’re vital music-production tools, but exactly what are compression and limiting, and how do they work in Ableton Live 10? We break it down to the practicalities…
There are times when music production, especially when it comes to mixing, seems like some weird kind of medieval black art, left over from the days when men in lab coats toiled over warm valves in a place called a ‘recording studio’. One of the most mysterious aspects of this process is compression – and this crosses over into limiting, expansion and, if you’re not careful, mastering.
Everybody knows that compression is important but, like EQ, not everybody knows how and when to use it, or even what it is. Here, we’re going to avoid technical explanations as much as possible, and instead give you some ideas about how to use it within your Live productions and performances.
The most basic explanation of a compressor is that it’s a device that reduces the distance between the quietest and loudest parts of sound. You set a level, above which you want the loud bits to be reduced in volume, and… end of tutorial! Almost. A limiter is the same, but anything that tries to pass the defined level is stopped dead. It’s limited and cut off.
With the right settings, a compressor can also double as a limiter, but in Ableton Live we have compressors and a limiters as separate devices, which keeps things a bit more immediate. Unlike most audio effects, a compressor doesn’t have a characteristic sound. In that sense, it’s more of a utility, like an EQ.
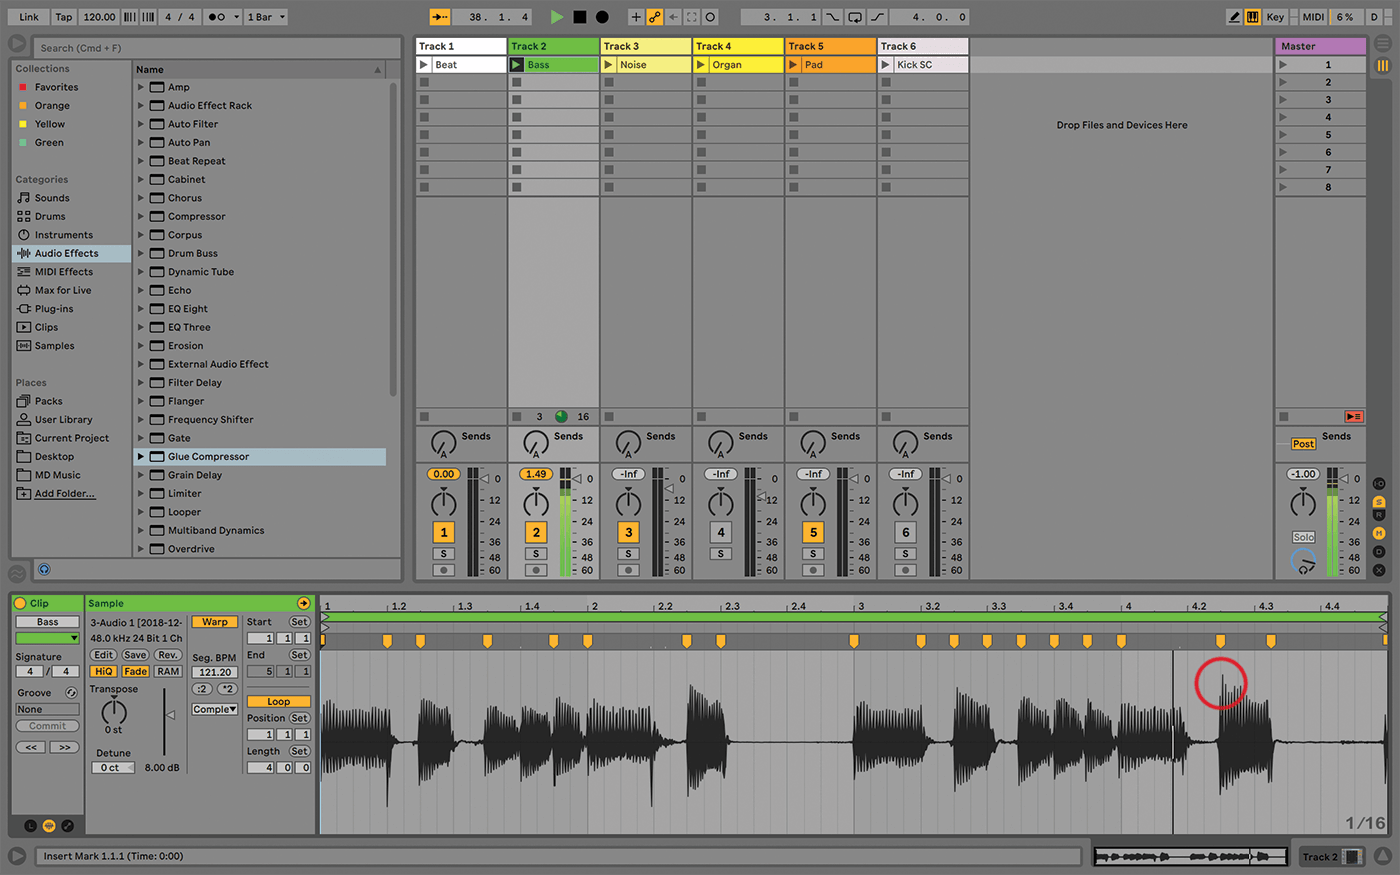
It can be used to even out the notes in a clean guitar performance, so they sound more consistent; it can constrain the dynamic extremes of a slap bass; it can beef up a recorded beat, because when you even out the dynamics in a recording, you can increase the overall loudness without creating distortion; or it can make a stereo mix sound louder and even blatantly pumped up to an extreme level if that’s what you want. One way to appreciate compression is to look at ‘before and after’ waveforms – I do this all the time.
Apply compression to a mix, then export it to disk, and bring it back in on another track, to see both at once. The compressed mix will look like it sounds – denser, and with less variation in the waveform. If you look at a stereo file that’s been limited, the outer edges of the waveform are blocked off.
Compression toolkit
Live has the following for compression or limiting: Compressor, Glue Compressor, Drum Buss, Limiter, and Multiband Dynamics. (Drum Buss is in Live 10 Suite only, and it’s almost worth the upgrade price on its own.) It’s often tempting to use compression in a more obvious and showy way, because it can sound great at extreme settings, but that’s not always good for your mix.
That’s why Compressor, Glue, Drum Buss, and Multiband Dynamics can all blend the original dry signal with the wet processed version. You can create a brutal smashed-up setting that is cool, but destructive, then dial it back a little to make it play nicely with the other tracks.
With bass guitar tracks, I often use Waves’ Bass Rider plug-in, which will effectively contain the loud and quiet parts of a track by automatically adjusting a virtual volume fader, leaving you free to either not use compression at all, or to choose a compressor based strictly on its tone. If you’re recording a bass going through an amp instead of direct, and the amp has a compressor, give it a go. That’s one of the few situations where I’d consider recording audio with an ‘effect’ in place.
This all stems from how easy it is to make super-clean productions with everything happening inside the computer. If you’re using valve guitar amps, for example, and pushing them hard, some natural compression can occur. In the same way, recording to tape, with its more limited dynamic range, creates a ‘natural’ compression, which is flattering to the music and kind to our ears. I love the sound of tape, but I use plug-ins and a hardware simulator – there’s no way I’m willing to deal with the high-maintenance real thing.
Compression plug-ins also have consistency, repeatability, and the ability to automate, and all of these are very useful. I don’t use much compression on the master. If I have a project with just a few tracks, I’ll compress each; if I have more tracks collected into groups, I’ll compress the groups. The master track is where the EQ, Utility and Limiter are used for final tweaks and for volume management.
Overall, I use compression and limiting on every project. It doesn’t have to be in an obvious way, but these useful tools are always close by.
Compression and limiting in Live: step-by-step

1. We have an example Live set ready, so you can get straight to it. Live 10 is required, but for older versions, simply take the samples from the project folder and add them to a new set.
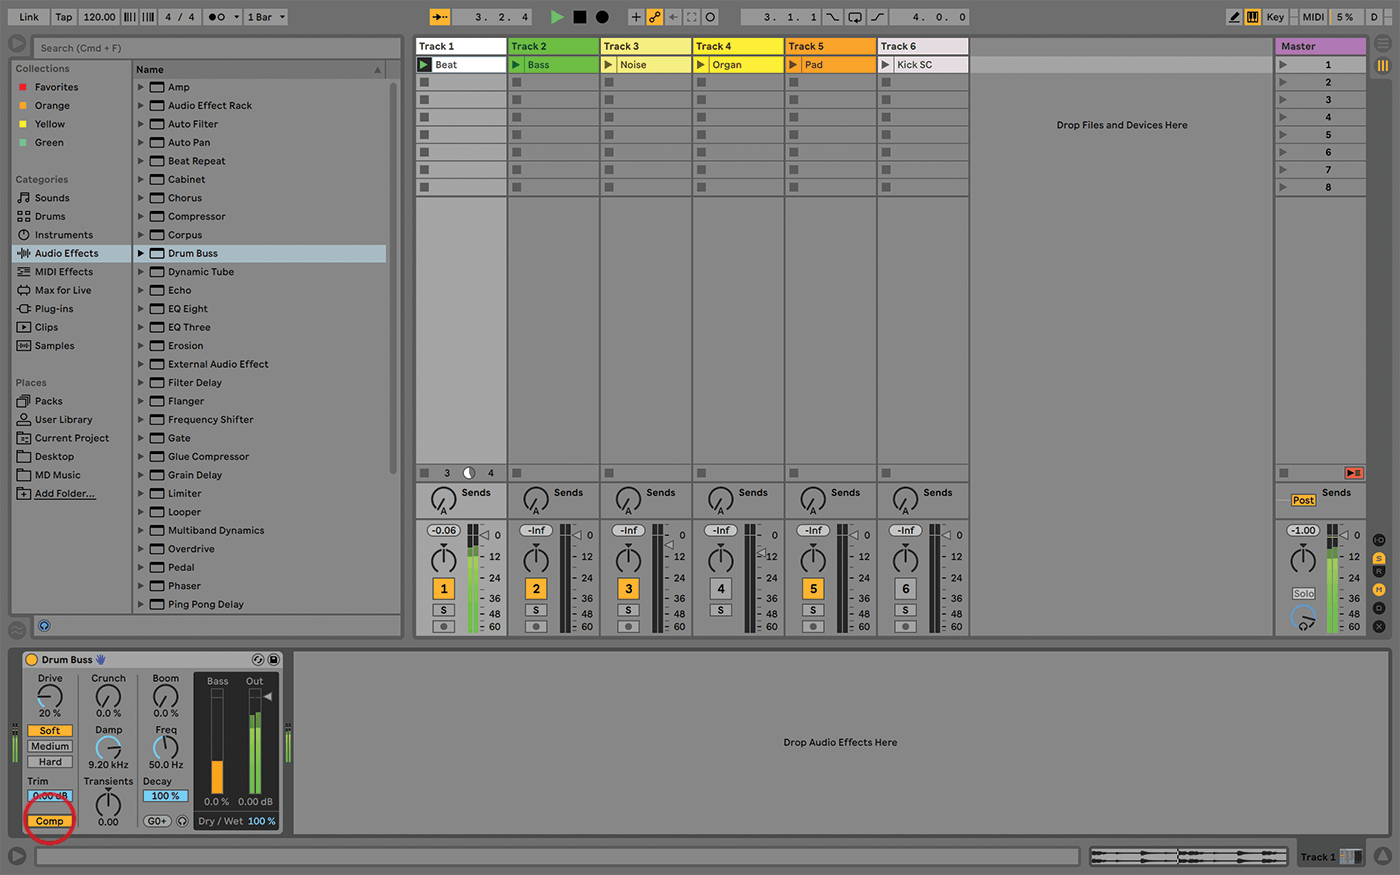
2. Track 1 contains a drum loop. Add the Drum Buss effect to that track, and click the Comp switch, applying compression to the incoming audio before it hits the distortion. Sounds a bit beefier, yes?
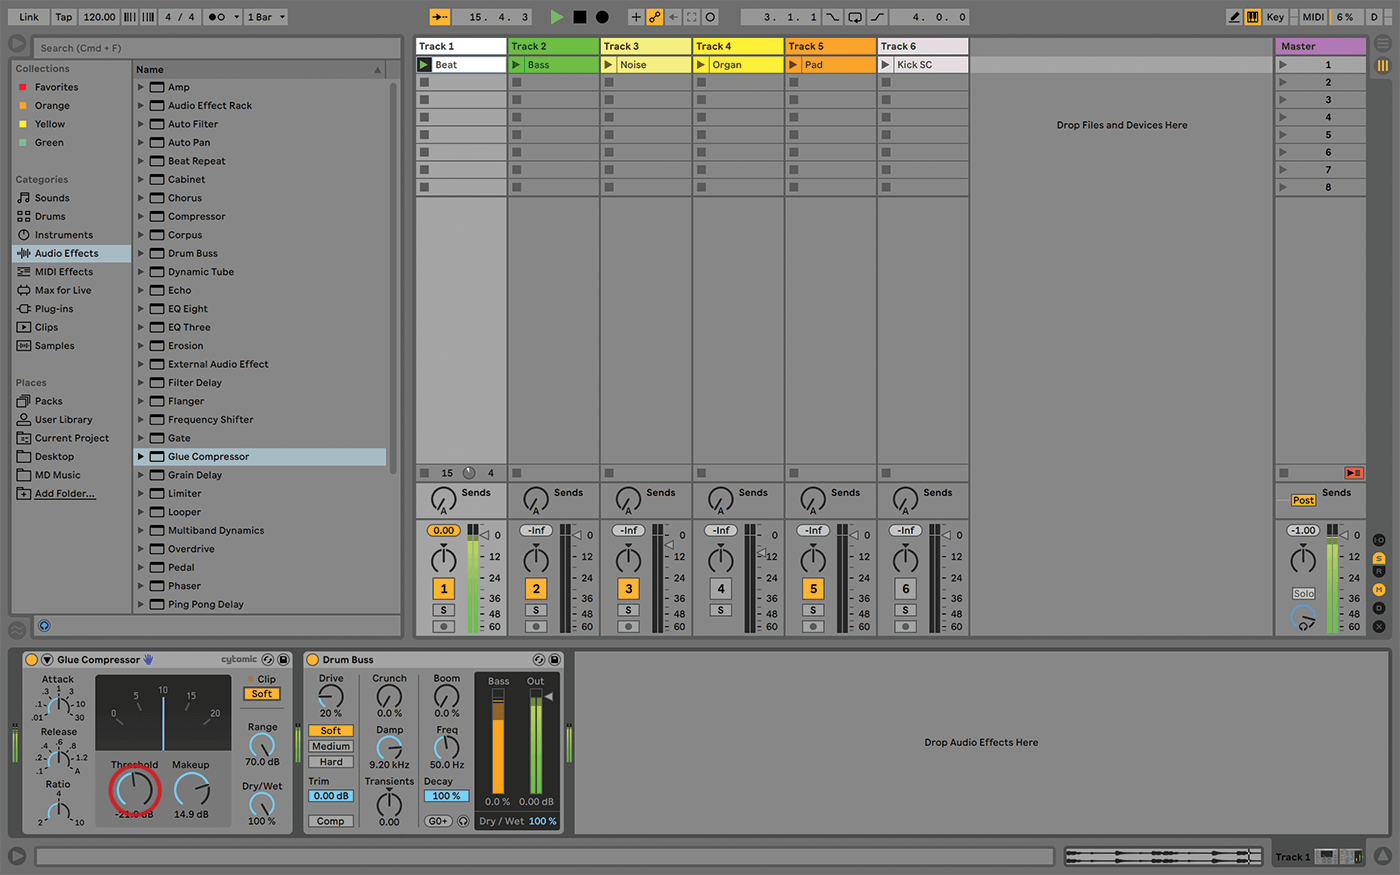
3. Alternatively, use Glue Compressor in front of Drum Buss, for more detailed compression settings. For parallel compression, where the compressed and direct signals are both heard, use the Dry/Wet control to adjust the balance.
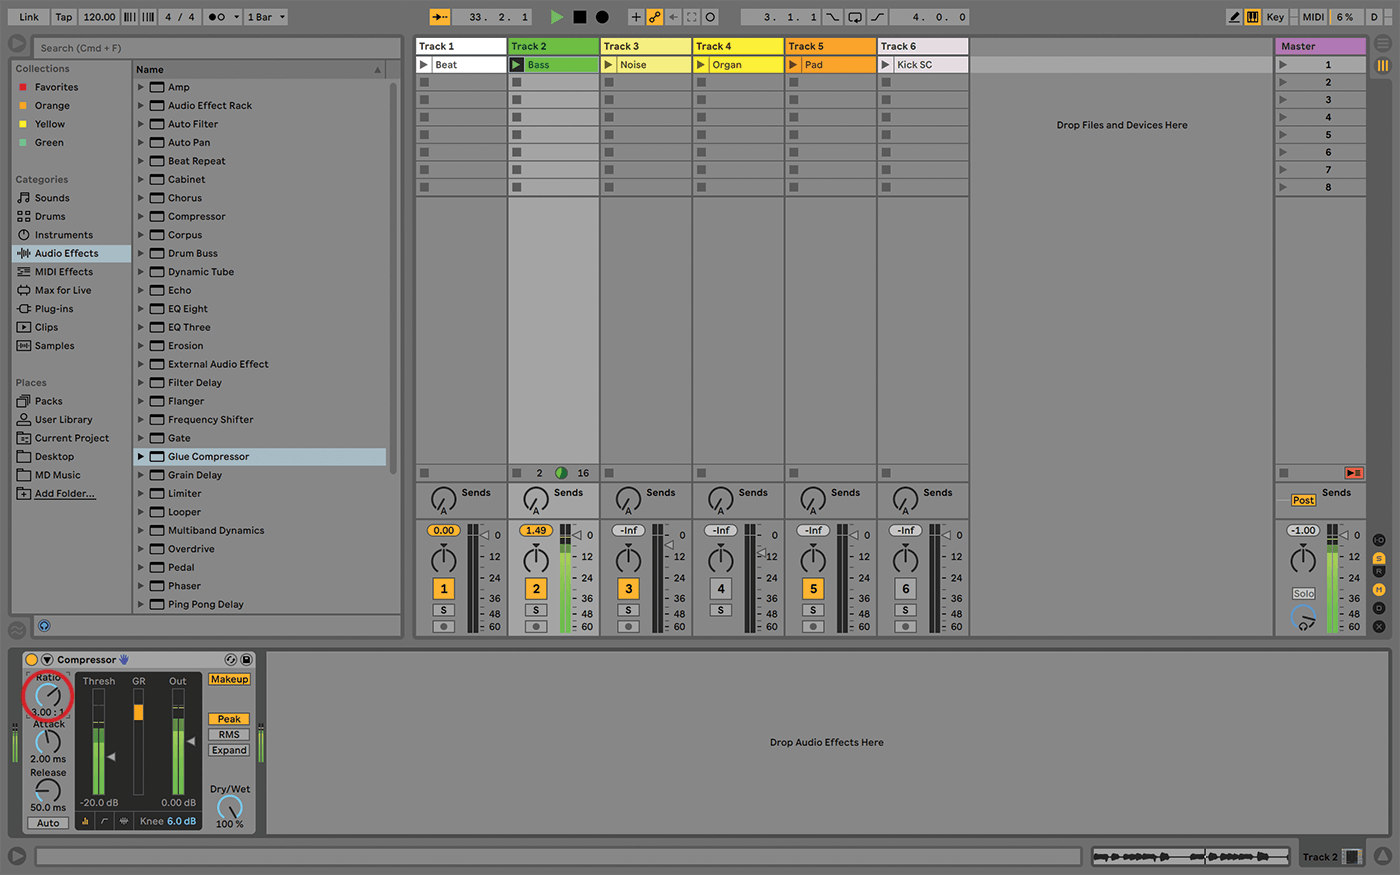
4. Track 2 contains a ‘real’ bass-guitar track. Let’s use the regular Compressor audio effect on this one. Lower the Threshold slider to -10dB, leave Makeup Gain on Auto, and Ratio to 3:00.
5. Bass guitar is a good candidate for compression, which evens out the dynamics and makes it sound punchier. These settings are subtle, though – you’ll mostly hear them working on the last notes of each phrase.
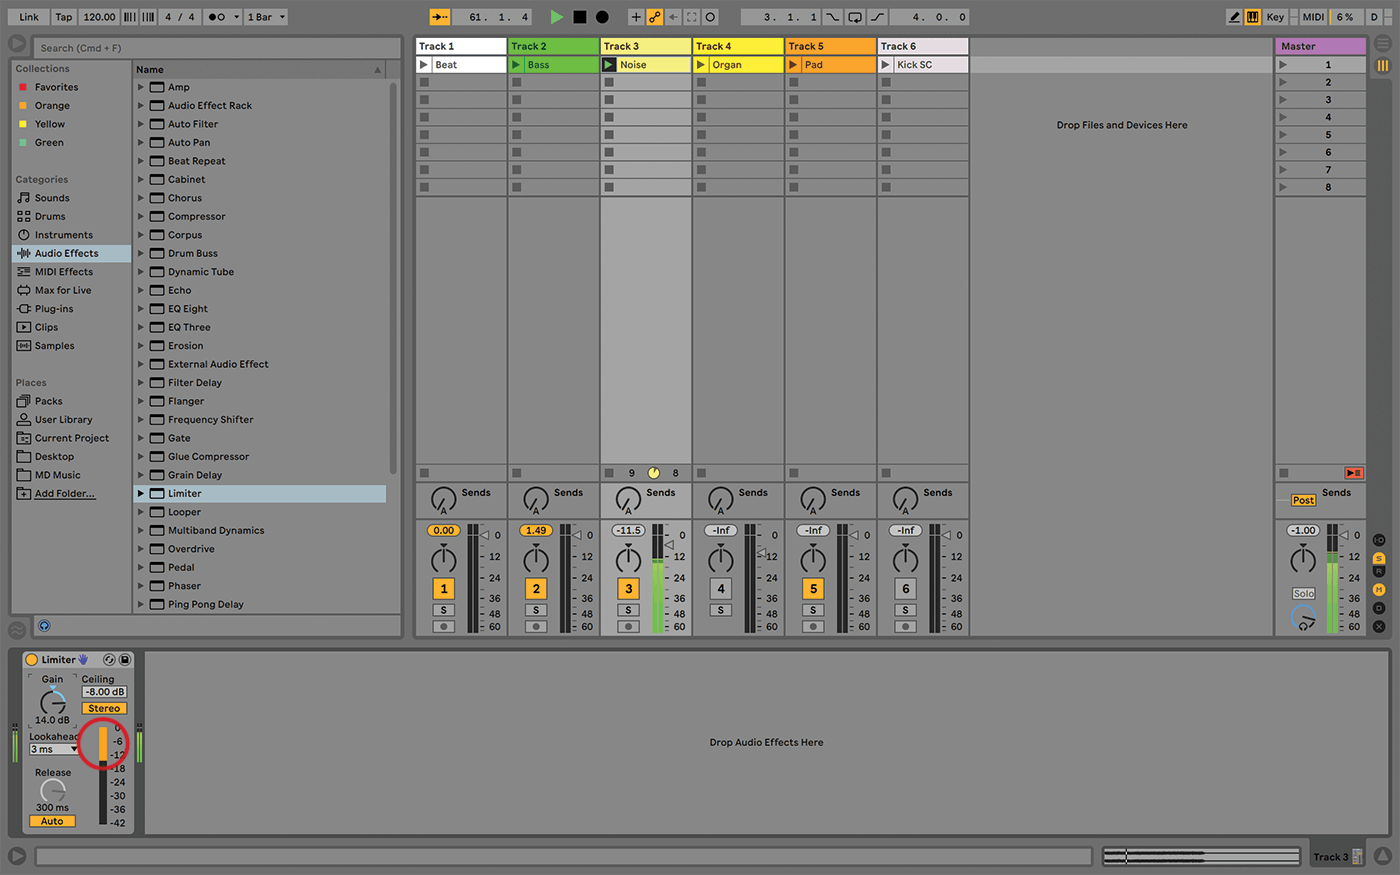
6. Track 3 contains a noisy loop. There are many ways to deal with this, but let’s use the Limiter. Set Ceiling to -8.00, Gain to 14.0, and you’ll see the orange GR (gain reduction) meter working.
![]()
EXPAND TO FIT There’s a third character in our story. An Expander can increase rather than reduce the range of incoming audio, making the quiet parts quieter and the loud parts louder. Live’s Compressor and Multiband Dynamics audio effects both have some degree of expansion available.
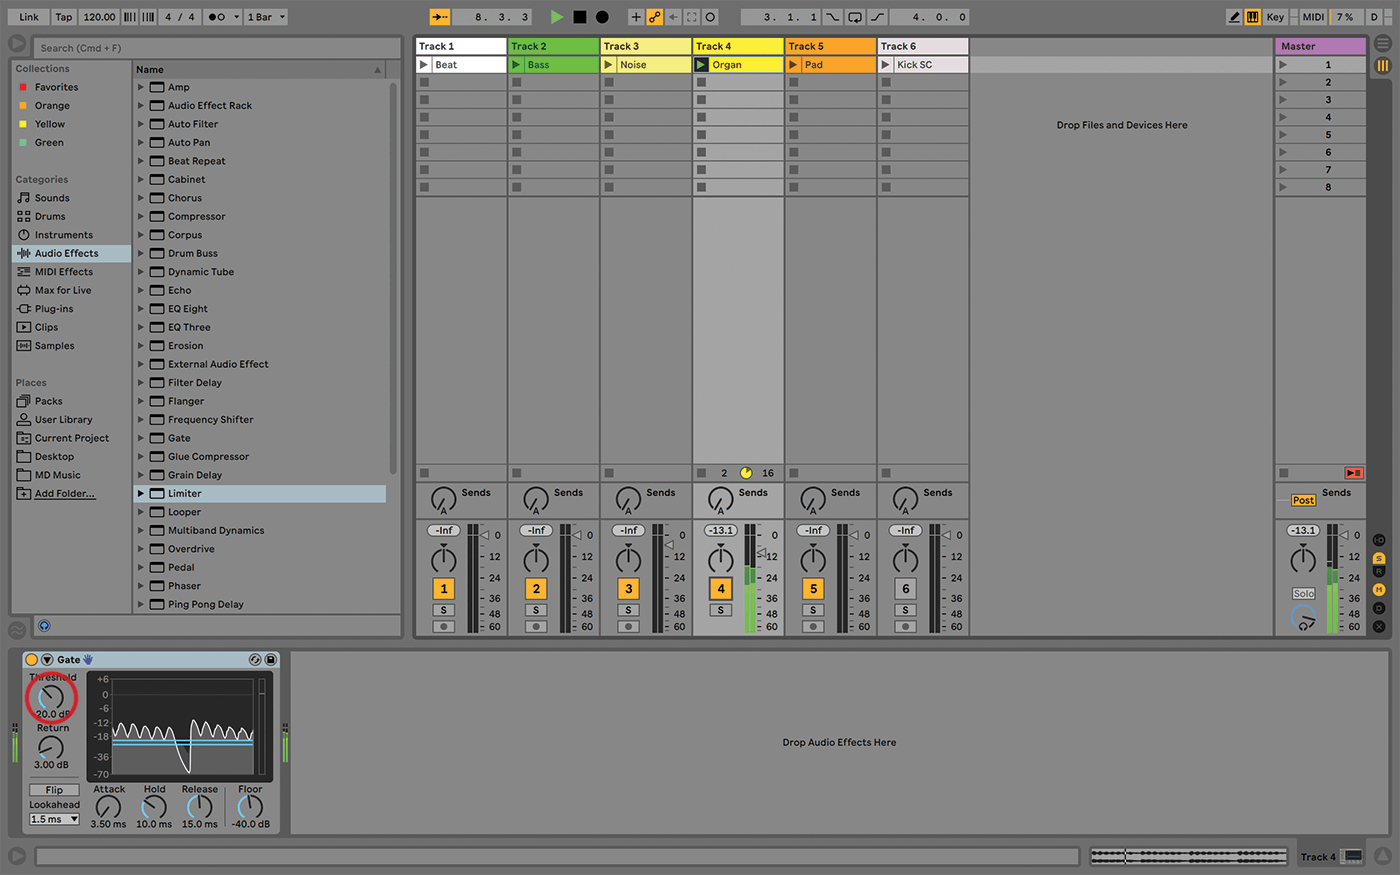
7. Track 4 has some background noise; Gate can deal with this. Set Threshold to -20dB. This is effectively working as an Expander, being applied only to the quieter ranges, thus reducing that noise.
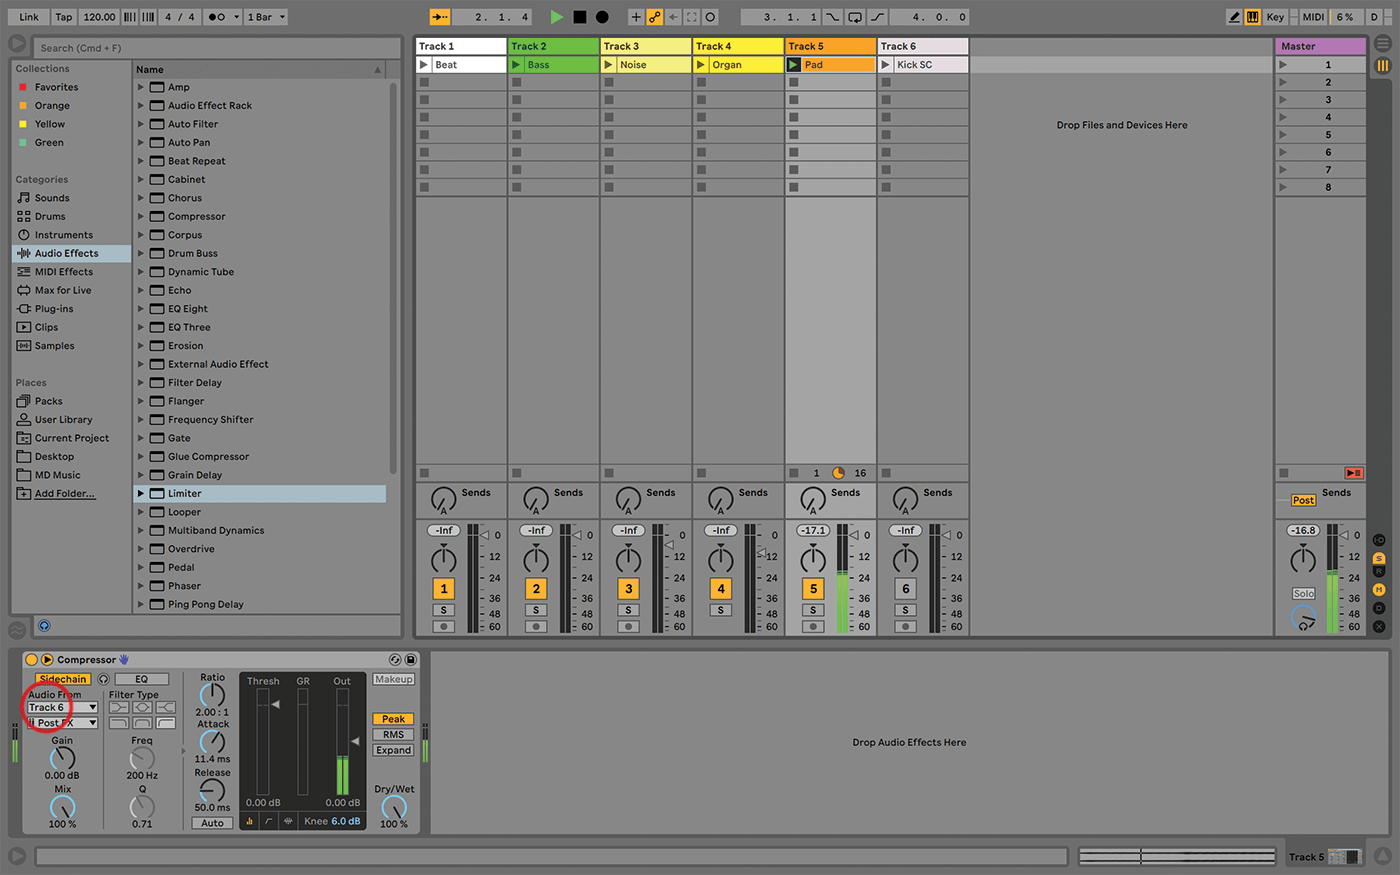
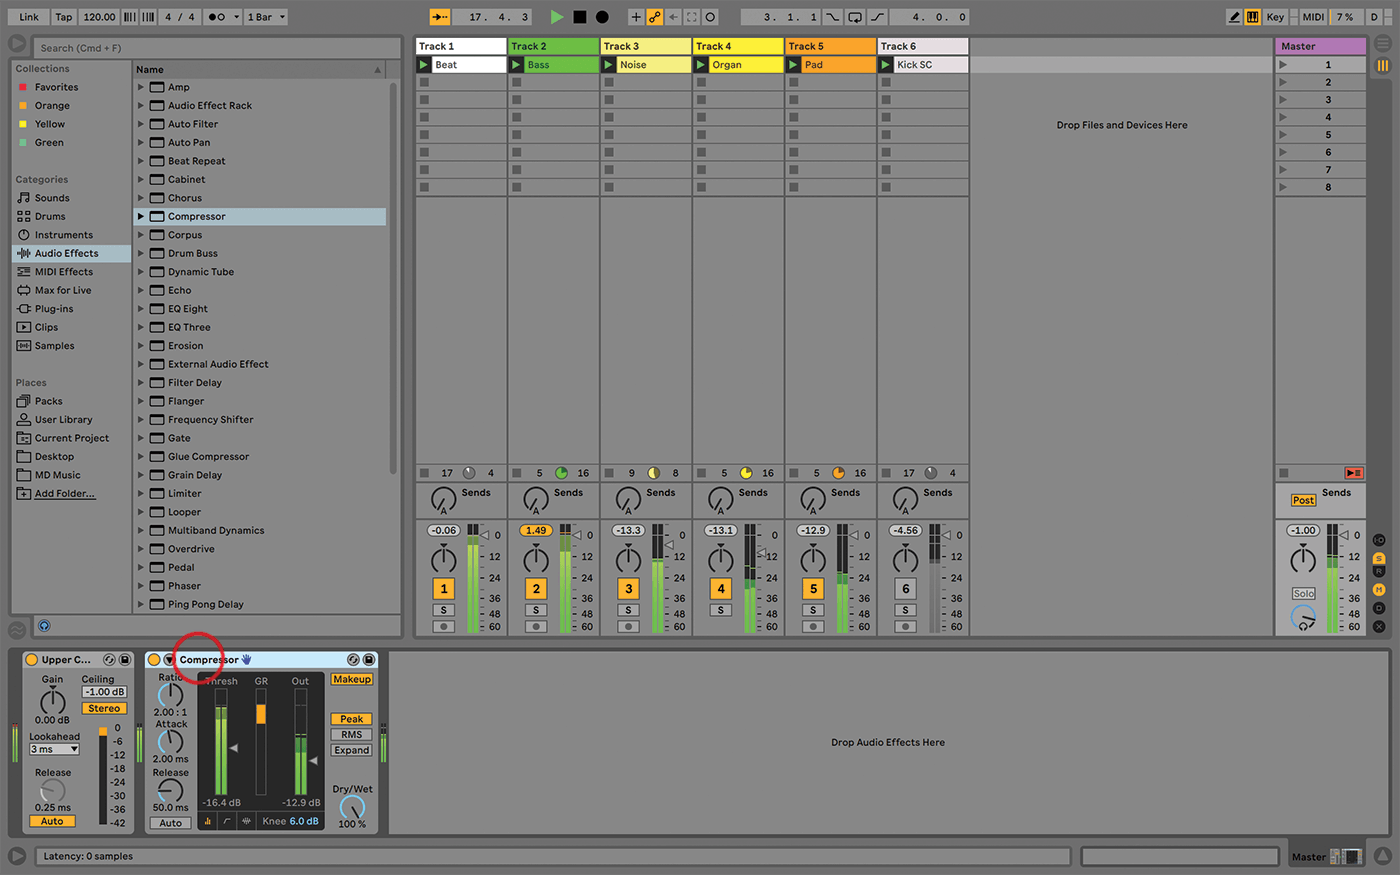
8. Compressors also have more creative applications. Add a Compressor to Track 5, which contains a pad sound, then click the small triangle in the title bar. Turn on Sidechain, then choose Audio From Track 6.

9. Launch the clip in track 6, then lower the threshold in track 5’s Compressor to -inf dB – the pad pumps in sync with the (muted) kick. If you hear any clicks, try increasing the Compressor’s attack time.
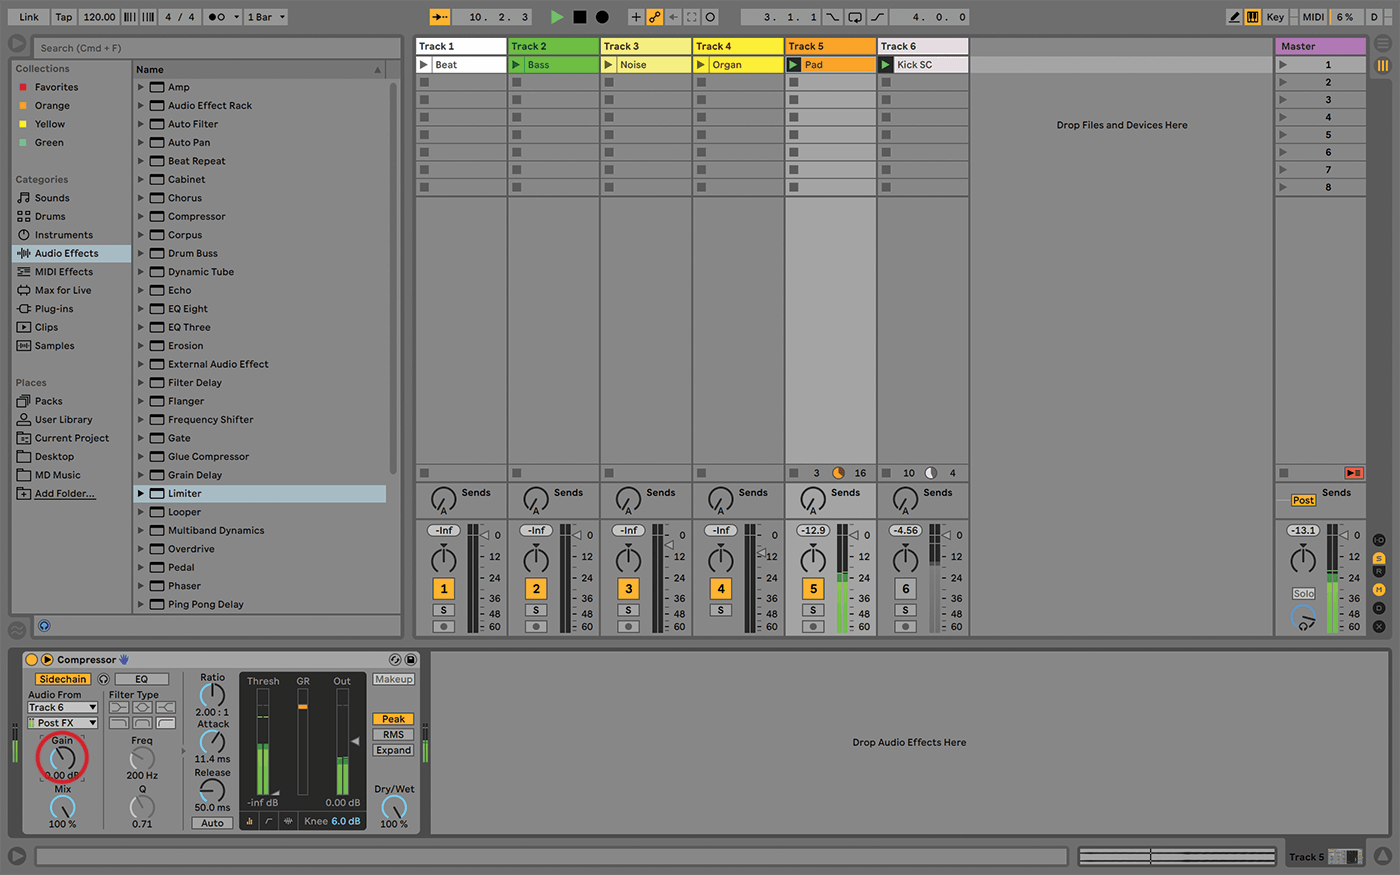
10. It’s easier to tell what a compressor is doing if it’s getting more signal, so boost the input on the compressor if it has one, or add a Utility in front to boost the signal.
11. Personally, I prefer to compress single tracks and groups more than on the master. The sound of too many sources hitting a single compressor at the same time can be a bit messy.

12. Having said that, Live’s Multiband Dynamics compressor effect can help when processing – or troubleshooting – full mixes, as it divides the incoming audio into Low, Mid, and High bands, so each can be adjusted.
![]()
THE GATE EFFECT is also basically a downwards compressor – it won’t boost volume, but it will reduce any low-level noise in between your transients. Sometimes, an Expander is a gentler way to cut noise in between words or drum hits, whereas a Gate can be abrupt and very noticeable.

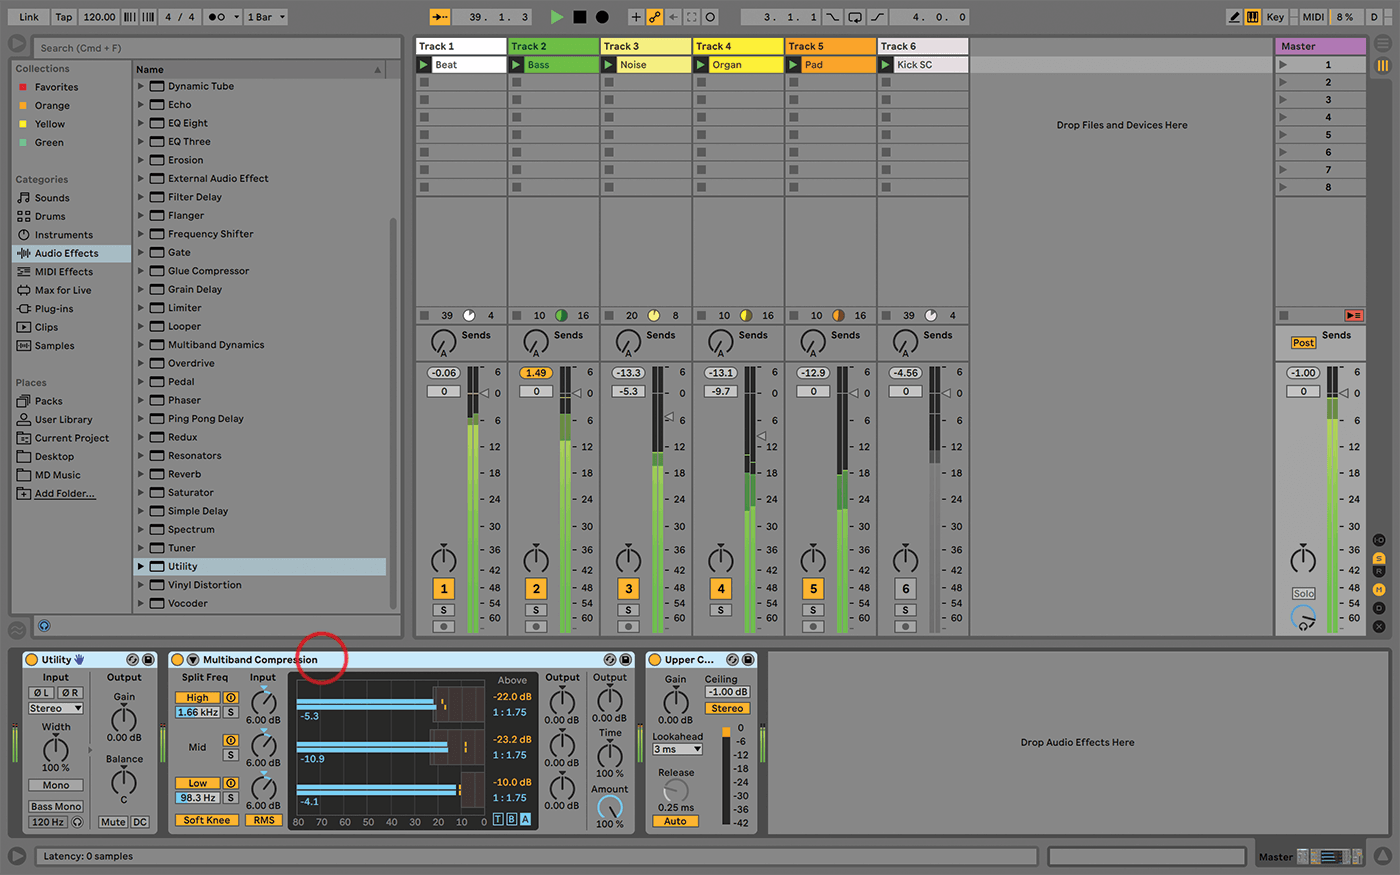
13. Load the Multiband Dynamics/Multiband Compression preset in the master track, and set the Above threshold on the lows to -10.0dB. We don’t need settings that are extreme as we’ve already compressed the tracks.
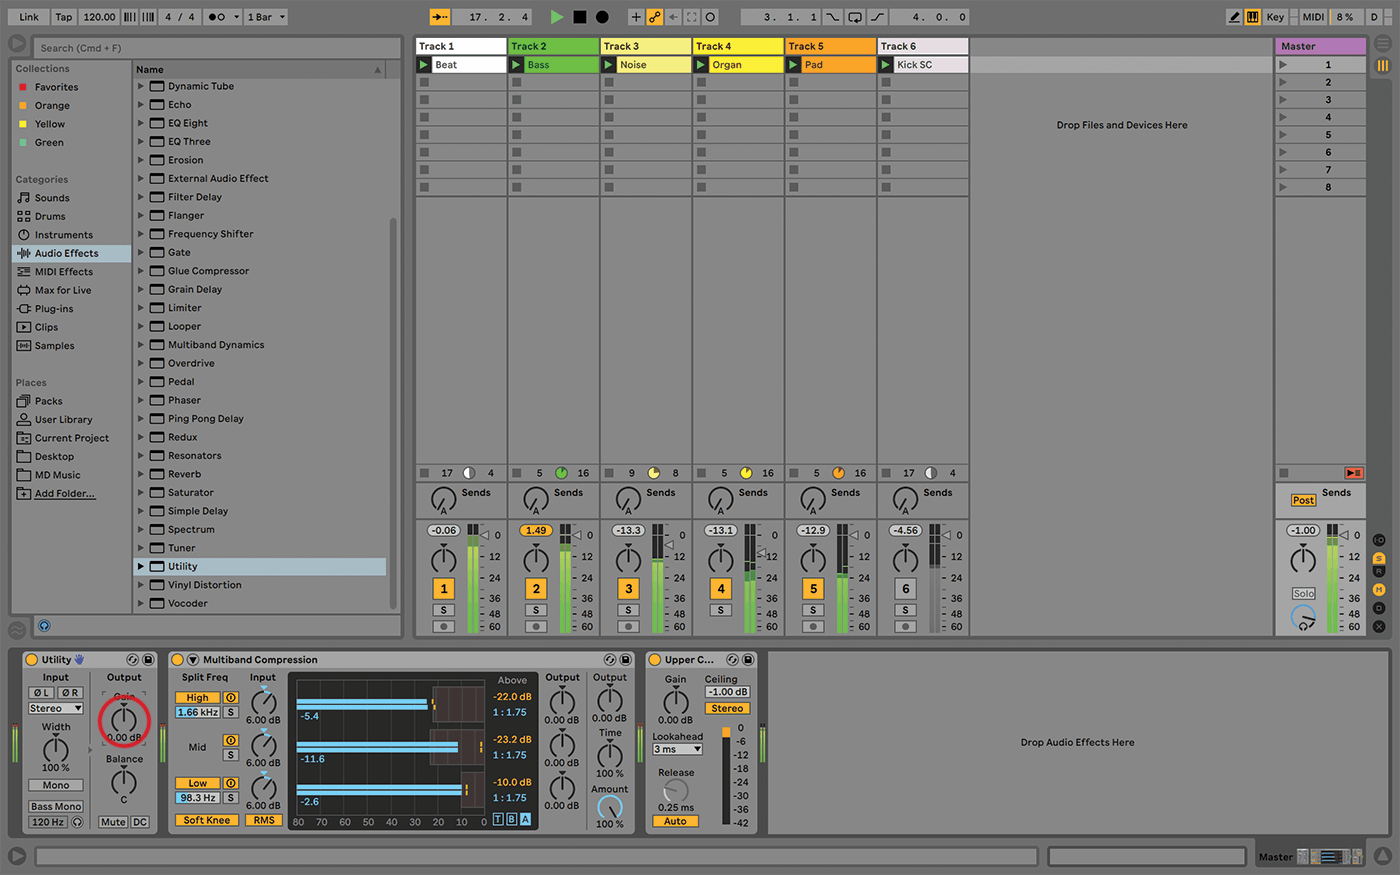
14. You can make a nice little master track chain by adding a Utility in front of the Multi-band Dynamics. (It’s not strictly necessary, but I like to use the separate Device for overall volume boosting.)
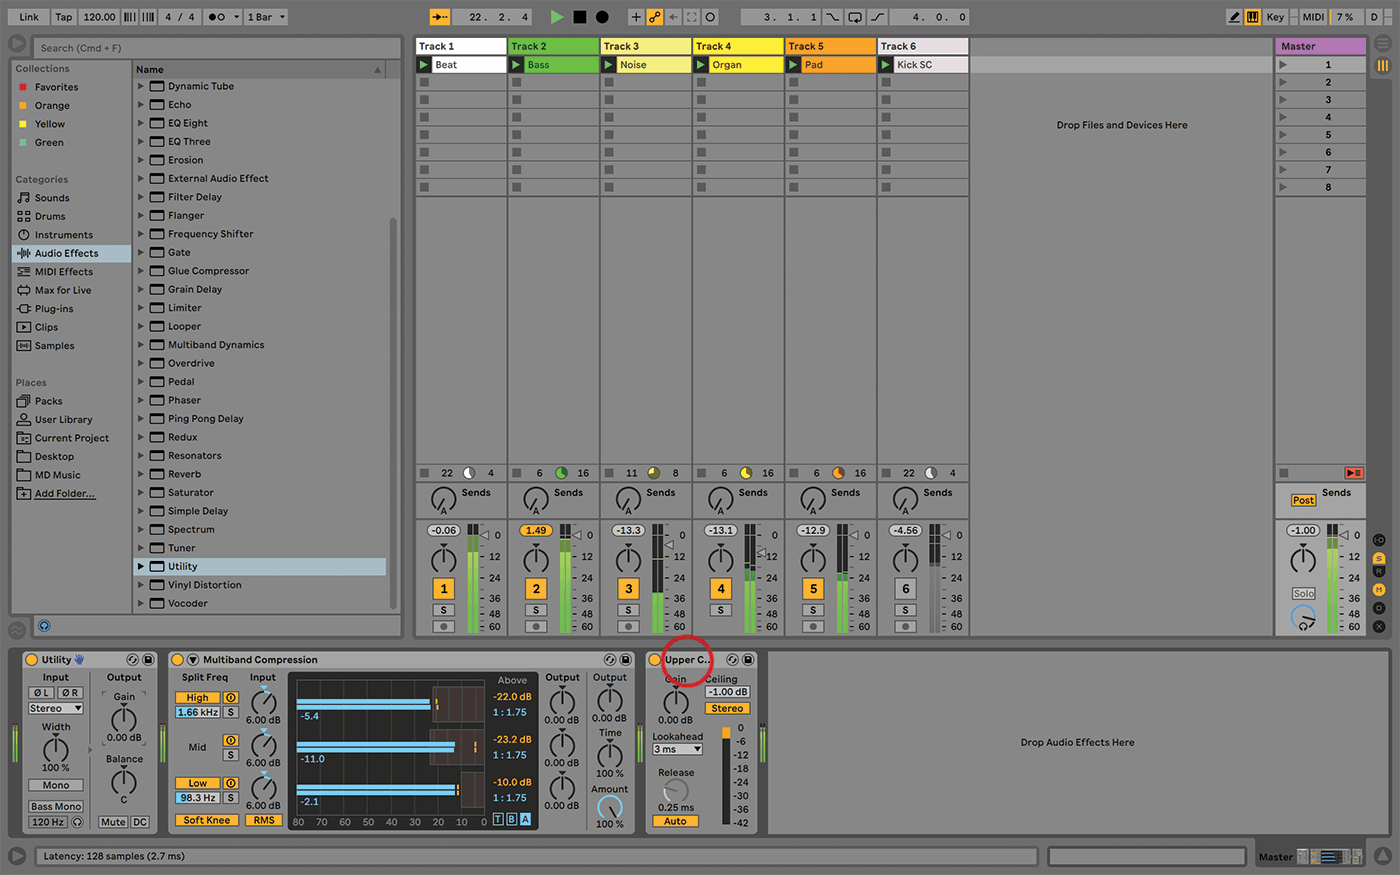
15. Then add Limiter after Multiband Dynamics, so that no matter how much you’ve boosted the signal into the compressor, you won’t overload the track – we don’t want any red peaks in this chain.
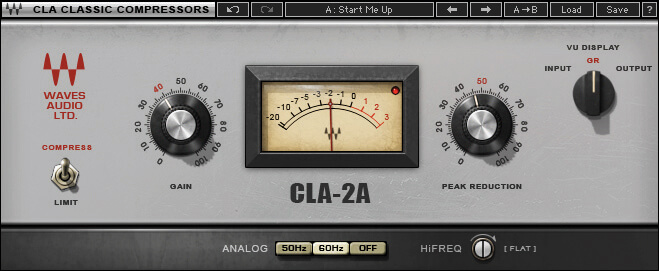
16. Live’s compressors sound clean (excluding Drum Buss, as it’s not ‘just’ a compressor), but some are used for their tonal qualities. You’ll need to add other effects, or third-party plug-ins, to achieve more of that in Live.

17. By using compressors on individual tracks, or groups, or the master track, along with Utility and Limiter, you can easily manage the volume and presence of each track as well as the overall apparent mix volume.
18. But that might be getting more into mastering territory, and we can talk about that another time. Let’s just say for now, that Live has all the tools you need to get a good clean, loud, mix!