For more Logic tutorials and workshops, check here.
Creating hybrid digital bass in Logic Pro X
Hard-edged digital bass sounds have underpinned many modern musical genres, but how do you best create these sounds in Logic Pro X?
by Mark Cousins
When you purchase through affiliate links on MusicTech.com, you may contribute to our site through commissions. Learn more
Despite the revival of analogue synthesis, there’s still a significant amount of love and respect for the thoroughly modern ‘digital’ synthesizer – most notably, Native Instruments’ Massive and Xfer Records’ Serum. The appeal of these instruments is easy to see – while analogue synths are the kings of warmth, digital synths really tend to come to the fore when it comes to hard-edged sounds, often using techniques such as Wavetable and FM synthesis to produce a unique palette of sounds.
In this workshop, we thought it would be interesting to explore Massive or Serum-like sounds using Logic Pro X’s own collection of virtual instruments, as well as some strategic use of the Phat FX plug-in. While true aficionados of Massive and Serum will shudder at the thought of mimicking such well-respected software synths, it’s as much an insight into a different way of producing synths sounds, particularly with respect to moving away from the use of a filter (which is a key part of analogue subtractive synthesis) and instead focusing on ‘waveshaping’ to provide the key interest and timbral movement to a sound.
Table service
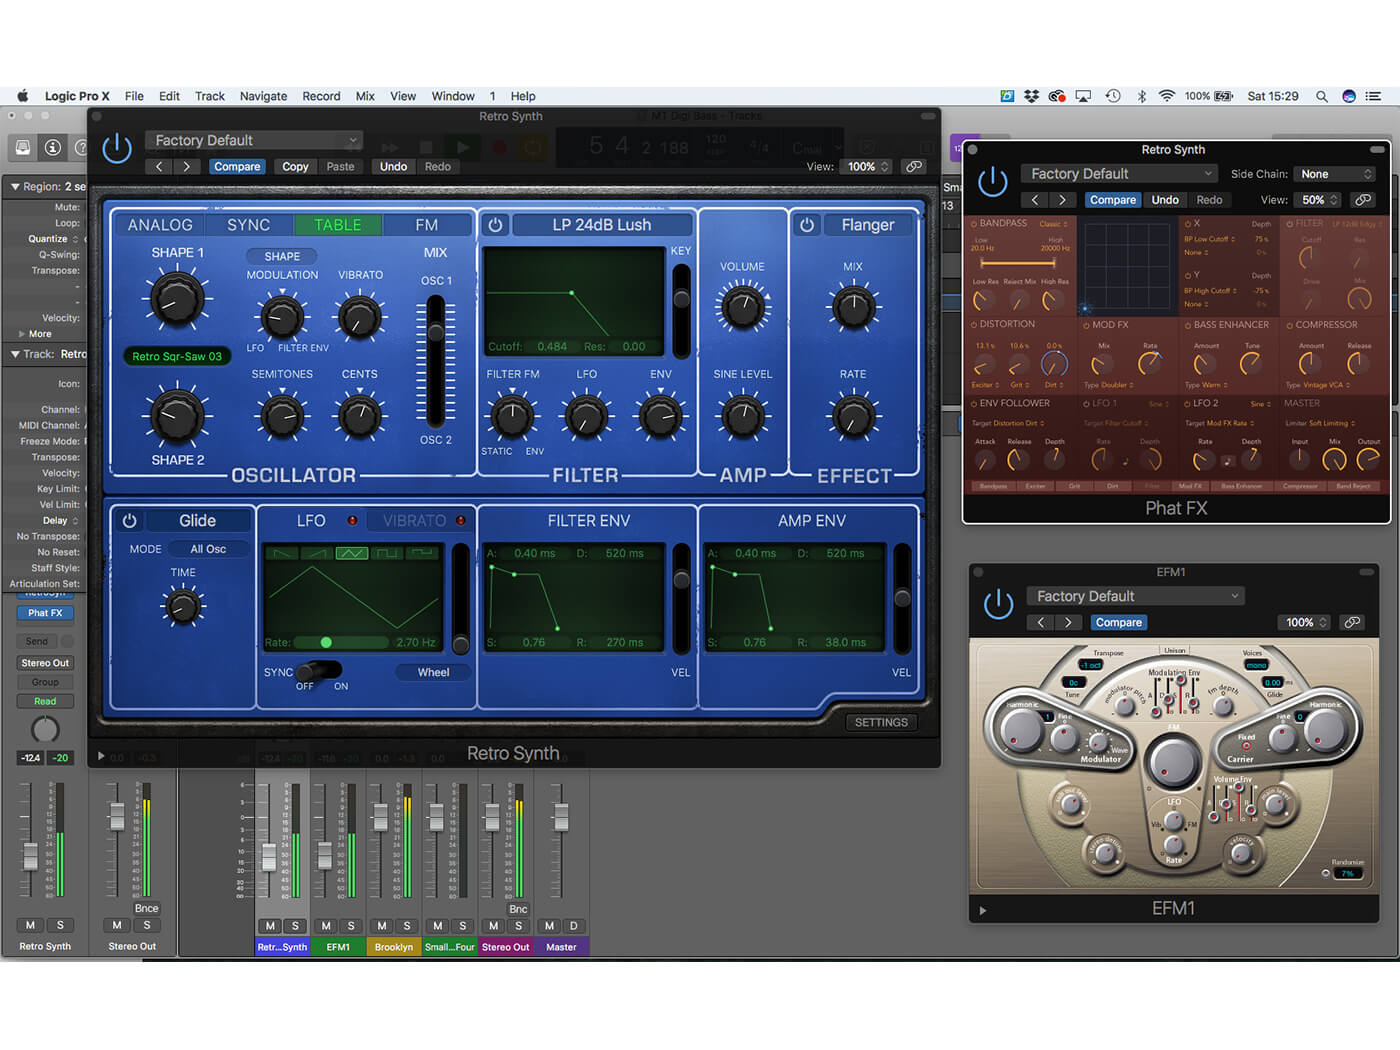
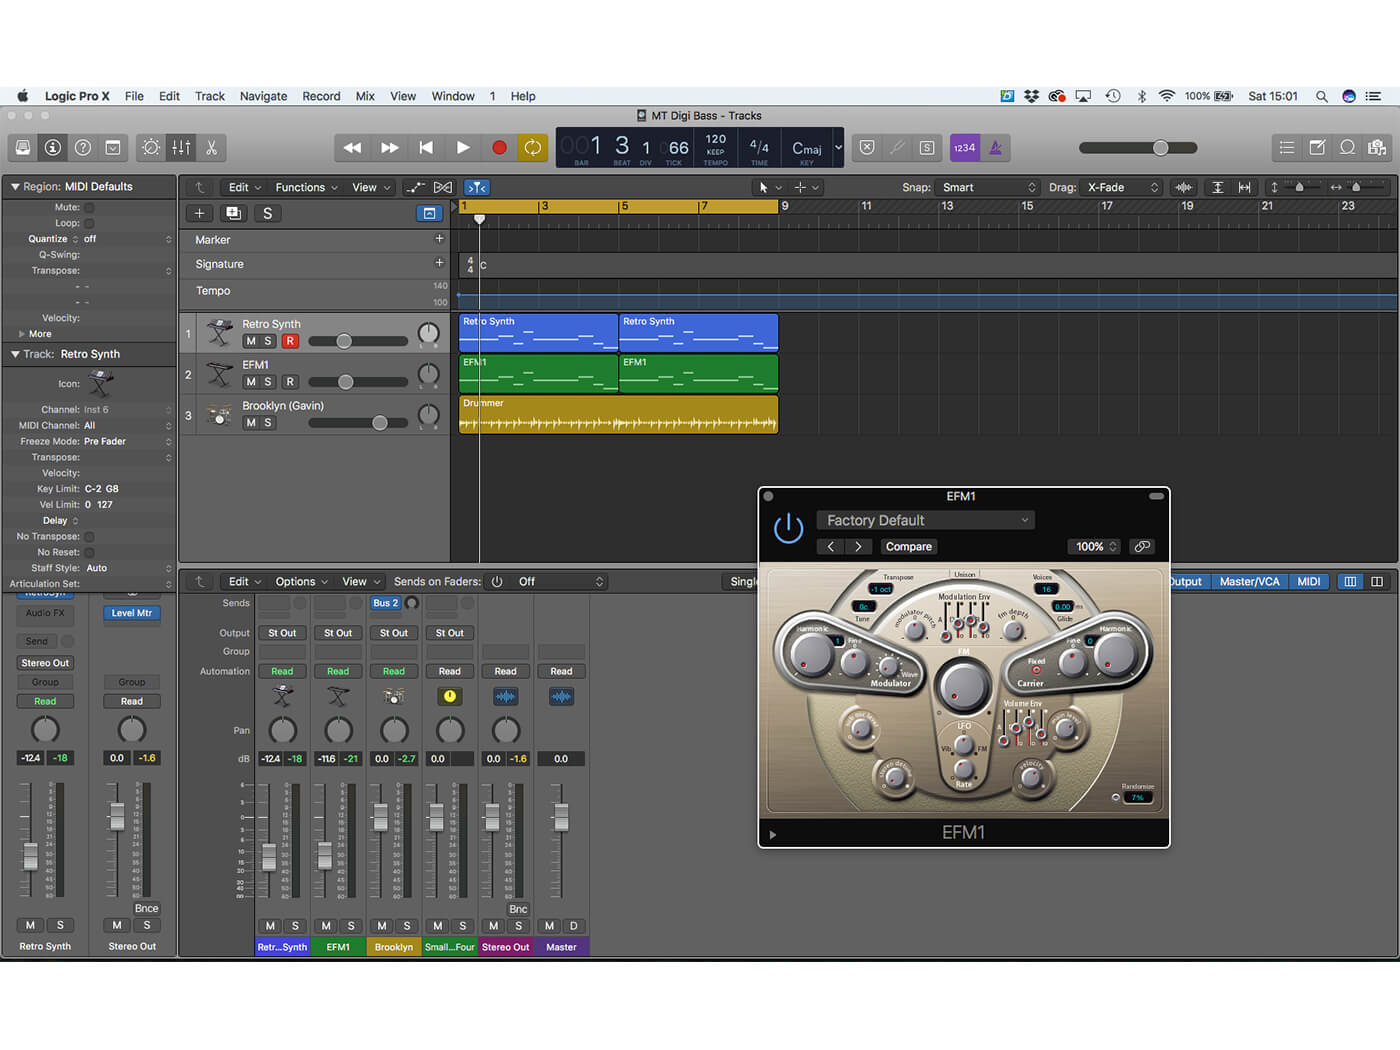
For the purposes of this workshop, we’re going to use two of Logic Pro X’s virtual instruments – Retro Synth, which contains an easy-to-use Wavetable option; and EFM1, which is an FM-powered synth that’s easy to overlook. Looked at individually, both of the synths are rudimentary when compared to fully fledged instruments such as Massive and Serum, but when layered in an interesting and dynamic way, they can produce sounds you’d expect to hear from a more complicated synth. In this case, the subsonic layer comes from the EFM1, while a more Unison-heavy, distorted wavetable layer is produced by Retro Synth.
As we said earlier on, the emphasis here is using waveshaping (rather than filters) to create timbral interest in our patches. EFM1 uses Frequency Modulation (or FM) so that a modulator oscillator modulates (in the audio spectrum) the pitch of a carrier oscillator. This might sound complicated, but the FM process effectively distorts the waveshape, adding harmonics and almost working in the reverse of a filter – the more frequency modulation, in other words, the brighter the sound. From the standpoint of aggressive synth sounds, the ‘growl’ of FM as it changes the timbre is much more edgy than a subtractive filter.
Wave shaping
Another important characteristic of a contemporary bass sound is a distinctive ‘wobble’ as the sound sustains. In the case of Massive and Serum, this is often produced by scanning through a wavetable rather than using the filter. In the case of the EFM1, though, we can patch the inbuilt LFO through to the FM amount and produce a similar cyclic waveshaping effect.
The EFM1 also has a great subsonic low end (largely because its sounds are constructed from sine waves) that is further enhanced by the in-built Sub Oscillator that sounds an octave lower than the Carrier.
Turning now to Retro Synth, we can actually directly explore wavetable synthesis as a means of creating the wobble effect. As the name suggests, wavetable synthesis uses a ‘table’ of waveshapes (rather than a single static waveshape) that can be swept through using an envelope or LFO to change the timbre of the sound. A big part of the sound of a wavetable synth is defined by the Wavetables themselves – with Massive’s ‘Modern Talking’ wavetable gaining near infamous stature – so you’ll find Retro Synth carving its own sonic palette, rather than sounding identical to Massive or Serum.
Many voices
As with the EFM1, the inbuilt LFO is used to apply the cyclic waveshaping – this time, mapping the LFO to the Wavetable Position. Another key component of the Massive sound was the powerful Unison effect that stacked multiple virtual oscillators. In Retro Synth’s case, we can use the Settings section to enable Voice Stacking, using four or eight voices per-key combined with a rich Detune and wide Stereo Spread.
An essential pairing with the Retro Synth is Phat FX, which is useful both as a means of adding distortion, but also an extra sense of movement. Phat FX combines a number of distortion options that can be used simultaneously for some complex distortion effects, adding plenty of extra body to Retro Synth’s occasionally weak output. What really lifts Phat FX, though, is the addition of various forms of modulation – including envelope followers and LFOs – that lend the plug-in a form of synth-like movement. In this case, adding an envelope follower to one of the distortion blocks, as well as some LFO to the Mod FX section, brings Retro Synth into Massive-like areas of aggression and movement.
While it’s clear that the combination of Retro Synth and EFM1 won’t replace Massive or Serum, it’s still a useful springboard for thinking about synthesis, and the instruments included in Logic Pro X, in a different way. From wavetable synthesis to FM, there’s a world of different synthesis techniques to explore.
How to create hybrid digital bass in Logic Pro X: step-by-step
1. We’ll start with the low end of our bass sound using the EFM1. In the EFM1’s default setting, note how the FM control works almost like a filter Cutoff. In this case, leave the FM control at its lowest setting.

2. By default, the EFM1 produces more percussive bass sound, so increase the Sustain on both the Volume Env and Modulation Env to full. The sound should now have more body and sustain for the note’s full duration.
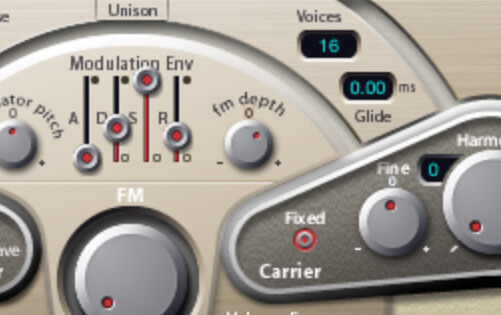
3. Set the overarching timbre use the FM Depth control. A setting of about one o’clock provides a suitable starting point where the sound has some purity to it, but also contains a few extra harmonics.
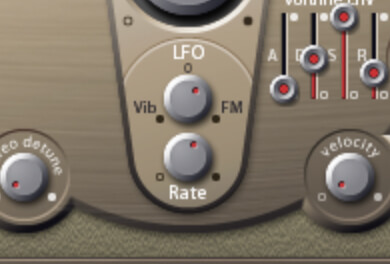
4. Set the LFO control around two o’clock so that it starts to modulate the FM amount. Set the Rate at around one o’clock, or a setting that’s complementary to your song’s tempo (you’ll need to do this by ear, though).

5. The real icing on the cake is the cake is the Sub Osc Level, which adds an additional sine wave an octave below the fundamental. The Sub Oscillator really adds to the low-end power of the EFM1.
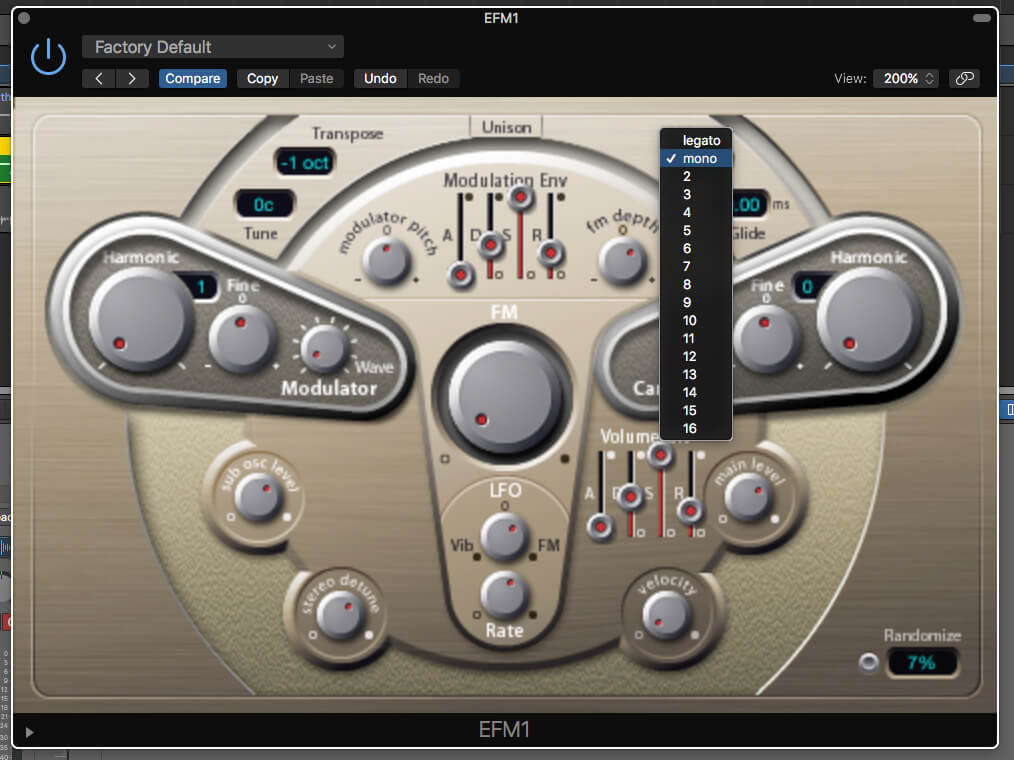
6. Set the Voices option to mono. The sound is finished, but you might want to explore further possibilities using the Stereo Detune (for a wider sound) or different tunings of the Modulator, especially using Harmonic 3.
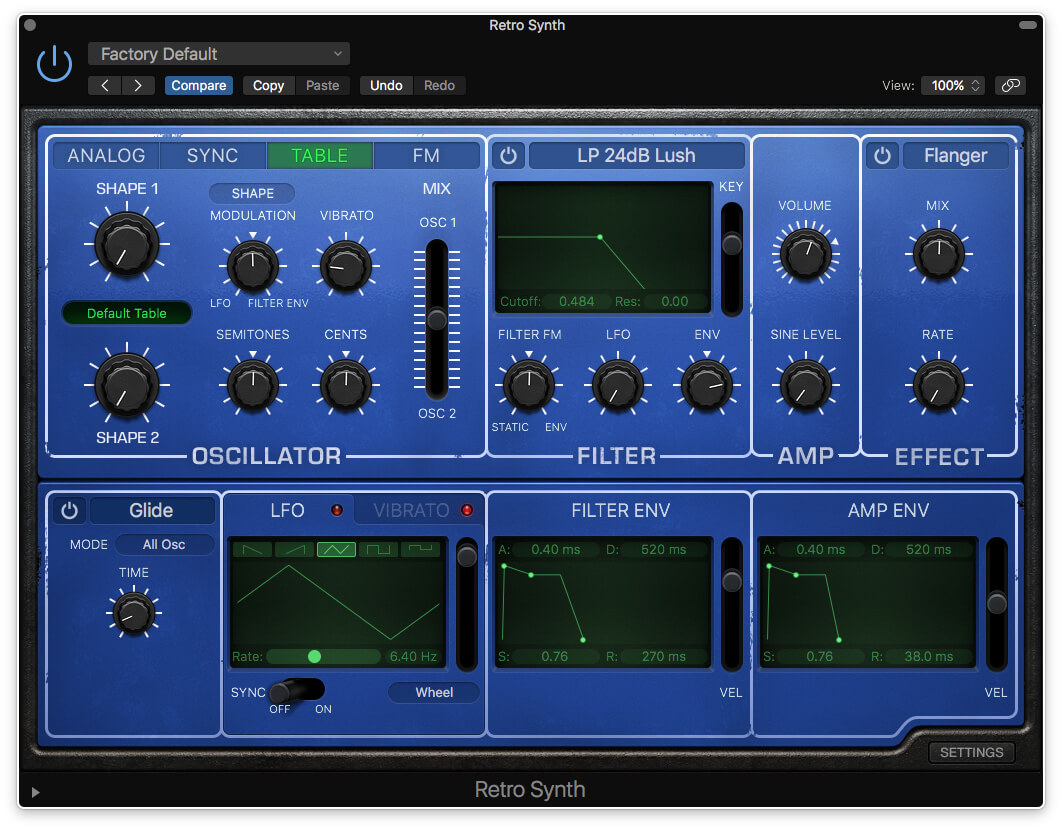
7. With the EFM1 providing a lower layer, now let’s turn to Retro Synth to provide a more harmonically rich layer with lots of stereo width. Set Retro Synth’s mode to Table, so as to replicate a PPG-like wavetable synth.
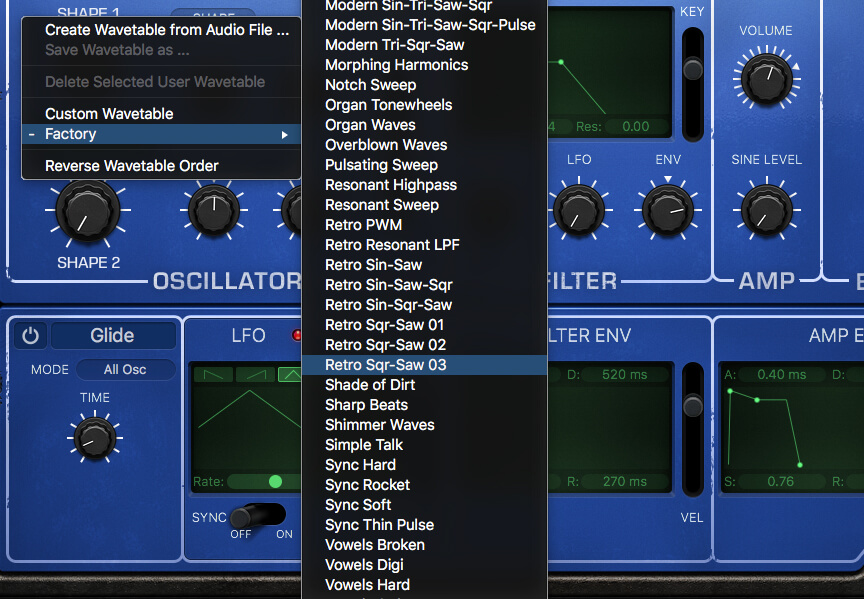
8. A large part of the sound is defined by the wavetable choice. From the drop-down menu select Retro Sqr-Saw 03 and then use the Shape control to audition moving backwards and forwards through the wavetable.
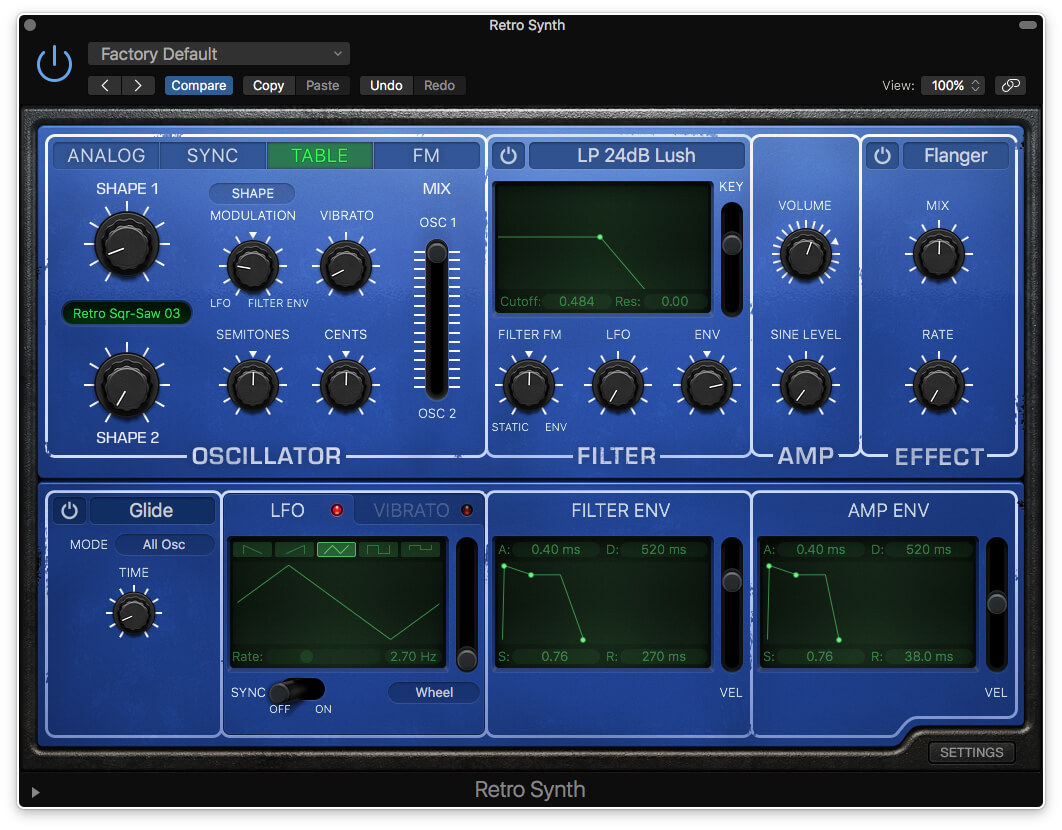
9. Move the Shape Modulation over to the LFO (about nine o’clock) so that the LFO sweeps continuously through the waveshape. Set the Rate of the LFO to around 2.70 Hz and lower the Wheel amount to 0.

CUSTOM WAVETABLES Retro Synth can create its own wavetables, using the menu function Create Wavetable from Audio File in the wavetable drop-down menu. Although the results are interesting, they can be erratic and not entirely predictable, even if you provide Retro Synth with reasonable consistent evolving waveform. Also note the extended parameters, which lets you specify the type of Audio File Analysis, varying between ‘Selective’ and ‘Relaxed’.
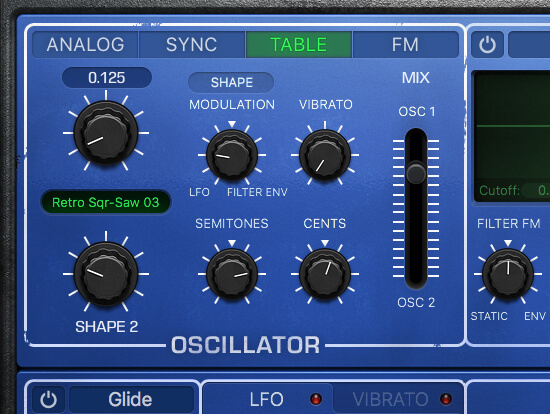
10. Add a second oscillator into the equation. Pitch Osc 2 an octave higher, set to a marginally different wavetable position and slightly sharper. Use the Mix control so that Oscillator 1 remains the predominant sound.

11. Open the Settings tab. Set the Voice Stacking to 4 Voices, Stereo Spread to 1.00 and Voice Detune to 0.60. The result is a rich Unison detune effect, with eight detuned oscillators panned across the soundstage.
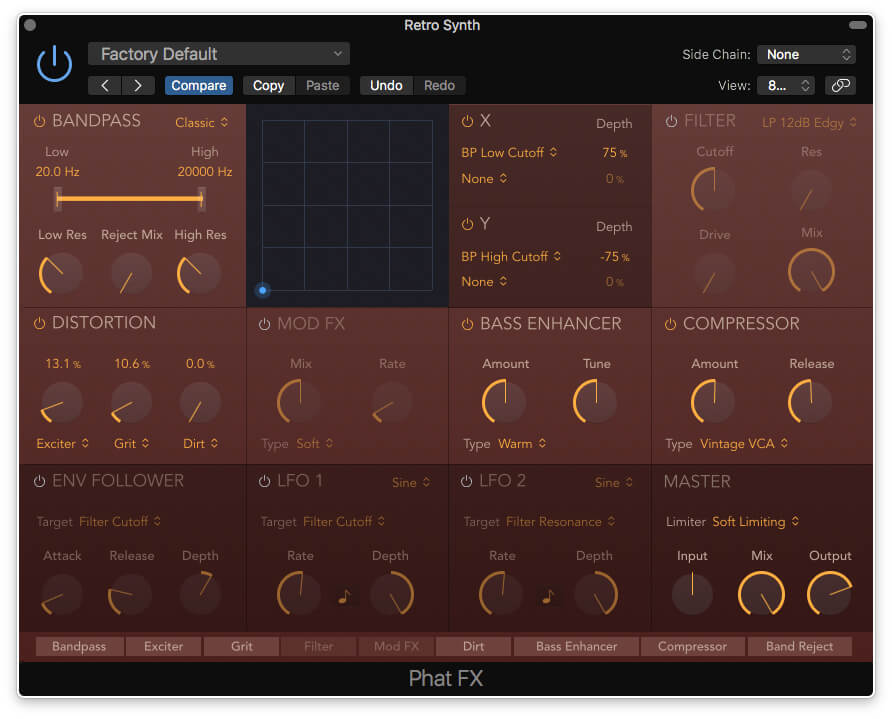
12. Use Phat FX to add extra sonic interest and movement to Retro Synth’s output. Create a three-tiered distortion effect, with Exciter, Grit and Dirt set to 13%, 10% and 0% respectively. Later on, we’ll modulate the Dirt control.
13. You can set the order of processing using the blocks at the bottom of the interface. Move the Dirt block back so that the distortions are in series, ahead of the Filter and Mod FX blocks.
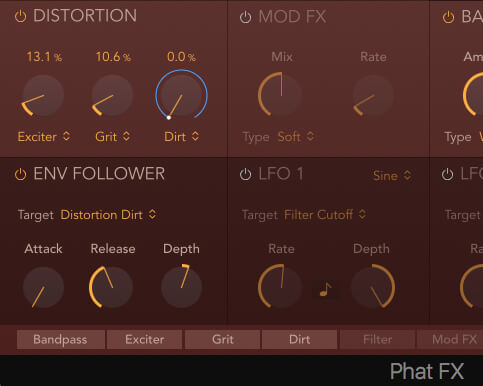
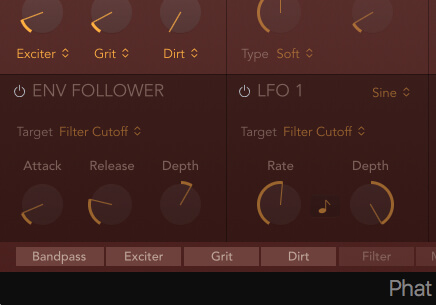
14. Activate the Env Follower and set its Target to Distortion Dirt. Set Attack to 0, Release to around 0.85 s, and depth to 128%. The Distortion should now track the envelope of the sound and change over time.
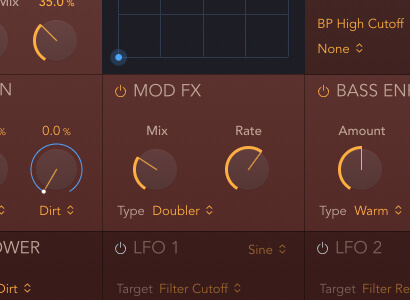
15. Activate the Mod FX section to add a Doubler effect on the bass. The Doubler is a form of chorus treatment – set the Mix to around 31% and Rate to 6Hz to create a soft doubling effect.

16. To add interest, insert an LFO modulating the Doubler’s Rate parameter. Set the Target parameter as Mod FX Rate, the Rate to 3.2Hz and the Depth to 18%. The Doubler effect should now have extra movement.
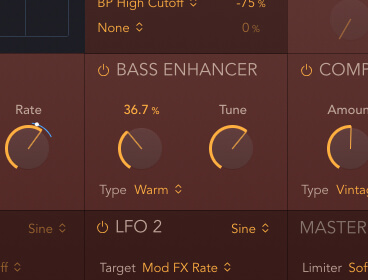
17. There’s plenty of additional modules in Phat FX that are worth exploring. For bass parts, one obvious addition is the Bass Enhancer. Set the Tune parameter to around 100Hz and the amount of enhancement to 36%.
18. The final sound is a blend of the two synths – the EFM1 providing the low-end, while the combination of Retro Synth and Phat FX provides a more frequency-rich top line. A 50/50 mix works well here.