How to create vocal chops with FL Studio
A surefire technique used across all genres, chopping up and processing vocals before sprinkling them throughout a mix can turn sturdy tracks into modern-day classics. Here’s how to do it in FL Studio.
Vocal chops are increasingly popular. You’ll hear them in almost every style of music but they’re particularly prevalent in dance. In fact, you’d be hard-pressed to find a major producer that hasn’t used vocal chops in at least one of their projects.
The most valuable thing about vocal chops is that, with the right level of manipulation on your end, you can effortlessly ensure that they always sound distinctive. Because every producer has his or her own version of the technique and everyone is starting with their own novel vocal or sample as a base, vocal chops can result in enormously divergent productions that rarely sound alike. In this tutorial, we’re going to show you a tried-and-tested method that will give you easy access to your own vocal chops using nothing but FL Studio plug-ins.
Chop chop
You could argue that the origins of vocal chops came in 1857, at the very moment mankind successfully proved it could record sounds. You might instead state that vocal chops were born in 1876, when Alexander Graham Bell invented the microphone. Both are reasonable arguments but the moment the technique was pioneered in a music-production context is more difficult to pinpoint still. We can, however, point towards a few important milestones.
In the 1980s, multiple companies released keyboards that could record and manipulate sounds and voices. One of the most notable came in 1987, when Yamaha released its VSS-30 Digital Voice Sampler. The product allowed users to record two-second clips of any sound and play them back instantly. Users could therefore record and modify their own voice and implement the resulting clips in their melodies. Though vocal chops were not nearly as prominent in the 1980s as they are today, the VSS-30 made it possible and, as a result, the keyboard is still highly regarded by modern-day producers.
Did I stutter
Over the past 10 to 15 years, vocal chops have cropped up in multiple genres and featured in many chart-topping songs. For example, the main vocal of Three Six Mafia’s 2008 rap hit Stay Fly featured a stutter, and Skrillex’s 2010 global smash Scary Monsters And Nice Sprites exposed the world not only to dubstep but to vocal chops too. The electronic producer still incorporates vocal chops in his productions today, just listen to his 2019 track Mumbai Power.
Vocal chops are used frequently in dubstep, as well as wider subgenres of EDM such as future house, and big-name producers such as Martin Garrix and Diplo have used the method to spice up their songs. The biggest reggaeton hit of 2017, Mi Gente by J Balvin and Willy William, is characterised by its catchy vocal-chop melody.
Fresh start
Any vocal or a capella that you can source from the real world or the web can form the starting point for characterful vocal chops. The techniques we’re exploring in this tutorial can be applied to any vocal. Try and apply them to any and every one you can find – the biggest sample treasures are often found in the unlikeliest of places. You could use a straight-laced recording of your own voice, a daft voice clip from a friend, or audio of a sibling screaming obscenities at you.
Practically any audio will do – and the vocal doesn’t even have to be clean, though it will help. Here, however, we advise that you begin by using a clean a capella version of a song you know and like. It doesn’t have to be the full song – a single chorus, verse or even sentence is enough. If you can’t access any, check out the Vocal Map included in FL Studio.
Light the spark
When creating vocal chops, it’s important to keep an open mind – the results can be completely unexpected. The beauty of vocal chops is that they can be fast or slow, high or low, snappy or delayed, round or squared, purple or blue, whatever it takes to light the spark and lift your tracks to another level. You can of course layer vocal chops with other synths and samples but, with the right processing, they can be standalone features of your music. Mess about with sound design and effects and you might create compelling results the likes of which you weren’t even looking for.
Making the perfect vocal chops might seem daunting but follow this tutorial and you’ll see that the technique isn’t terribly difficult. Over the next 18 steps, you’ll learn all the basics you need to create your own unique chops in FL Studio. For higher-pitched results, try a female vocal, and for lower pitches, opt for a male vocal.
Creating vocal chops in FL Studio: step-by-step
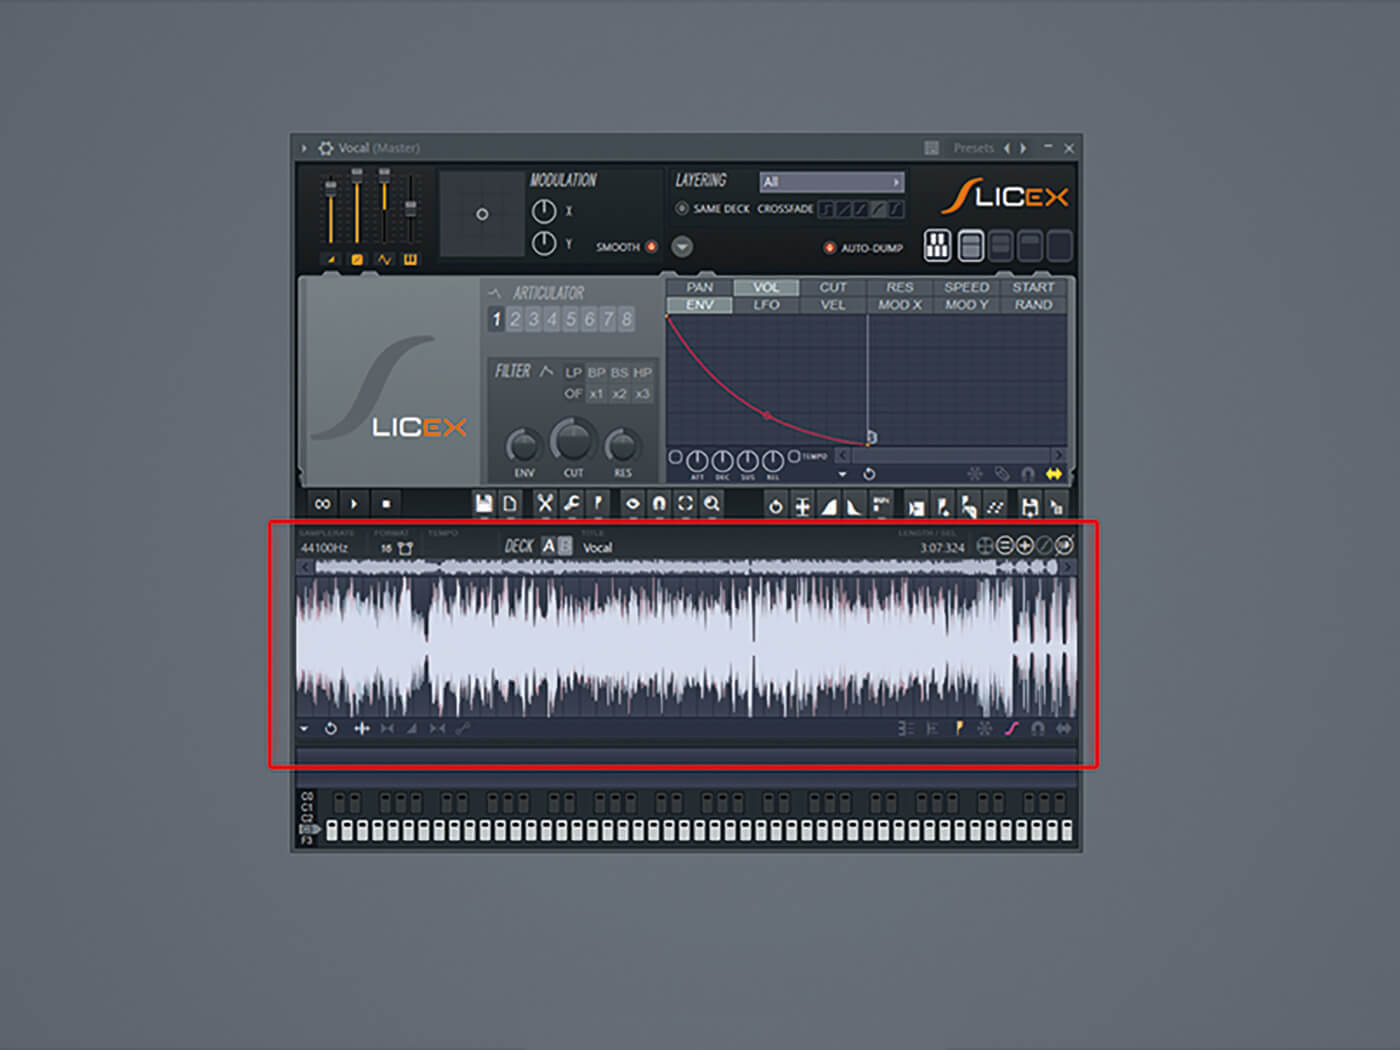
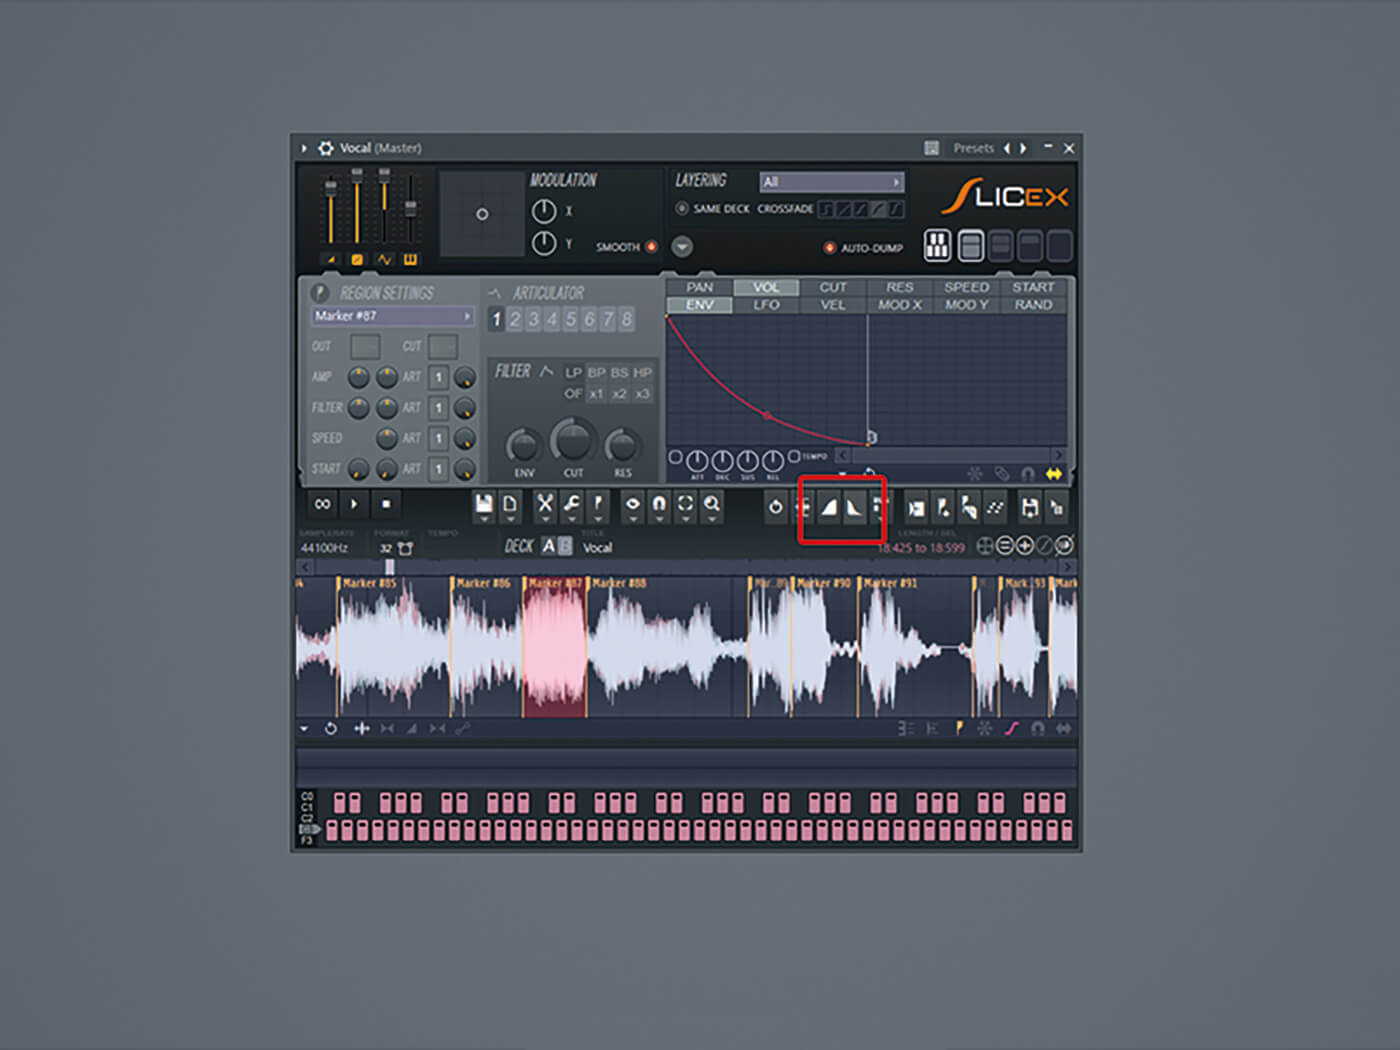
1. Open up Slicex and drag and drop your vocal into the plug-in, or load your sample by hitting Ctrl+O and selecting it via the browser.
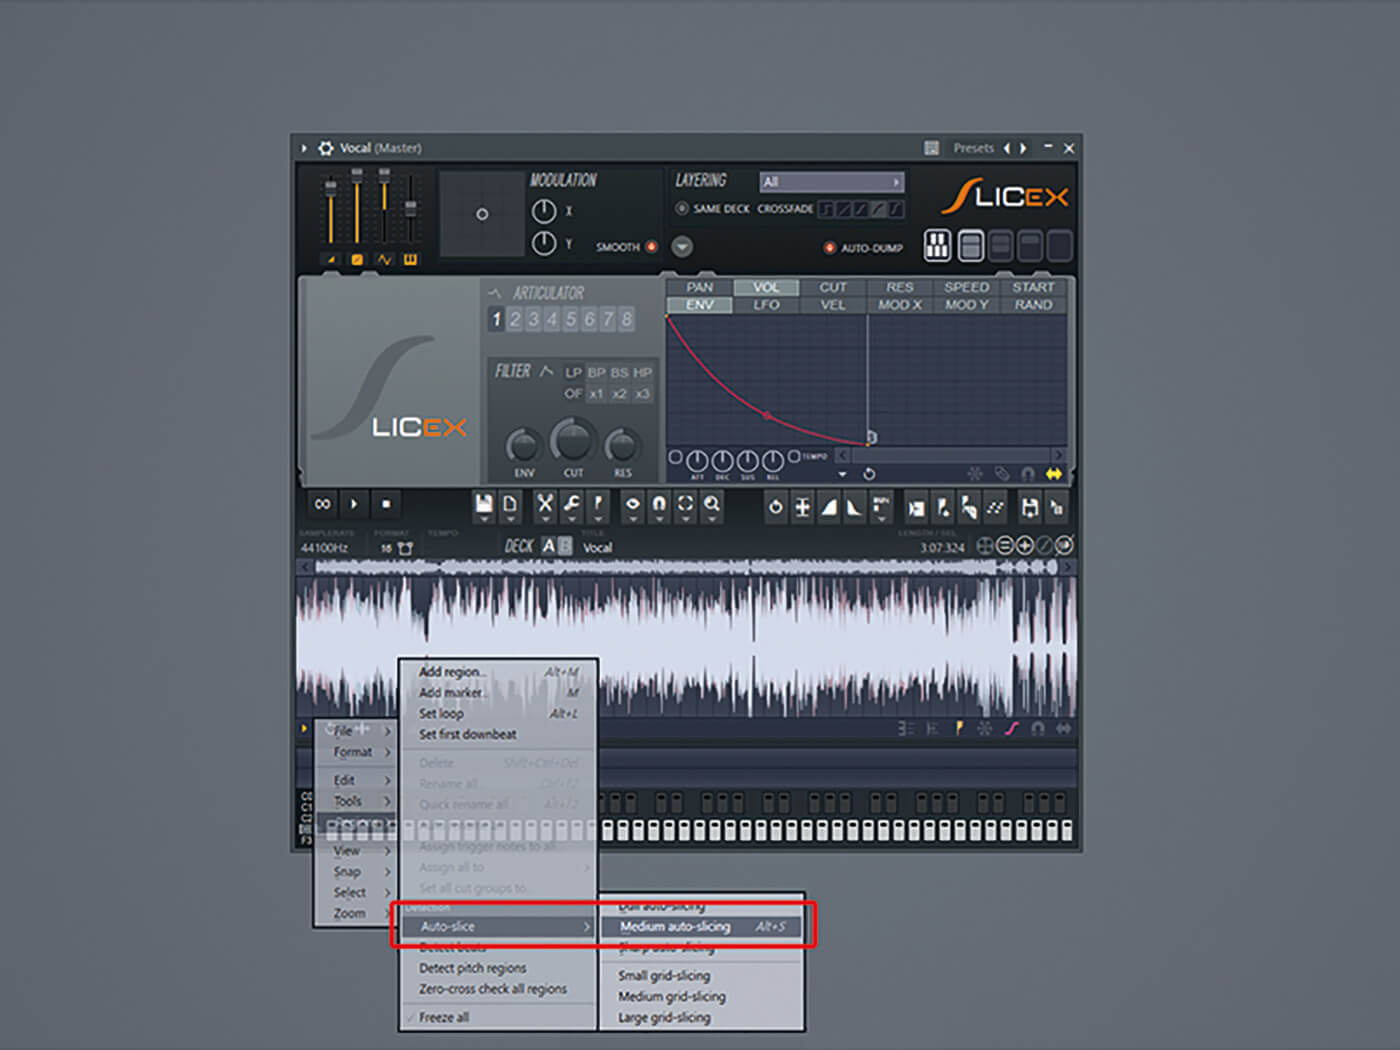
2. To slice up your vocal, go to Regions and Auto-Slice, and choose the medium auto-slicing option. If the slices are too long, you can switch to sharp auto-slicing or just change the length of the sample later on.
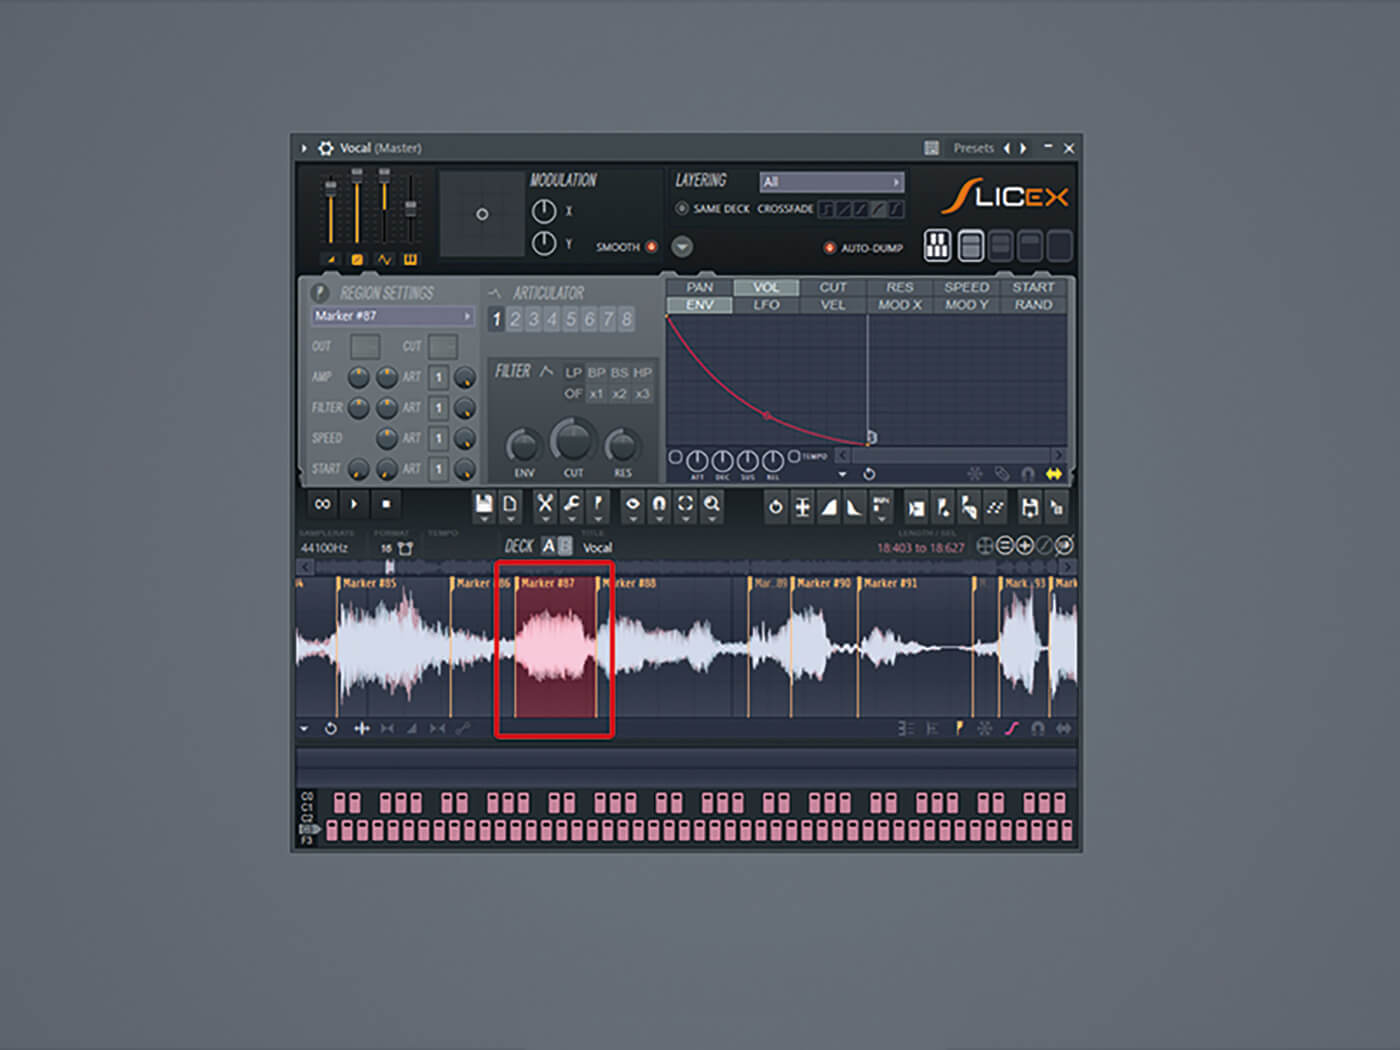
3. Use your scroll wheel to zoom in and reveal all the slices. Use your MIDI keyboard or right-click a slice to preview it. Audition them to find the most suitable slice for your track.

4. If your selected slice is too long or too short, change the start and/or end marker to alter its length. This way, you can create your own custom slice.
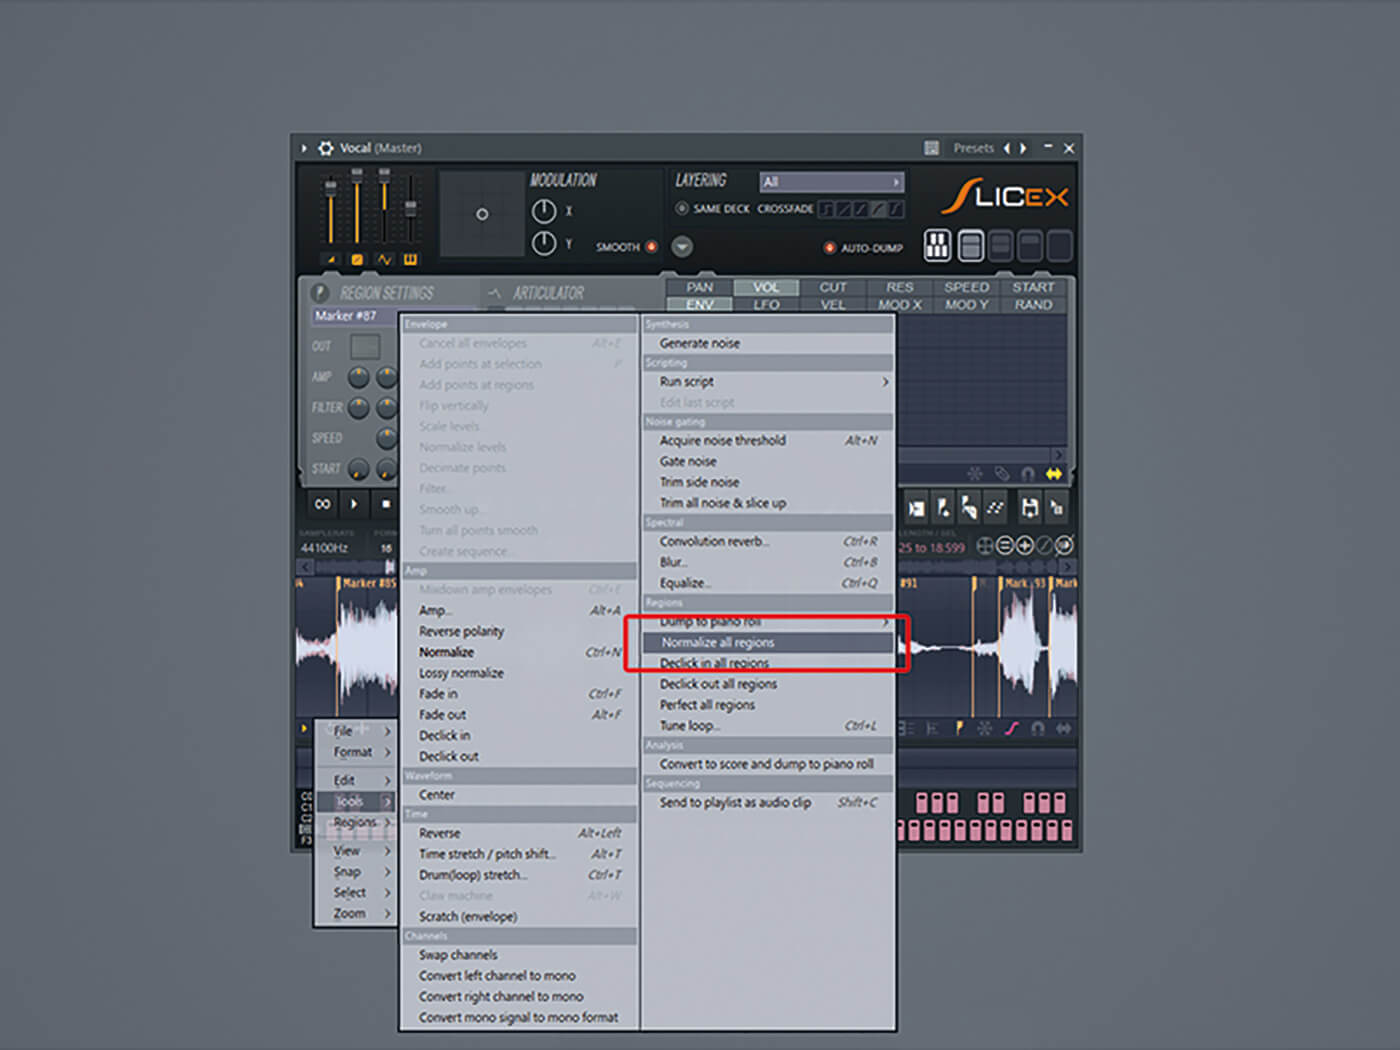
5. If your slice needs more volume, normalise it pressing Ctrl+N. Alternatively, go to Tools and choose the normalise-all-regions option to normalise all your samples at the same time.
6. Often, automatically divided slices will begin or end with a short clicking sound at the point they were cut. Smooth over these by right-clicking the slice and selecting the fade-in option to remove clicks at the start, and the fade-out option for clicks at the end. Both options can be found via the tools menu too.
![]()
PITCH LOCATOR If you want to find the pitch of your sample, you can load it into Edison, right-click the sample and press Regions > Detect Pitch Regions. If you change the root note of the sample, it will correspond to the correct key on your keyboard. There are also some third-party plug-ins that can find the pitch of a sample.
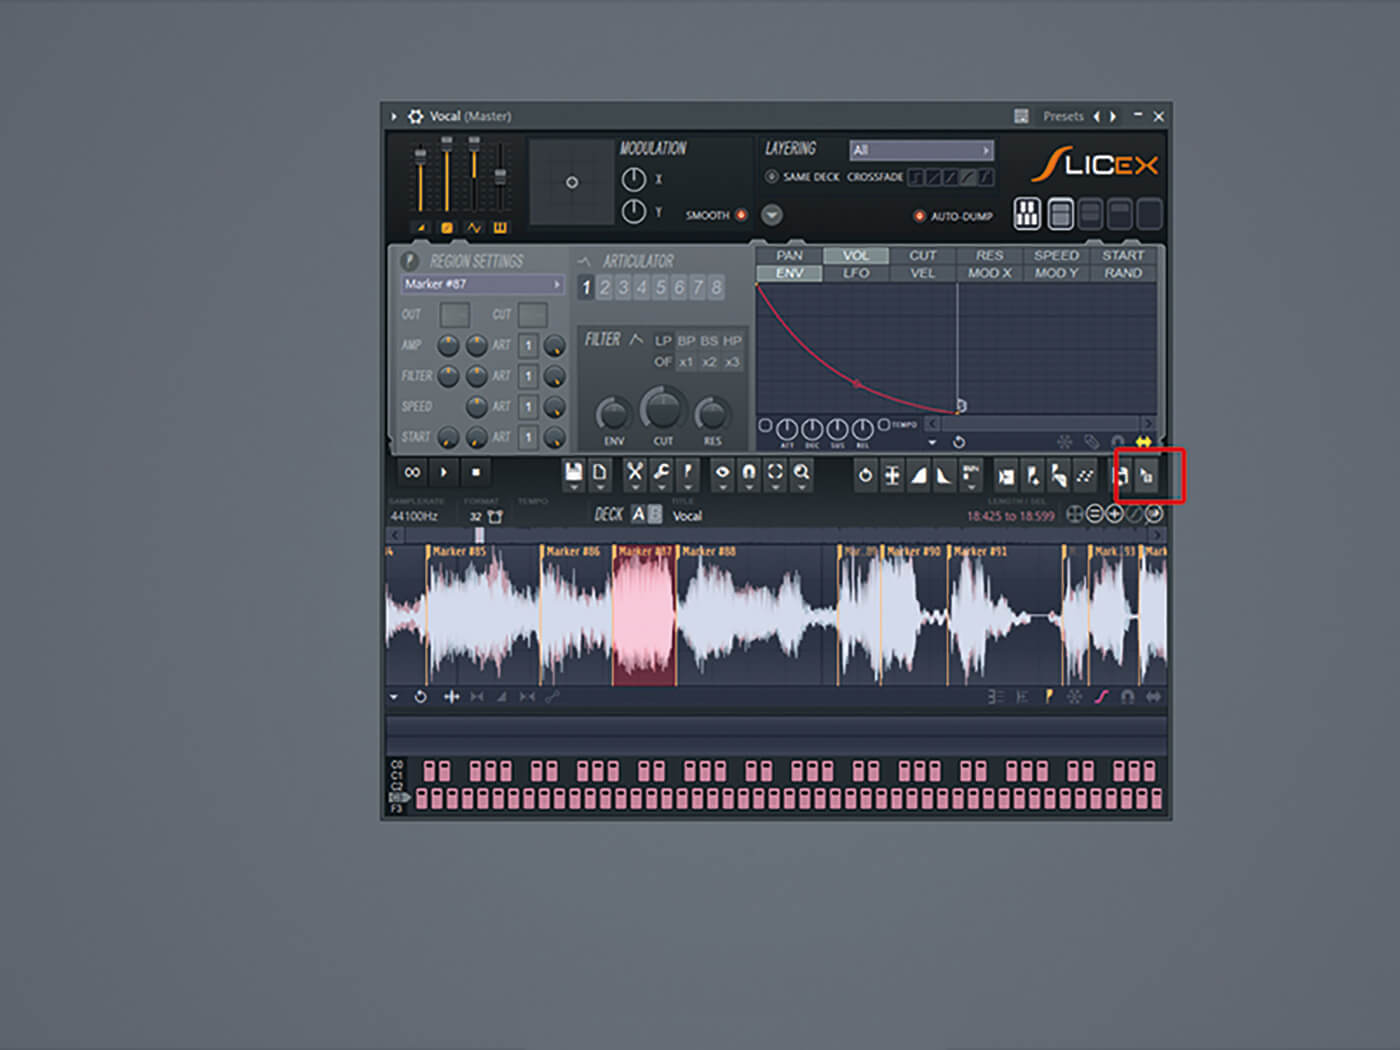
7. Click the slice you want to pursue and drag and drop it into the sampler.
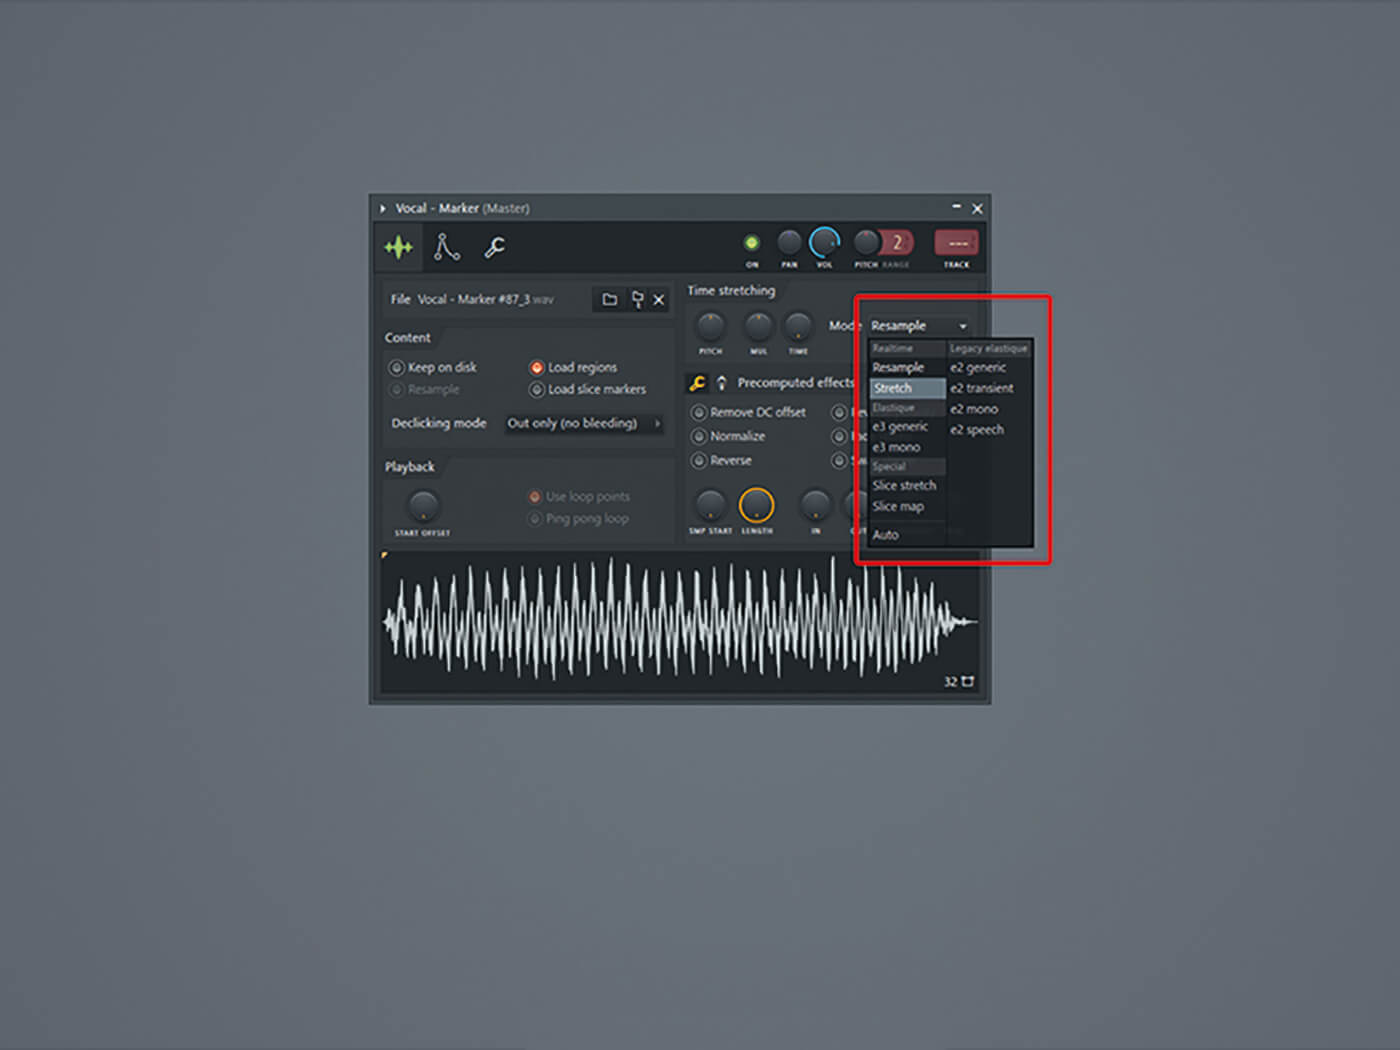
8. To keep your sample the same length no matter what note you play it, change the time-stretching mode from Resample to Stretch.
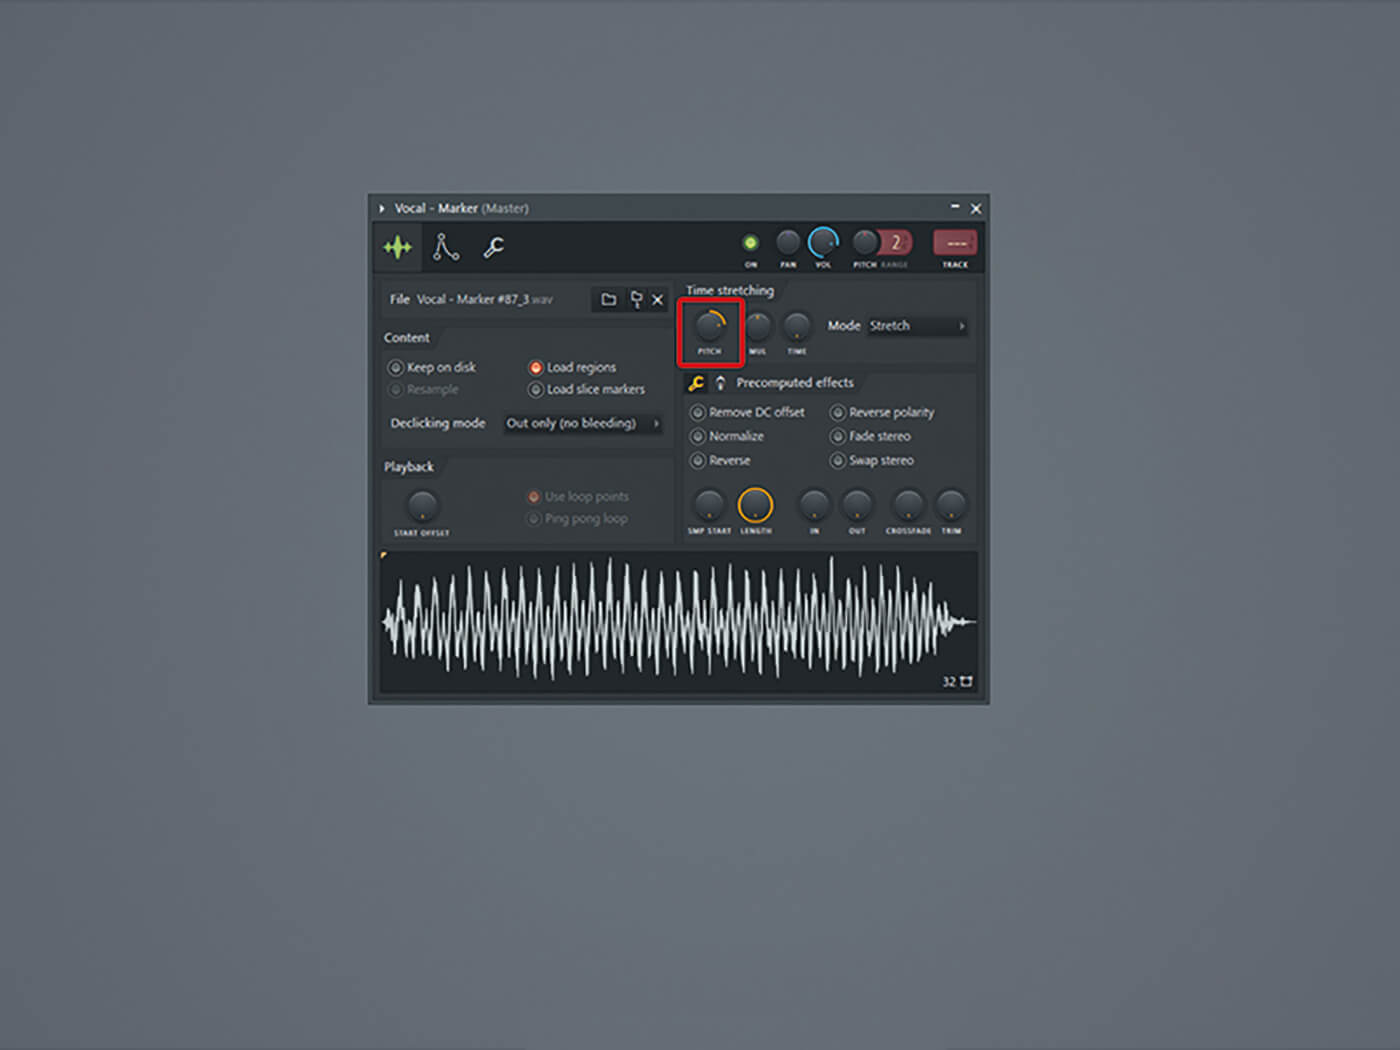
9. Shift the pitch of the sample to your liking. Experiment by pressing different keys on your keyboard when changing the pitch. Turn the knob completely to the left to lower the sample an octave, and to the right to add an octave.
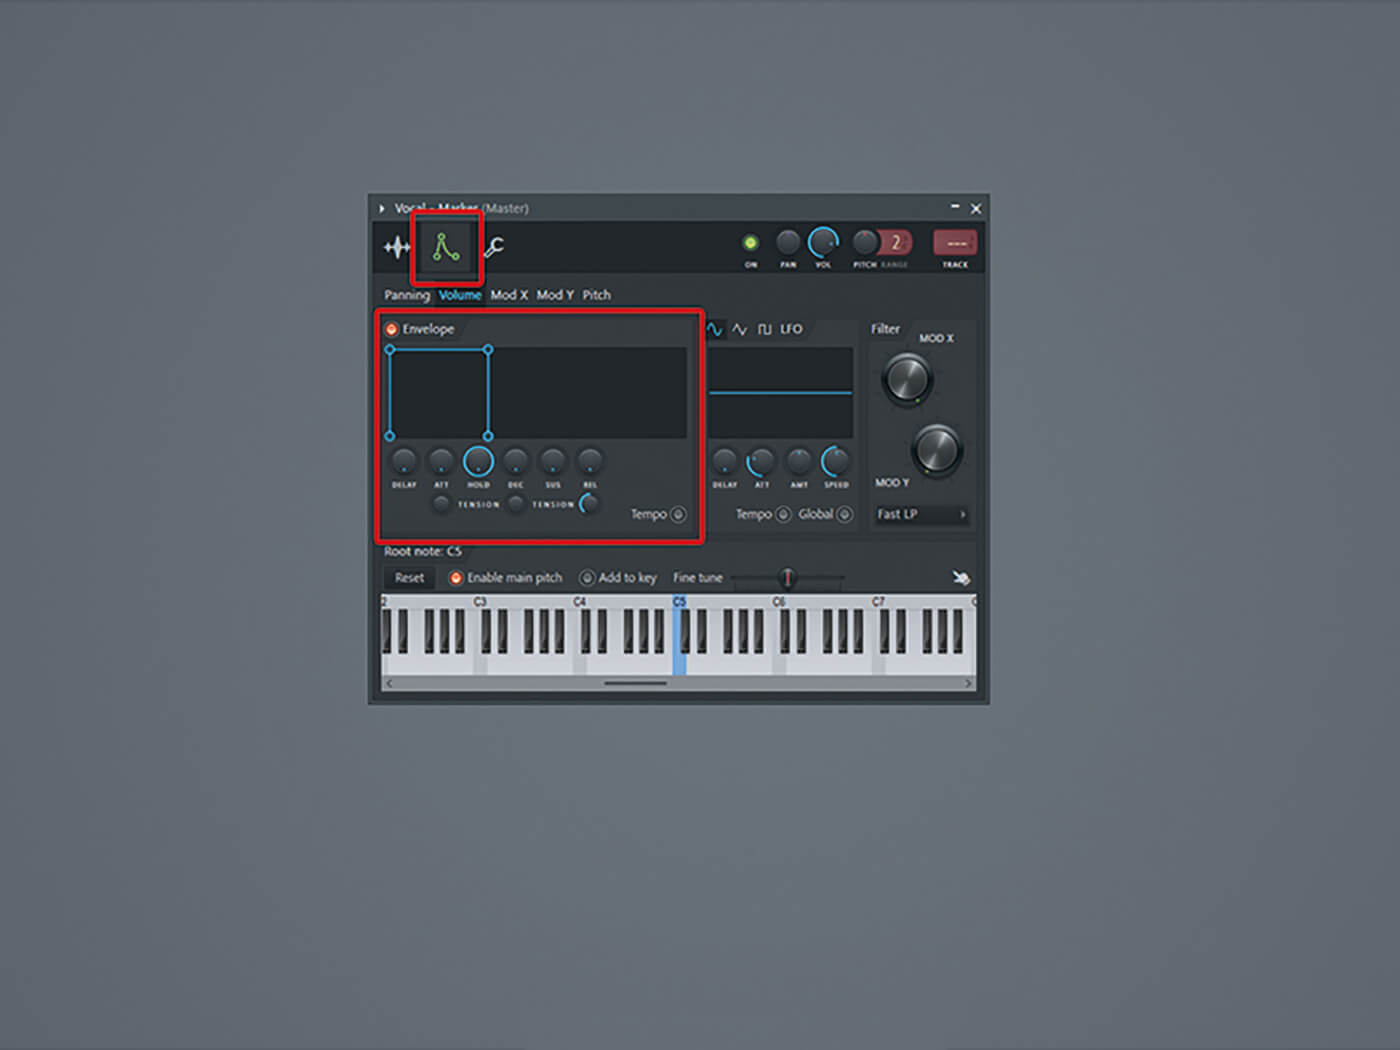
10. Go to the instrument settings tab and lower all the envelope knobs to zero except hold, which you should maximise. This will ensure your sample plays for as long as you hold the key.
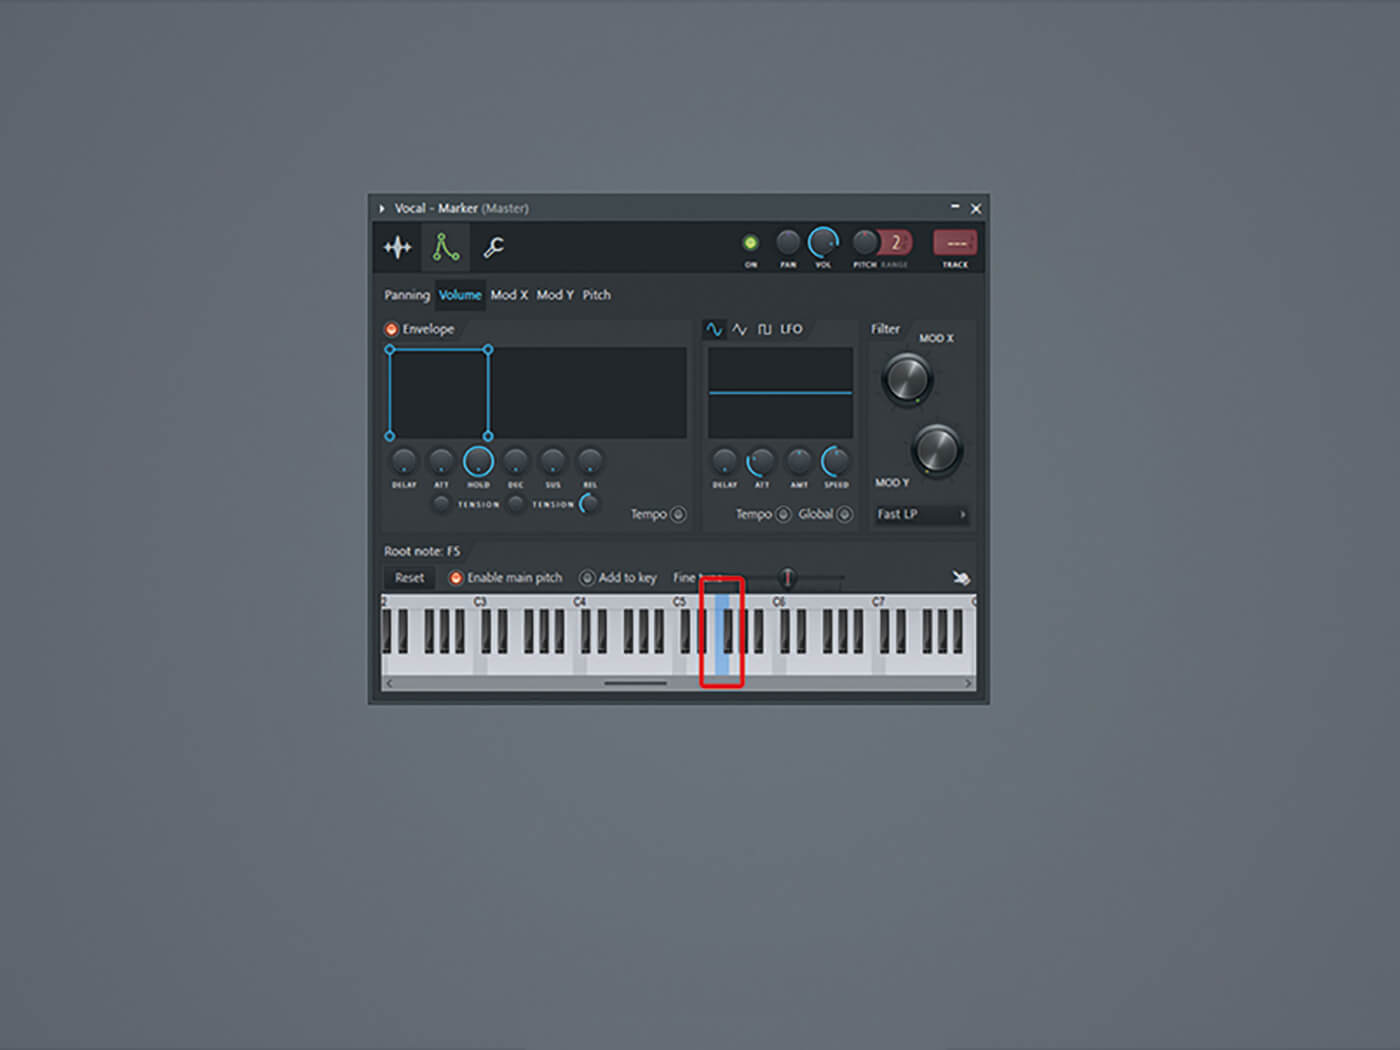
11. If you know the note of the vocal slice, you can change the root note in the sampler by right-clicking the corresponding key. This way, the note of the sample will match the note you hit on the keyboard. This step is not mandatory.
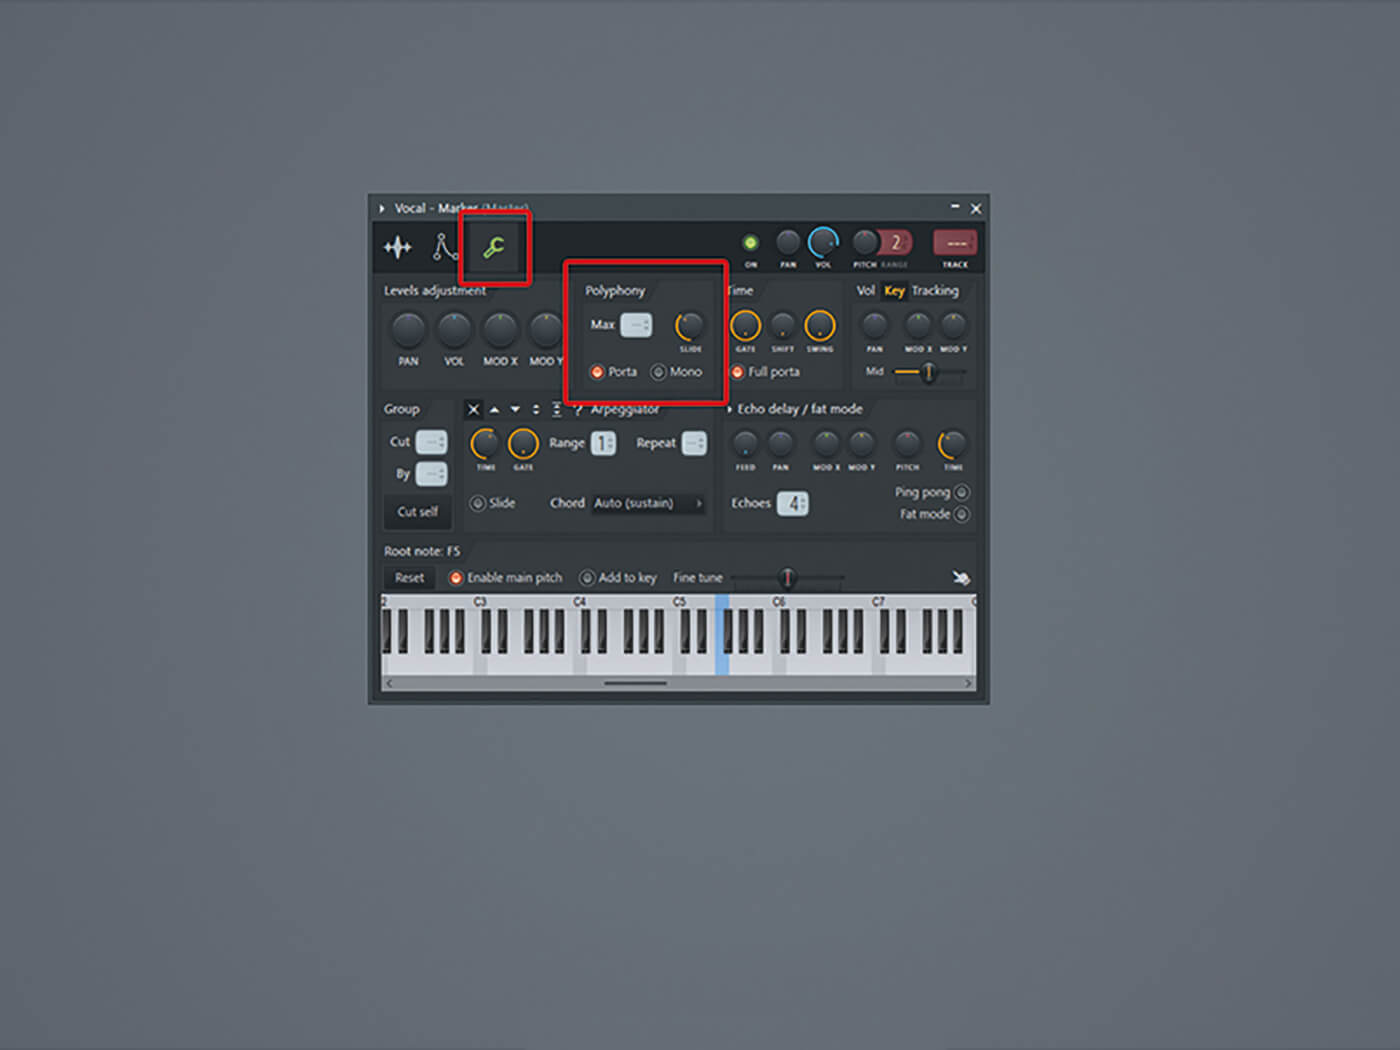
12. Playing the sliced vocal back repeatedly probably sounds harsh, with no natural glide. Go to the miscellaneous functions tab, turn on the Porta function in the Polyphony section, and adjust the knob to your liking. Press keys in lower and higher octaves in succession to hear the effect.
![]()
NO LIMIT There are no limitations to vocal chops. Experiment with as many effects and samples as possible and see what you come up with. Why not use delay instead of distortion? You don’t need expensive plug-ins to get professional results. FL Studio’s stock plug-ins will do the job.
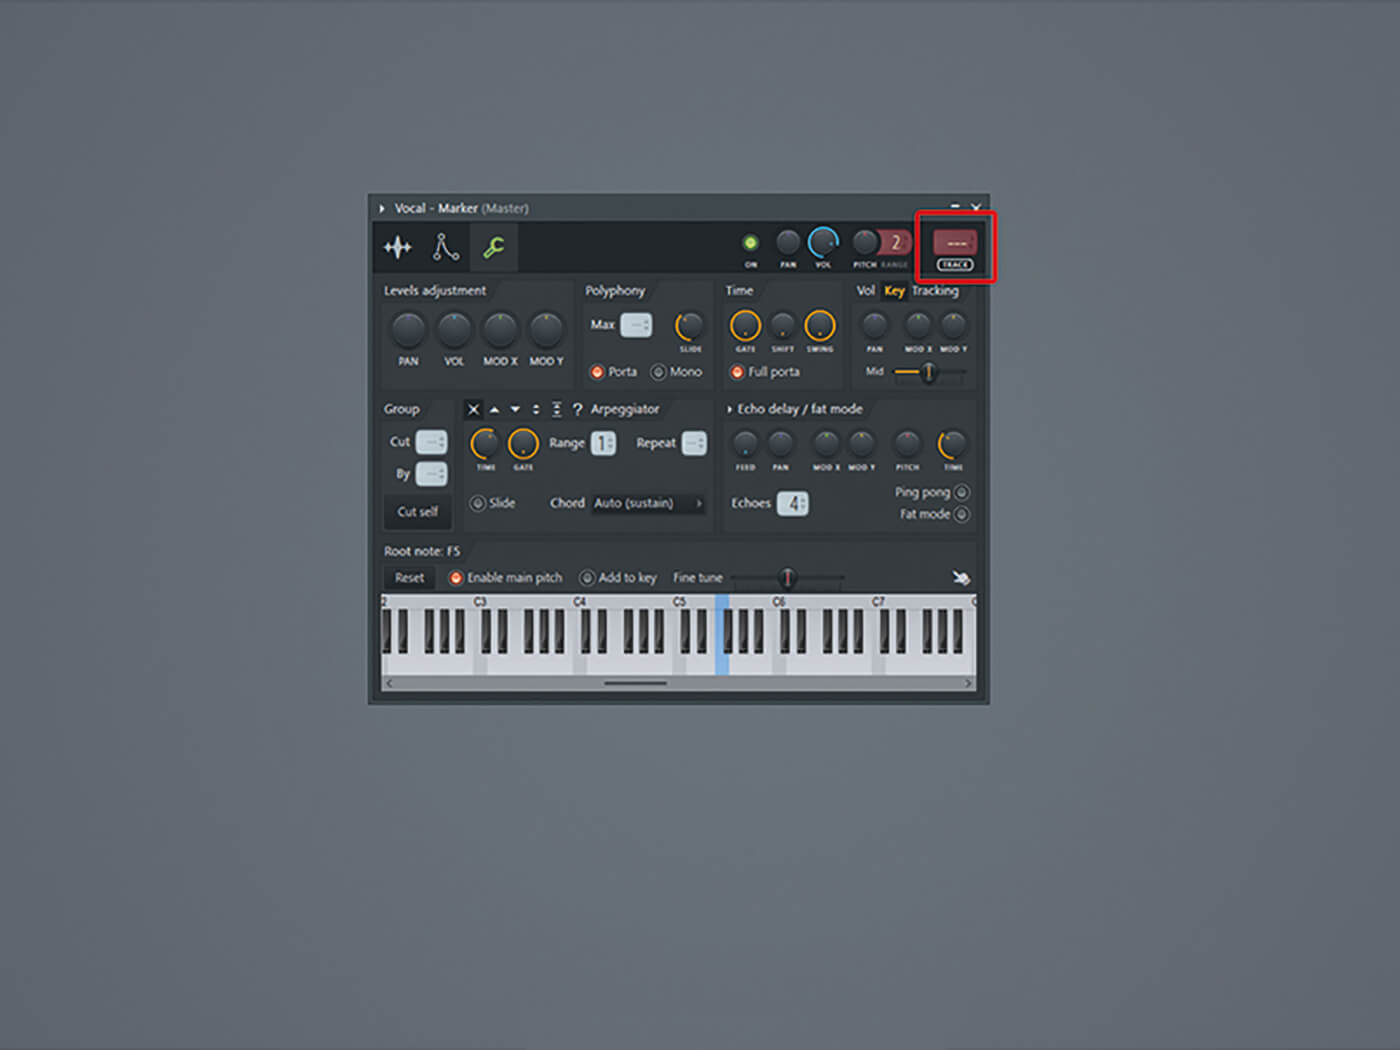
13. Assign the sample to a free mixer track by pressing Ctrl+L or click the track button. This will put the sample on the first free mixer track in your mixer. Now it’s time to add effects.
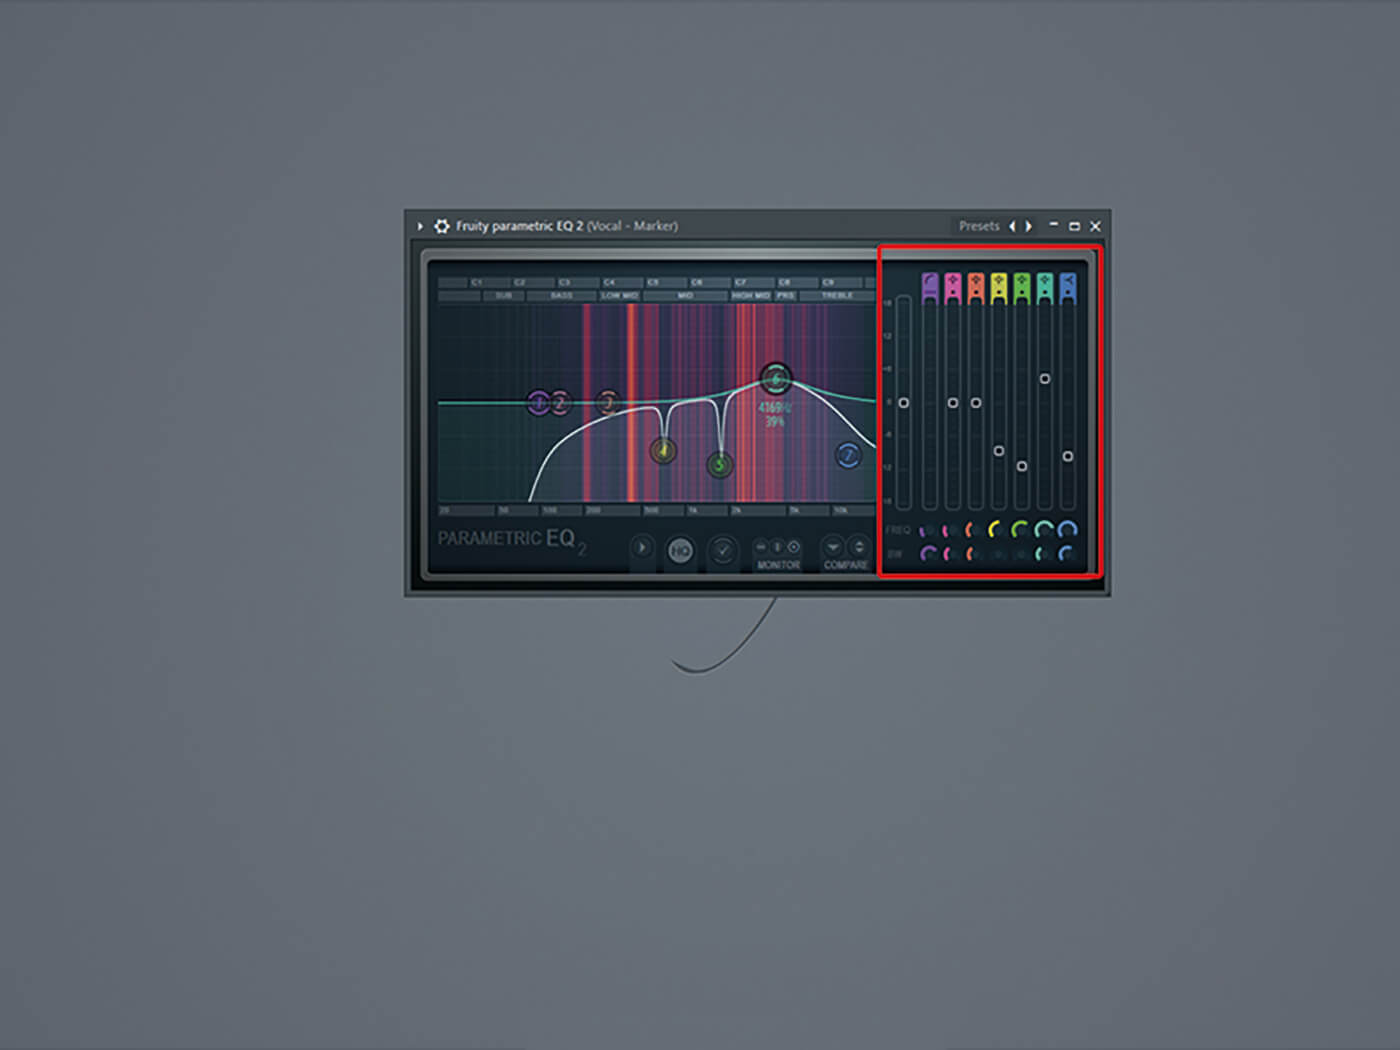
14. Add a Fruity Parametric EQ 2 to fine-tune the sample. Highlight some of the more annoying frequencies (if there are any) and lower them by pinpointing them with the knobs and sliders.
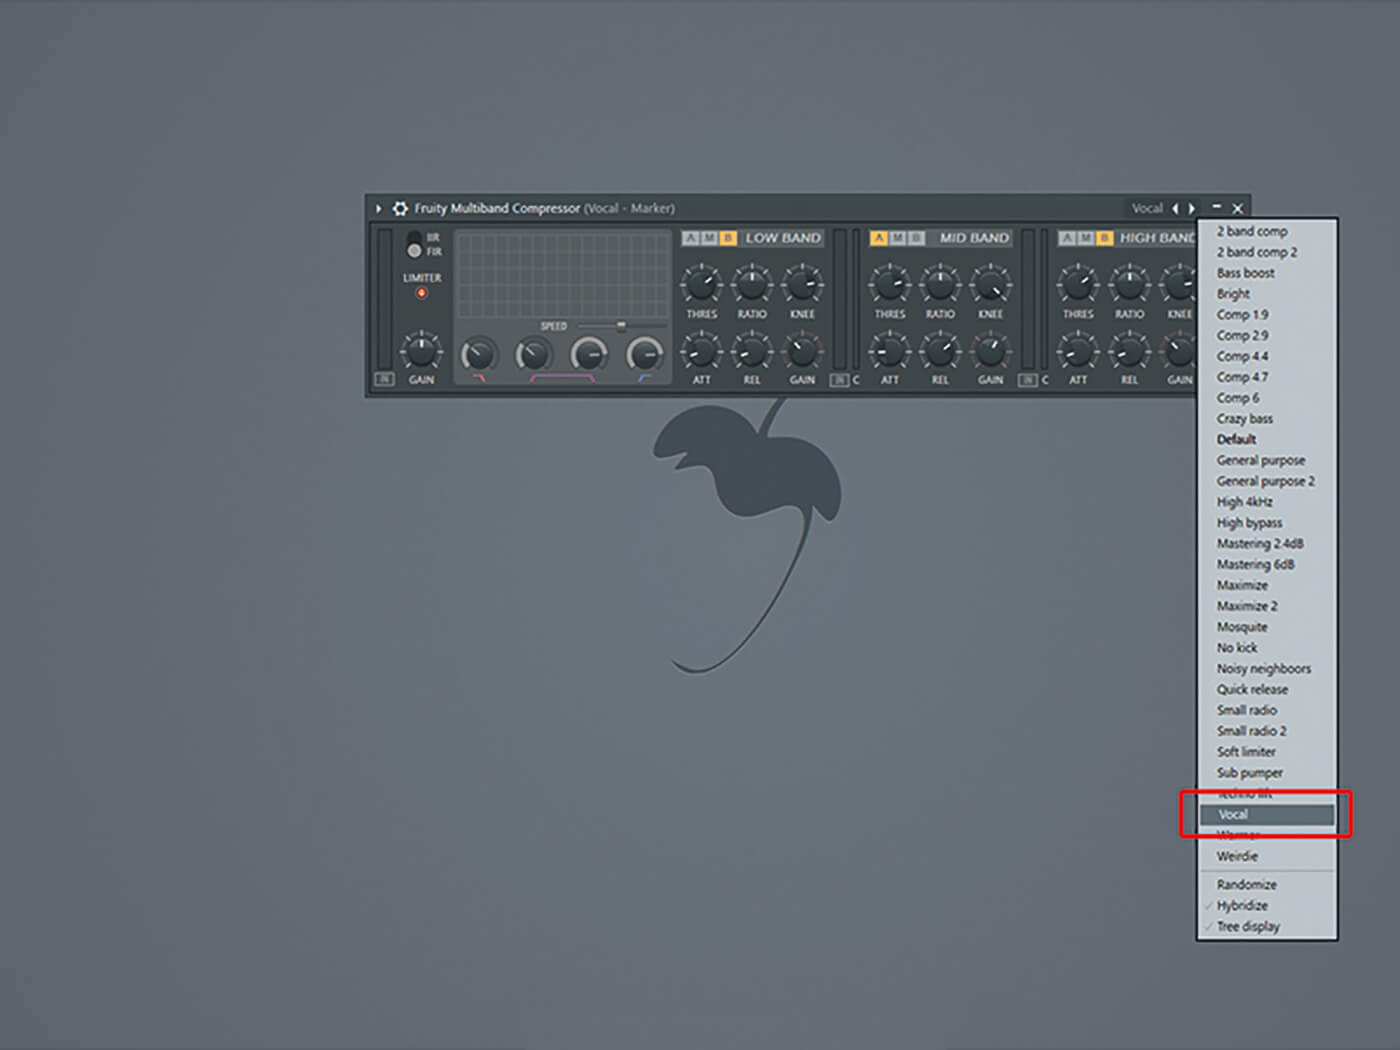
15. To give the vocal chop some extra power, use the Fruity Transient Processor or Fruity Multiband Compressor, which has a nice vocal preset.
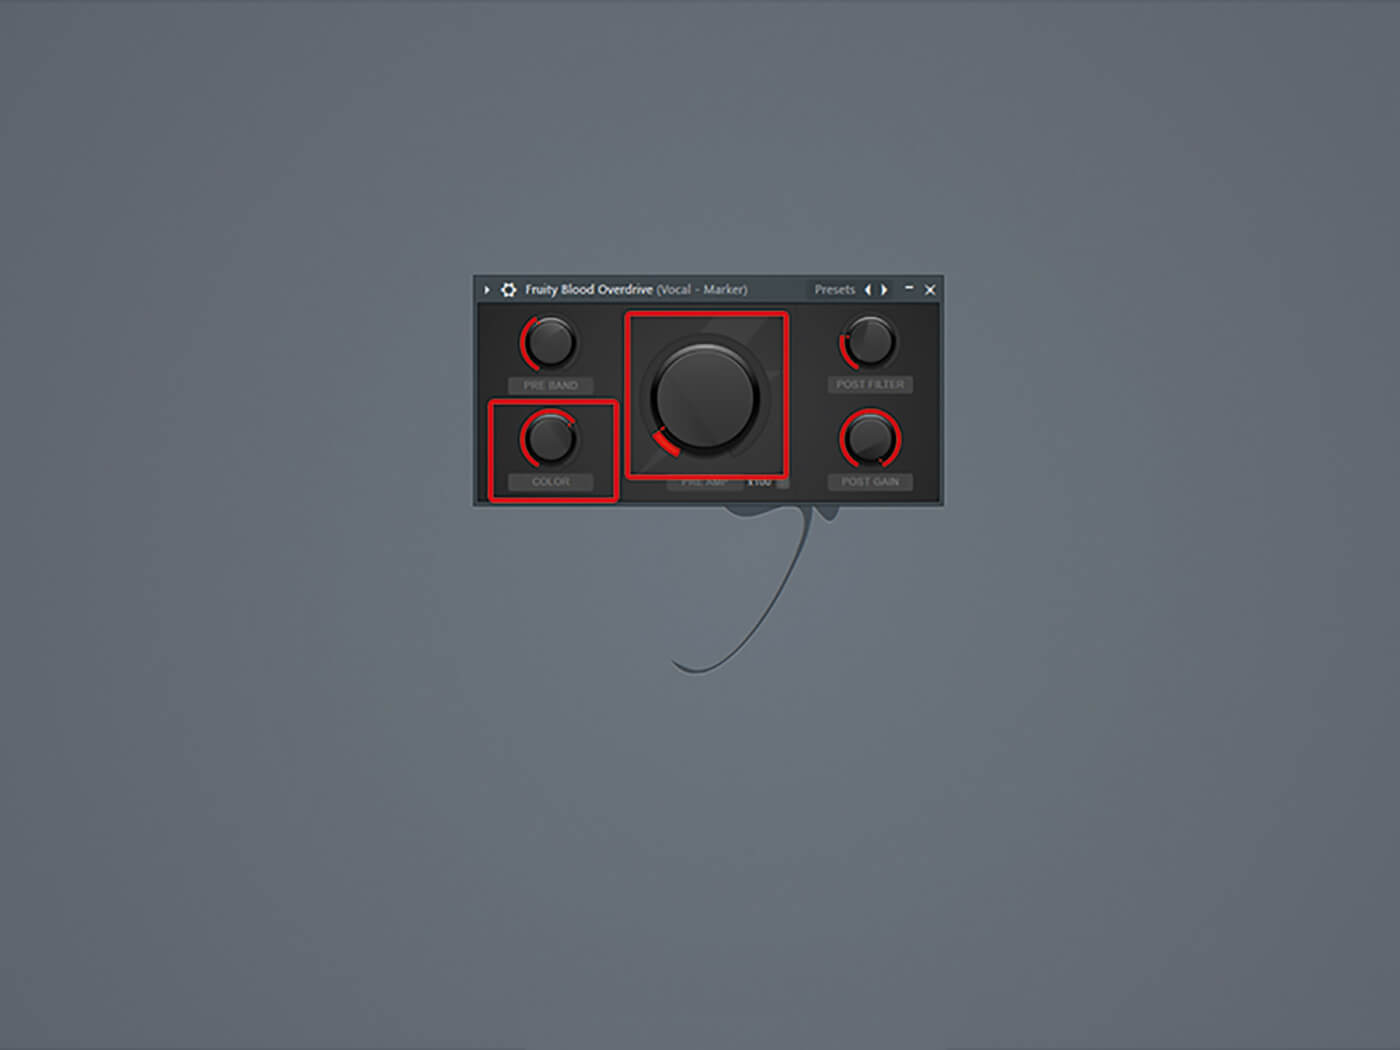
16. Distortion will make the vocal chop stand out more in the mix. Add Fruity Overdrive and select the Boost preset. Crank the Color and Pre Amp knobs to really push the effect but don’t overdo it – a little is enough.
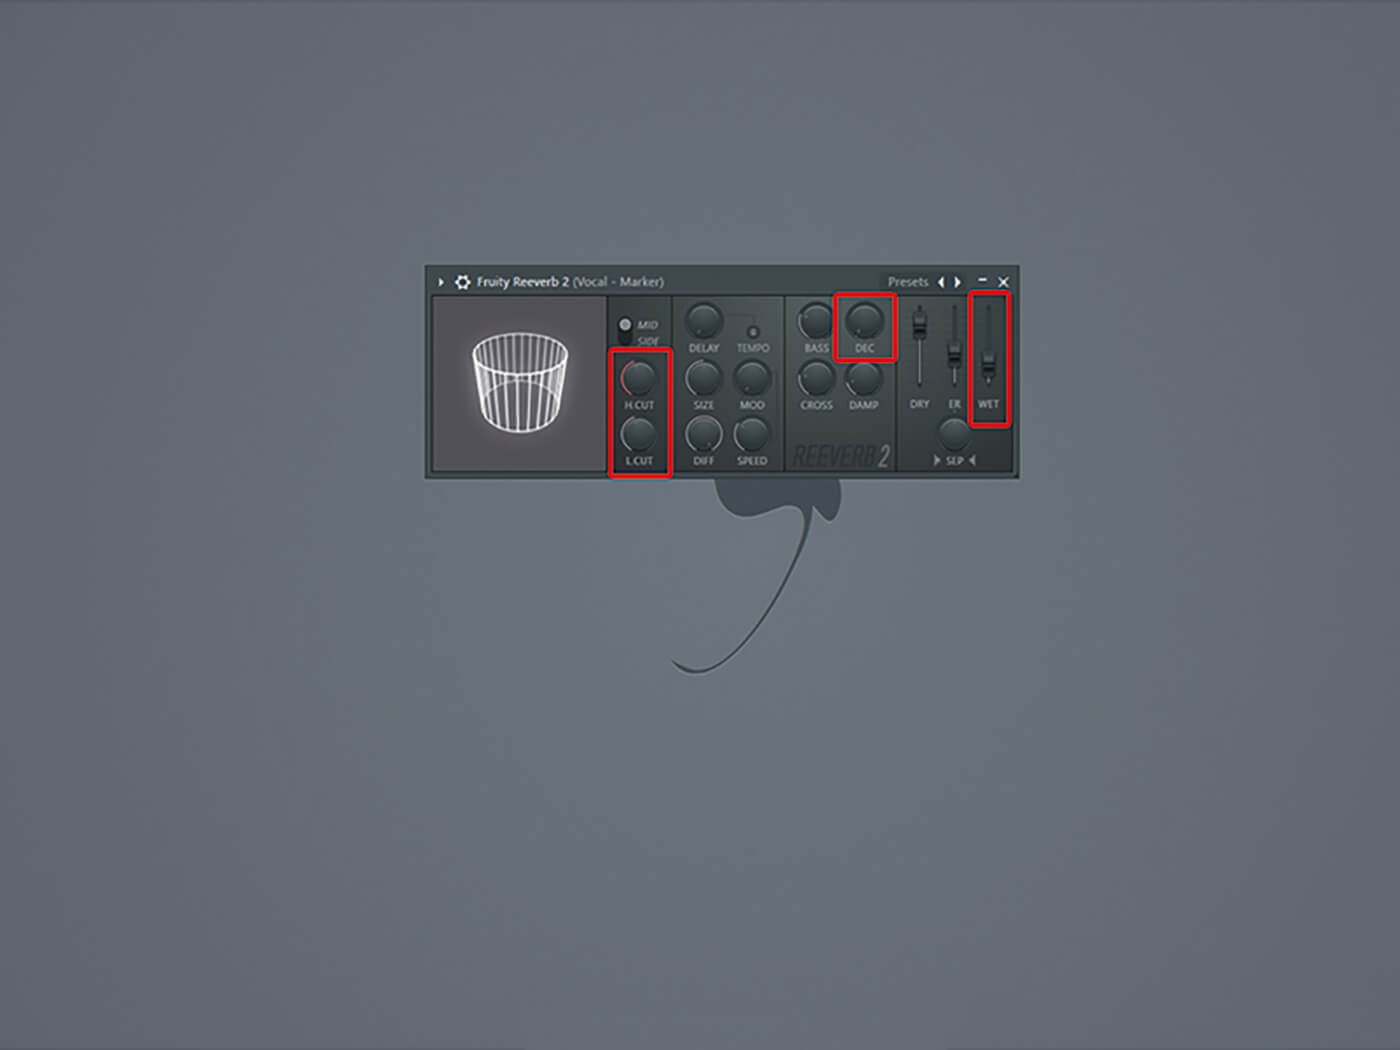
17. Add Fruity Reeverb 2 to keep the vocal chop from feeling too choppy. Lower the decay to about 0.5 seconds and turn the high-cut and low-cut knobs to about half. Adjust the wet slider to increase or decrease the effect.
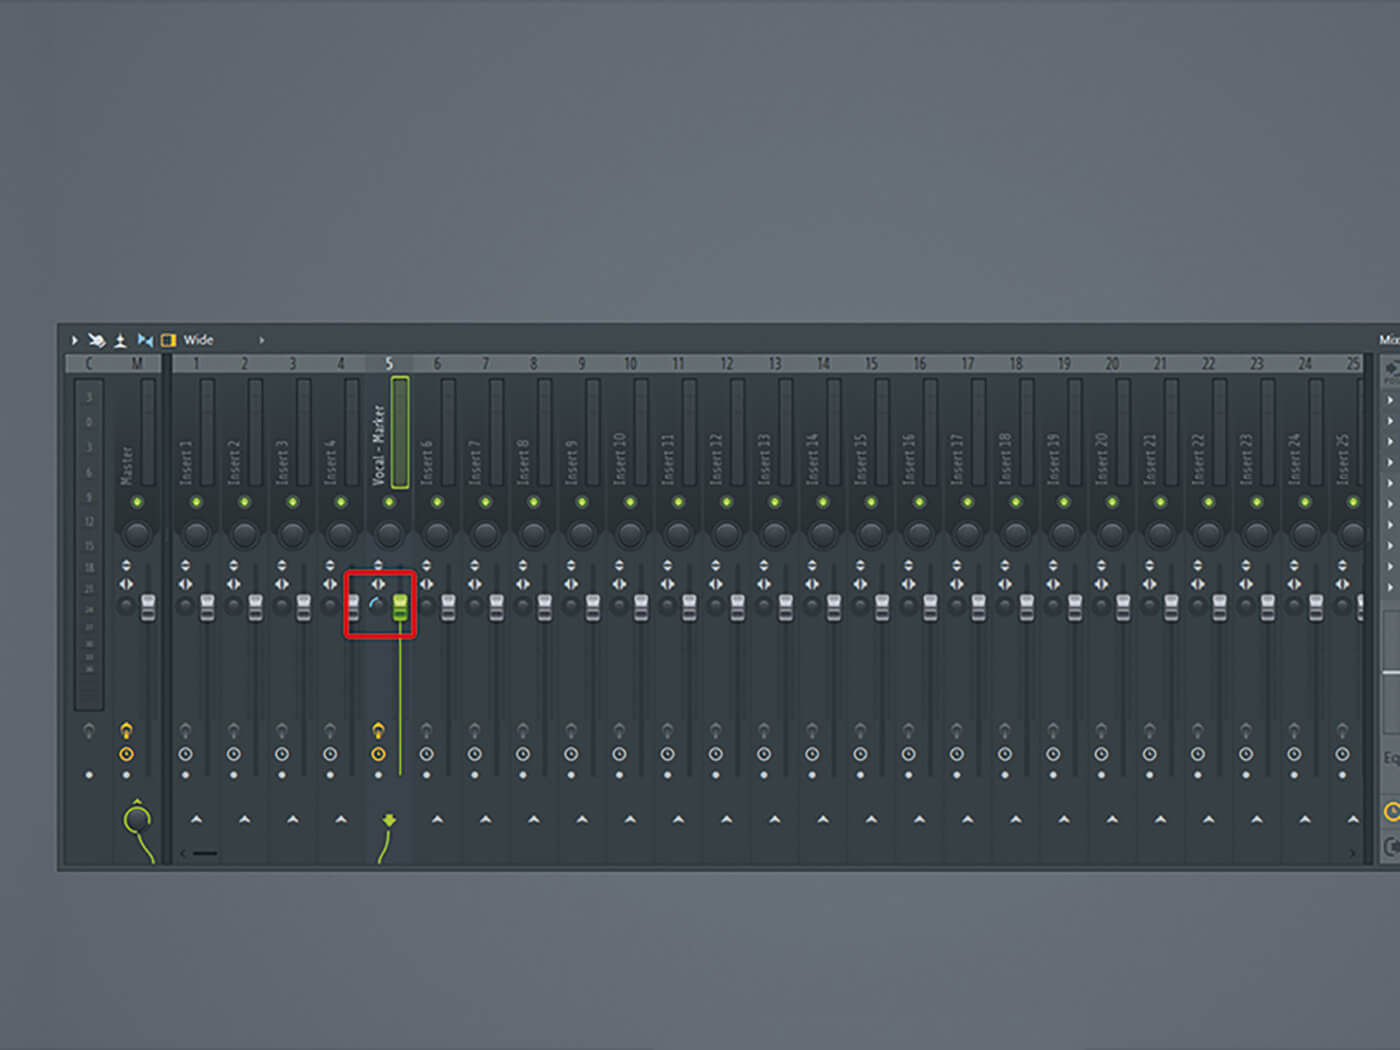
18. In the master panel next to your volume slider, you’ll find the Stereo Separation knob. Turn this to the right for a more mono sound that will keep the vocal chop centred in the mix. Turn it to the left to open up the chop in the stereo field.
For more FL Studio tutorials and workshops, check here.