House Percussion That Raises The Roof In Logic Pro X
Percussion has long been an essential part of house and techno, but how can you go beyond a simple bongo loop? Alex Holmes joins the drum circle… Because house, techno and its many variants are based on a simple 4/4 kick, it allows plenty of space to be playful using additional percussion to build up […]
Percussion has long been an essential part of house and techno, but how can you go beyond a simple bongo loop? Alex Holmes joins the drum circle…

Because house, techno and its many variants are based on a simple 4/4 kick, it allows plenty of space to be playful using additional percussion to build up more intricate grooves. There are no hard and fast rules, but at its most basic level, the emphasis in house tends to centre around the off-beat hat, with more familiar, live-sounding percussion loops.
In contrast, techno is often more electronic, industrial and experimental, with more use of syncopation and short, hypnotic loops.
Whatever the genre, though, the first thing to consider is whether you’re going to program in your pattern or use a loop. Although individual sample or synth hits can provide easier control over placement, velocities and envelopes, using a well-performed percussion loop will give you natural details and variations that can help make a beat feel more organic and alive.
If you can, it’s a good idea to try and perform your hits in live, using a controller, and if you’re going for sparser, larger sounds such as toms or conga hits, then try and place these in the spaces around your other drum elements.
Devil in the details
Using loops doesn’t have to be a drag, drop and forget experience. If you like the sound of a certain loop, but the placement is wrong, try simply shifting the loop left or right in 16th- or 8th-note increments to get a completely different feel. If the beat is sounding too cluttered, then chop out and mute individual hits, especially those that are clashing with your other drums and getting lost. You could also try rearranging regions, copying and pasting, and using different sections or loops for the end of the 4th or 8th bars to build up longer patterns.
To quantise or not to quantise with percussion (or indeed any drum element) will largely depend on the vibe you’re trying to create. An organic, live-sounding house track will more likely work better with some loose percussion than a rigid techno roller.
Listen to all the elements that build up the track, whether fairly loose or strictly on-grid, and see whether a looser percussion groove complements or complicates the overall feel. If you’re looking to quantise audio, you can either cut up and highlight individual regions, then quantise their position in the Event list editor.
A quicker way, though, is to engage Flex and quantise in the Region Inspector, which allows you to use the Q-Strength amount to experiment with a little off-grid looseness. You’ll probably find that the Rhythmic and Slicing Flex modes are best for natural-sounding percussion, but try some of the others, as the artefacts can sometimes create some interesting effects.
The transient hits aren’t always obvious with live percussion, so if the quantise is a little out, then you may have to go into the Audio Editor and adjust some of the transient marker points for the best results.
Speaking of transients, it’s worth looking at all of your drum and other musical elements and seeing how many really transient-heavy sounds you have.
Your kick, snare and hats will probably all have fairly upfront transient spikes, so you might consider shaving off the front of your percussion sounds to blend them in and reduce the feeling of an aggressive and overly fussy top end. A good tape saturation or Logic’s Enveloper are good tools for this.
Alternatively, if you want your percussion to be a key, standout part of the track, you might want to reduce some of the transients on the other drum elements to allow space.
Taking this idea further, and assuming you have your percussion and drums bussed separately, you could give your percussion extra emphasis by inserting a compressor on the drum buss and using the side-chain input to duck a little whenever the percussion plays.
We would recommend being careful with this though, as you could end up with an uneven-sounding beat. It’s probably best used when you have more sparse, clusters of percussion that can poke though at key points.
![]()
Good housekeeping In a house track, you might want to spend some time adding variations and fills to extend the loop to feel more like a performance. Maybe have a couple of different-sounding loops, which can be used to differentiate between 16- or 32-bar sections.
Final touches
Once you’ve got a grooving pattern that you’re happy with, you can start to think about how it will work with the rest of the track. One final note: although it’s good to have certain elements available to change and automate, it can also be liberating to commit certain effects to your audio whilst you’re building a groove.
Bouncing percussive hits with short, characterful reverbs and then compressing the hell out of them can be a good way to get more unique, industrial sounds out of standard percussion instruments. Ultimately, though, it’s all about the groove, so make sure your percussion is driving the beat forward, rather than cluttering or holding it back.
House percussion: Step-by-step
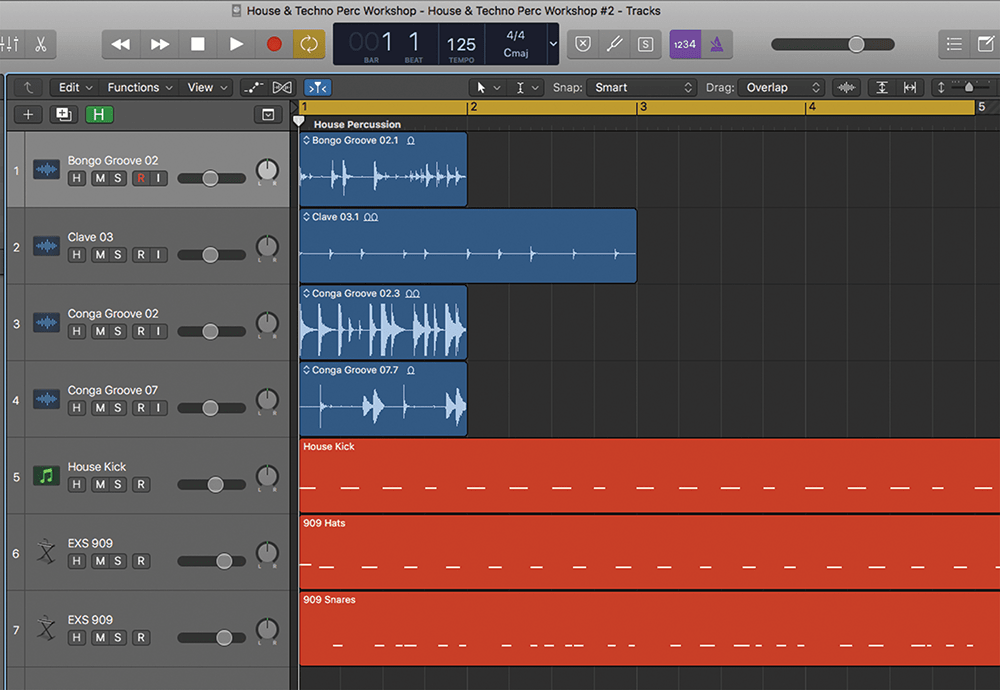
1. Here, we have a simple, swung house beat. The first step is to pick a handful of live-sounding percussion loops and lay them on top. Congas, bongos or more exotic instruments work well.
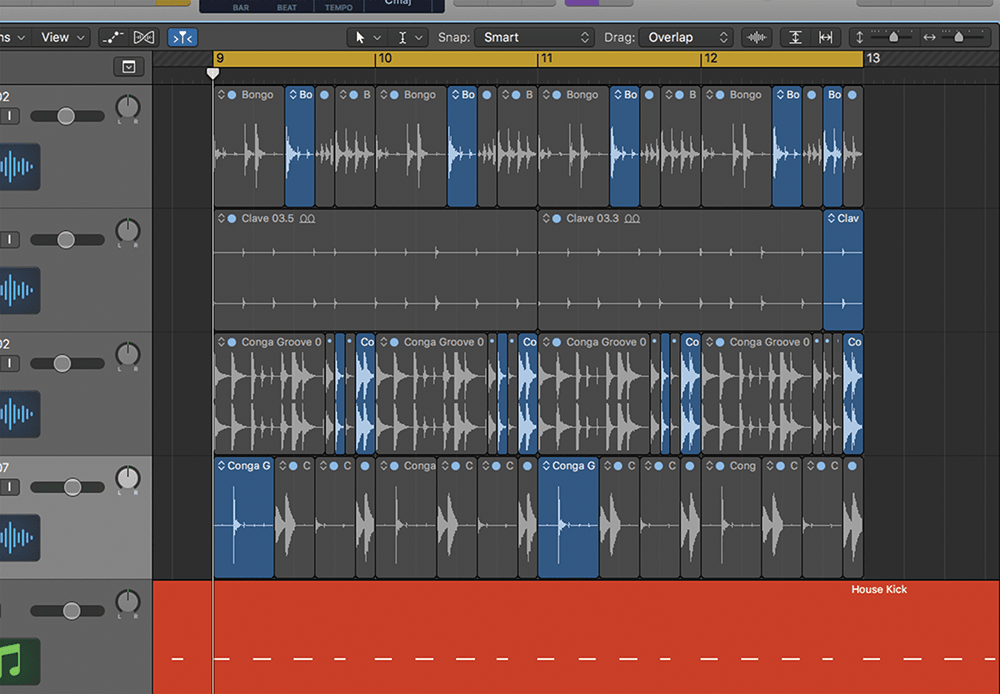
2. Next, we’ll chop in to them to pick out key hits and build up a new groove. The aim here is to create as much space as possible and to get the different instruments sounding like they’re having a conversation.
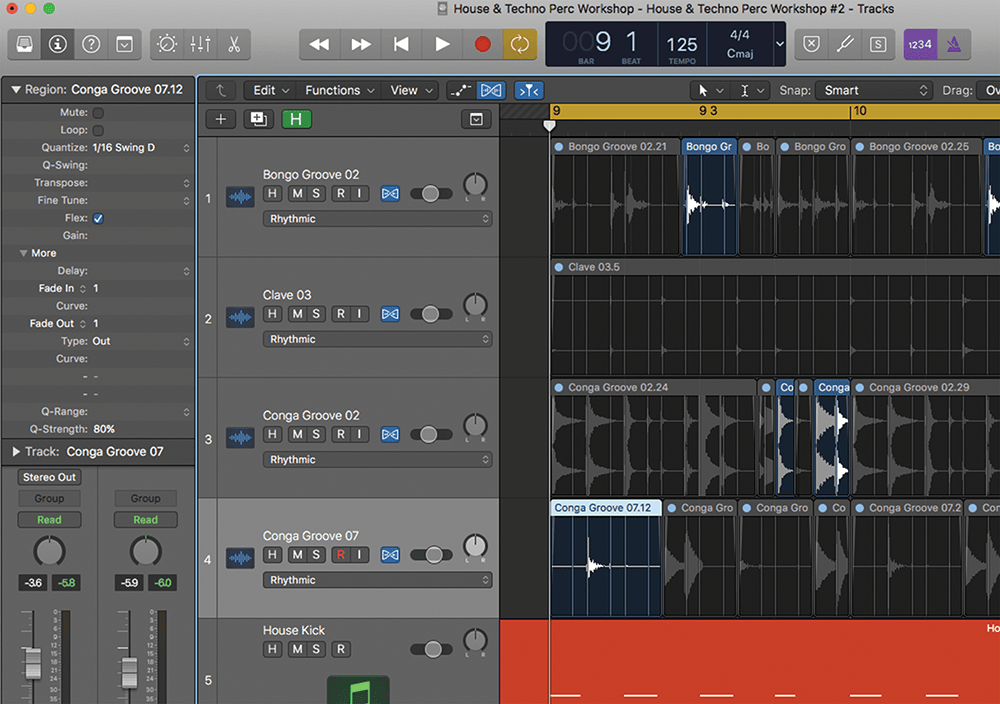
3. You might have to do some cleaning up and use Region fades to avoid pops and clicks, or use Flex (Rhythmic and Slicing modes are best here) to quantise the hits, depending on how loose you want it to sound.
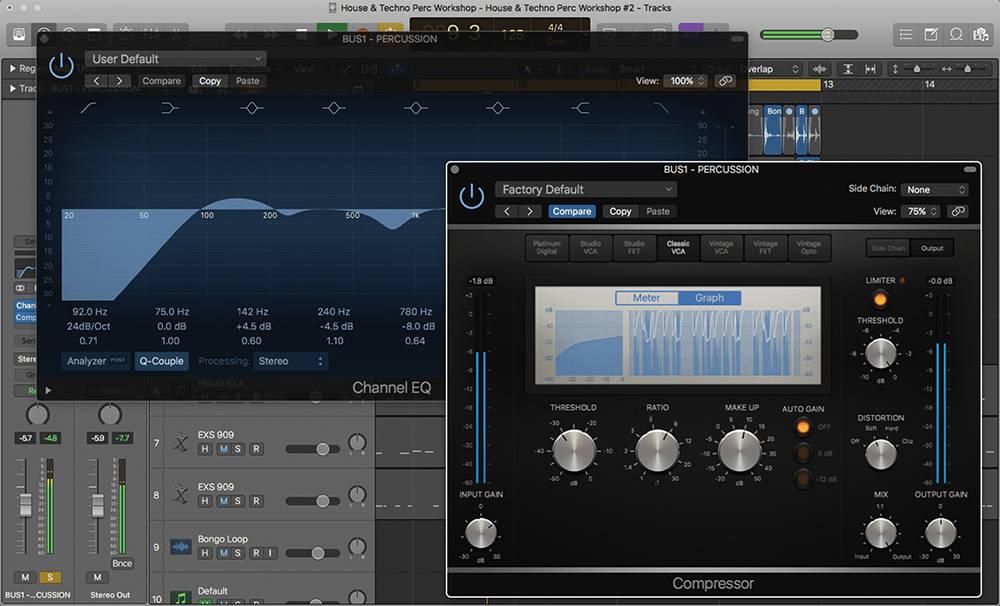
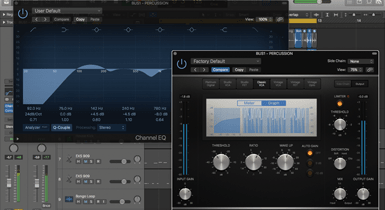
4. To save time, we’ll send these to a percussion buss to add some EQ/compression and gel them together. Experiment with the different compressor models and aim for an upfront, even sound between the different hits.
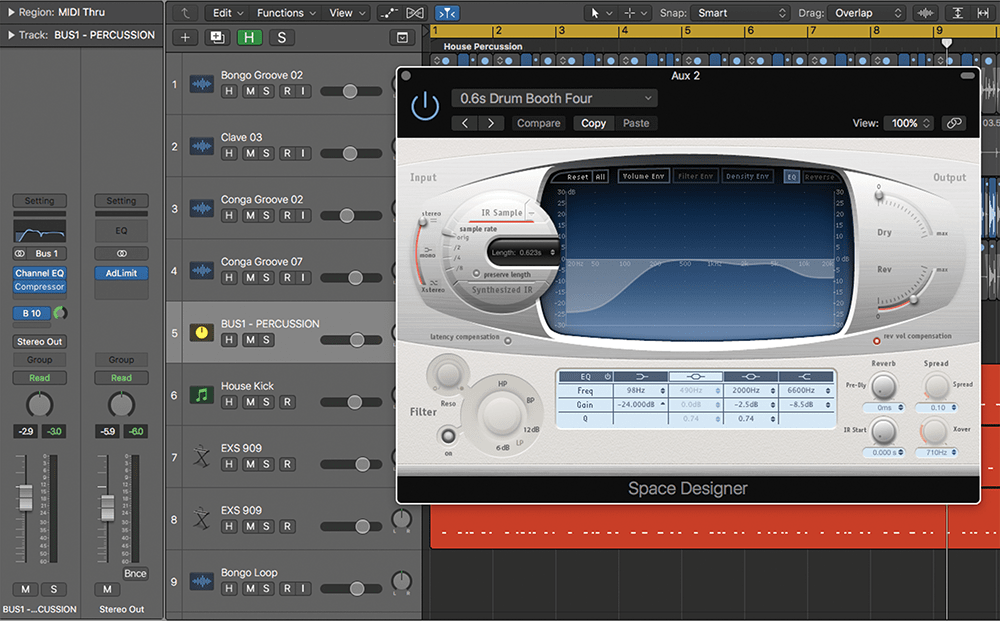
5. Next up, we add a send to the buss and, using the Space Designer, choose a tight room setting. This will further help glue things together and you can sculpt the sound using the built-in EQ.

6. As a final touch, we can add a bit of pumping to the percussion buss, either using a compressor with a side-chained kick, or a quick-and-dirty method using the Tremolo plug-in with the Smoothing off and Phase set to 0.
Click here to learn how to bring something extra to your techno percussion
