Logic Pro X Tutorial: Programming Beats – Step-By-Step
Alex Holmes continues his step by step look at creating beats using Logic’s versatile drummer…. Programming House Beats with Drum Machine Designer 1: Drum Machine Designer is a good choice for programming house beats, as you can fine-tune the sounds as your track progresses. First up, let’s load in the Ibiza Kit (seems like the […]
Alex Holmes continues his step by step look at creating beats using Logic’s versatile drummer….
Programming House Beats with Drum Machine Designer

1: Drum Machine Designer is a good choice for programming house beats, as you can fine-tune the sounds as your track progresses. First up, let’s load in the Ibiza Kit (seems like the obvious choice!) and program a basic kick pattern.
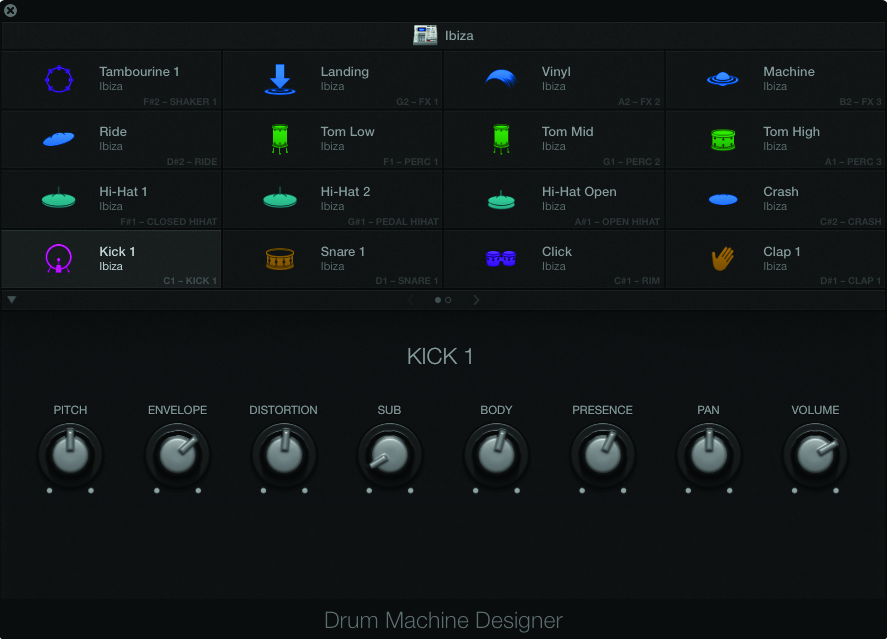
2: Next, we’ll click on the Kick pad and start fine-tuning the sound. We’ll dial up a little bit of Envelope, Distortion, Sub, Body and Presence, so that it’s just enough to bulk out the sound and help it punch through the mix.
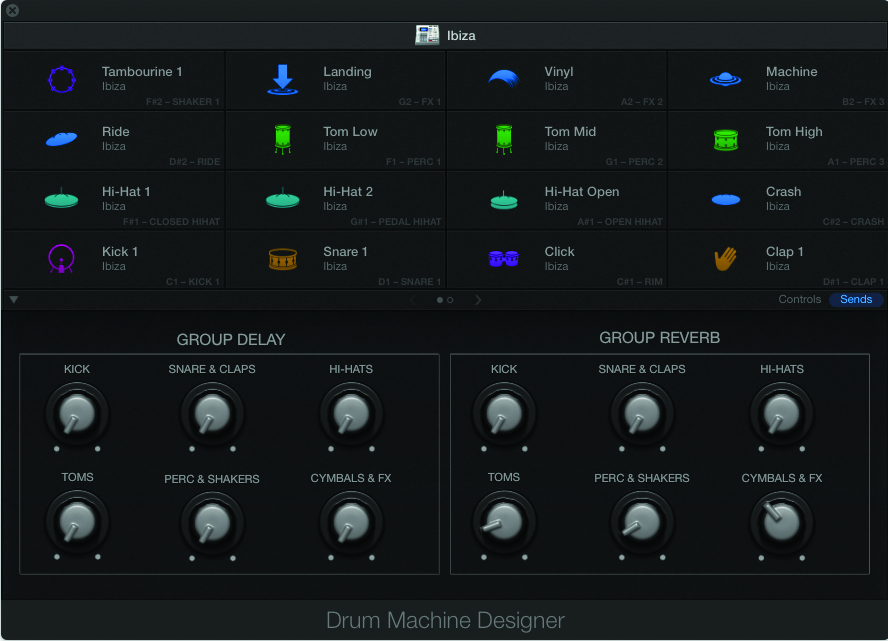
3: You’ll find certain sounds have effect-sends set up by default, so go into the Sends page and pull down the delay and reverb on the groups you want dry. We’ve also added in a simple offbeat hat and fined-tuned the parameters.
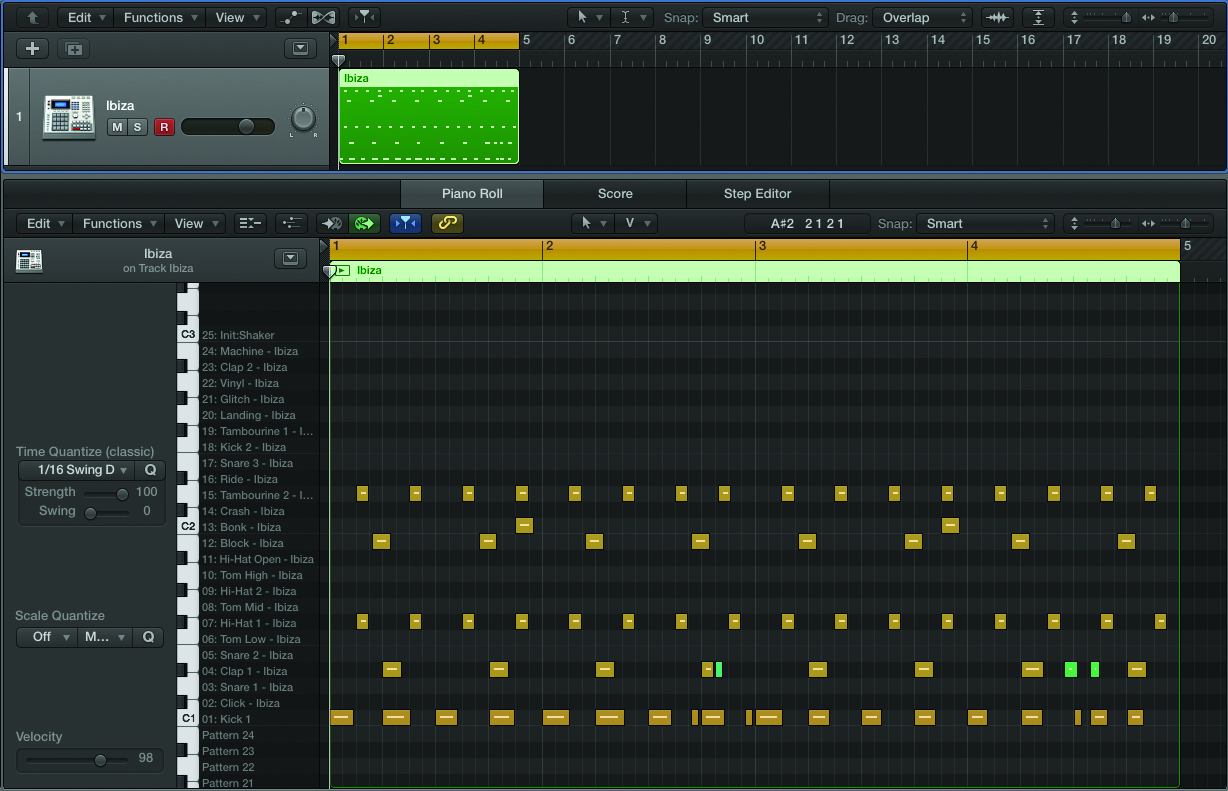
4: Next, we’ll build up the pattern by adding some extra percussion elements and tweaking the tuning, length, volume, and pan of each, so we have a balanced, fuller beat. We’ve opted to quantise everything to 16D, to give it some swing.
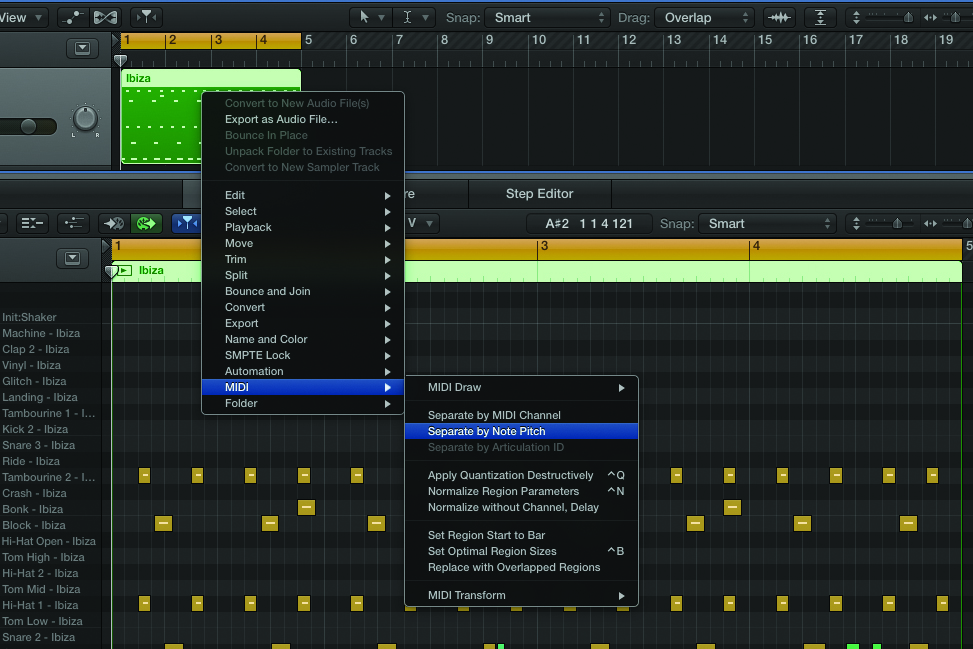
5: If you now right click the region, then select MIDI > Separate by Note Pitch, Logic will create a Track Stack, which you can then expand to start arranging your drum building blocks into a more substantial track.
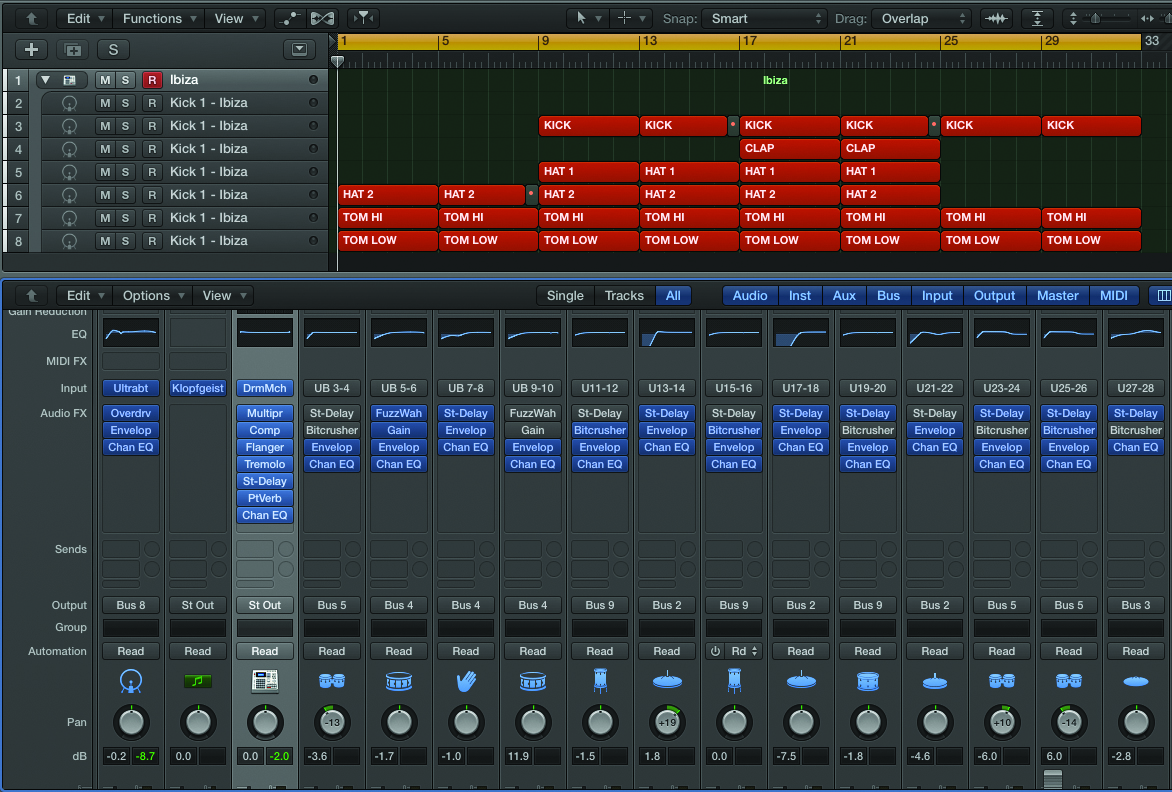
6: Drum Machine Designer is essentially an Ultrabeat with lots of sends, and if you go into the Mixer window, you can further process the individual drum channels, with the Track Stack acting as your master drum buss.
Drum ‘n’ Bass Breaks with EXS24
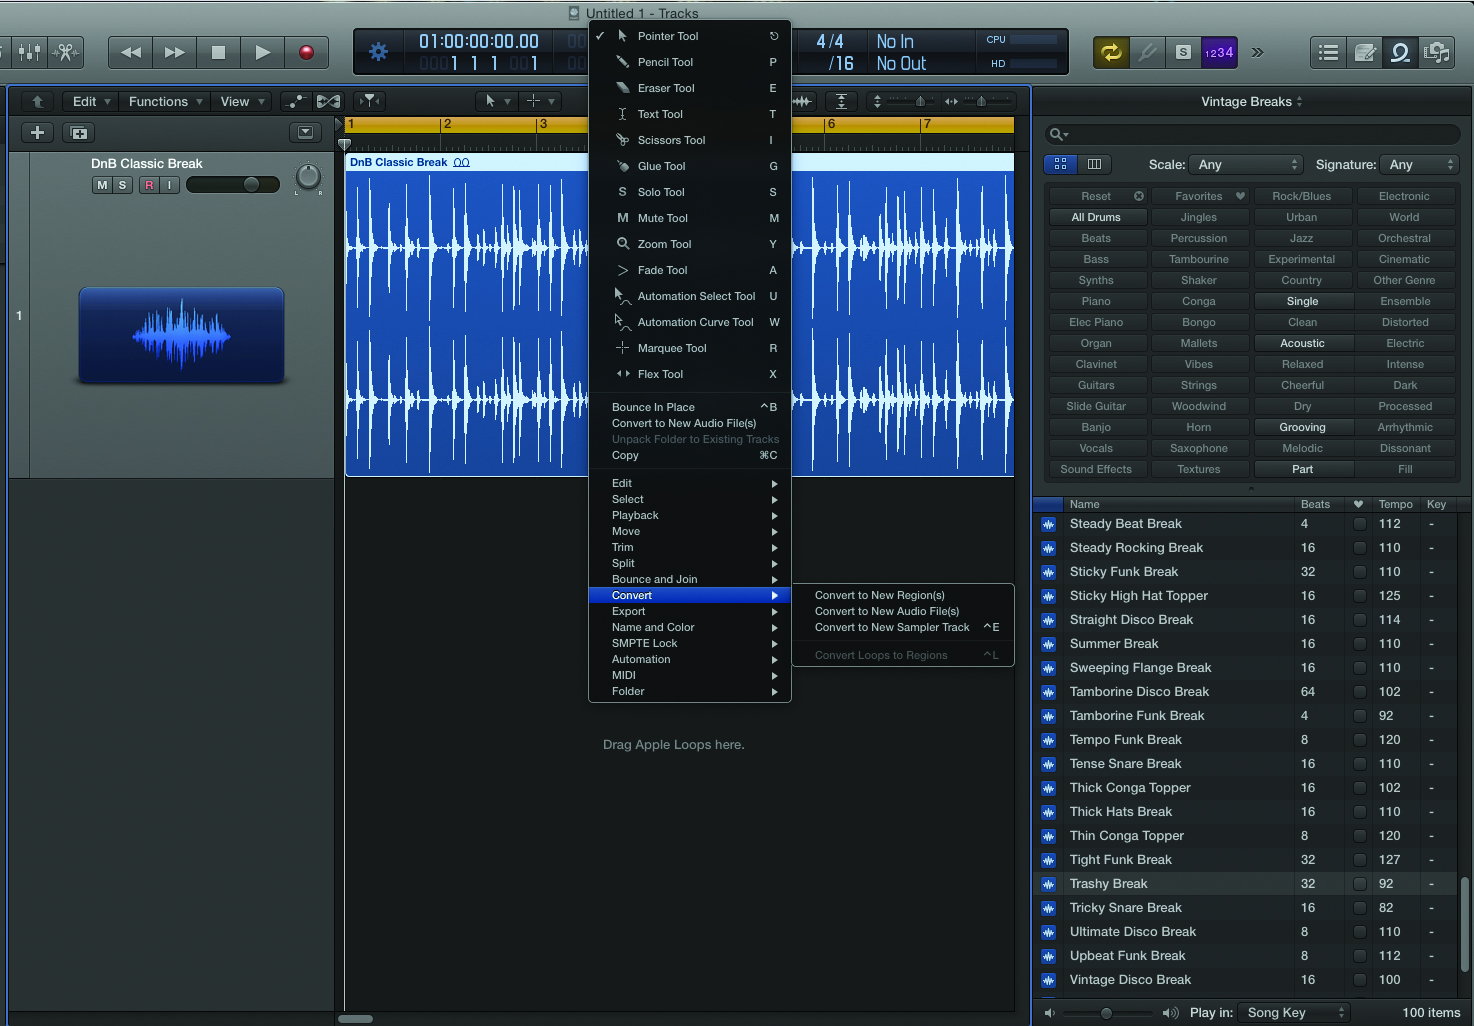
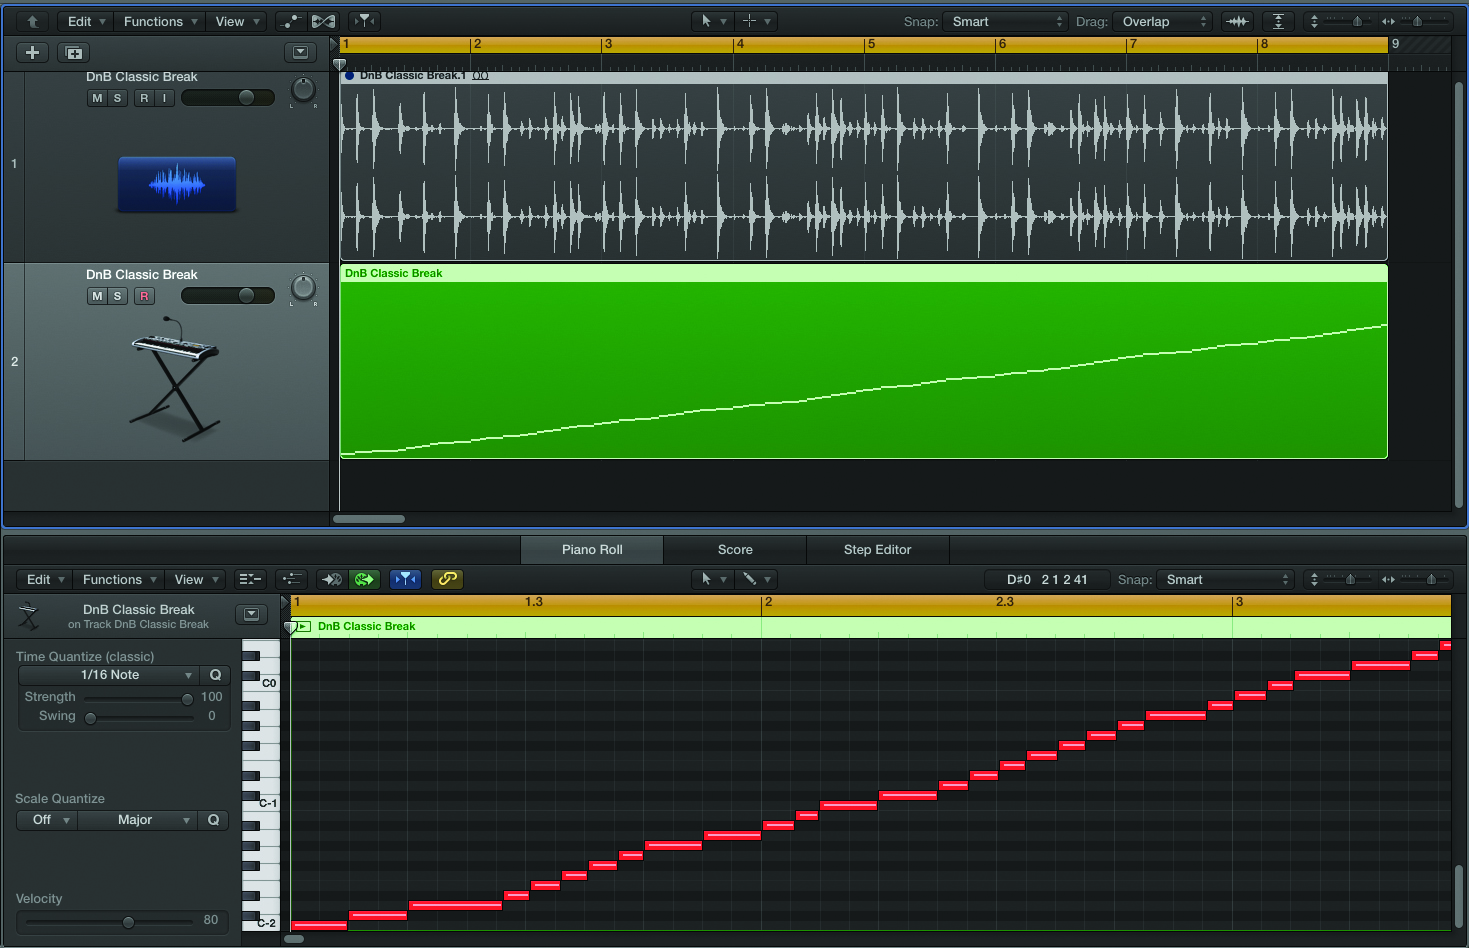
1: One of the best ways to program exciting d ’n’ b drums is to use chopped up breaks. We’ve selected the DnB Classic Break from the Apple Loops library, right clicked the region and selected Convert Regions to New Sampler Track.
2: You’ll want to select Transient Markers, then ‘OK’, and you’ll be presented with a shiny new EXS24 instrument with the chops laid across the keyboard, and the MIDI notes laid out in the style of a REX file.
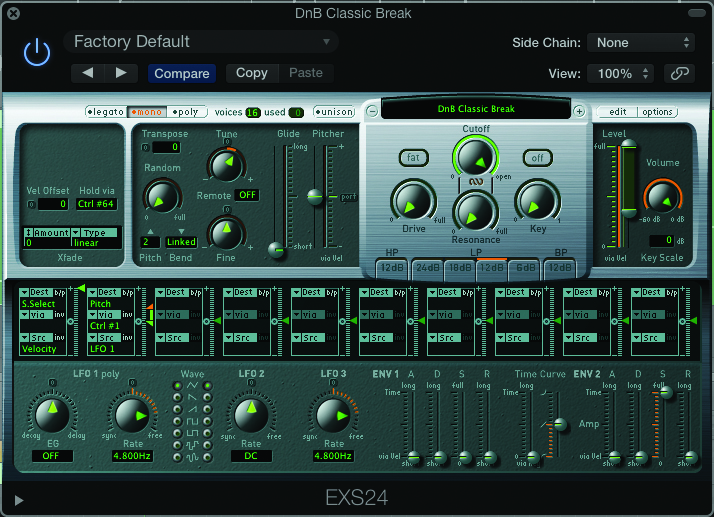
3: The original loop was at 110BPM, but we want it faster, so bump up the tempo to around 160/170BPM. You can control the pitch from within EXS24 to give the break a more traditional pitched-up feel, which will also shorten the notes.

4: Pull the Env 2 Sustain all the way down, and slowly bring up the Decay to taste to create much tighter sounding hits. You might also want to switch on the filter and then add a little drive to bulk out the sound.
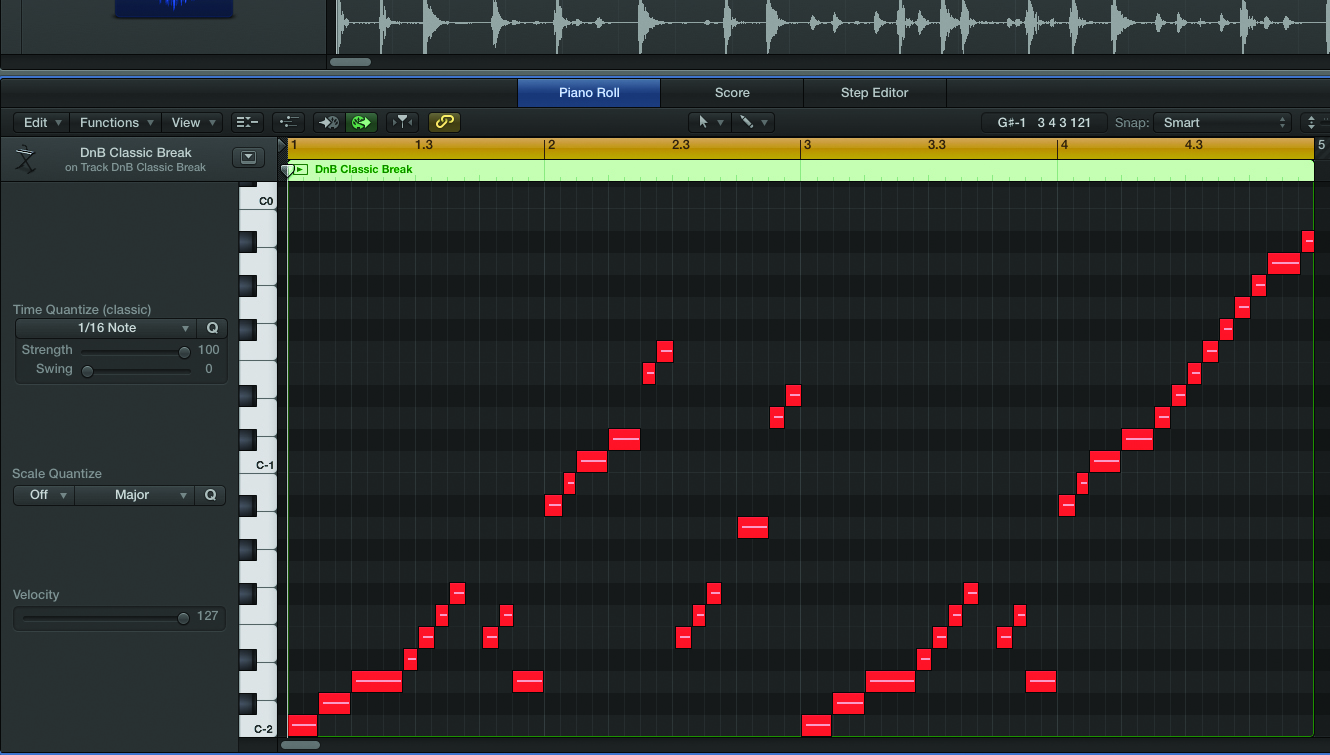
5: Here’s where the fun starts! Now you can rearrange the pattern of your break by taking different sections of MIDI notes and copying and moving them to create a more interesting beat, even choosing to quantise if you want it super tight.
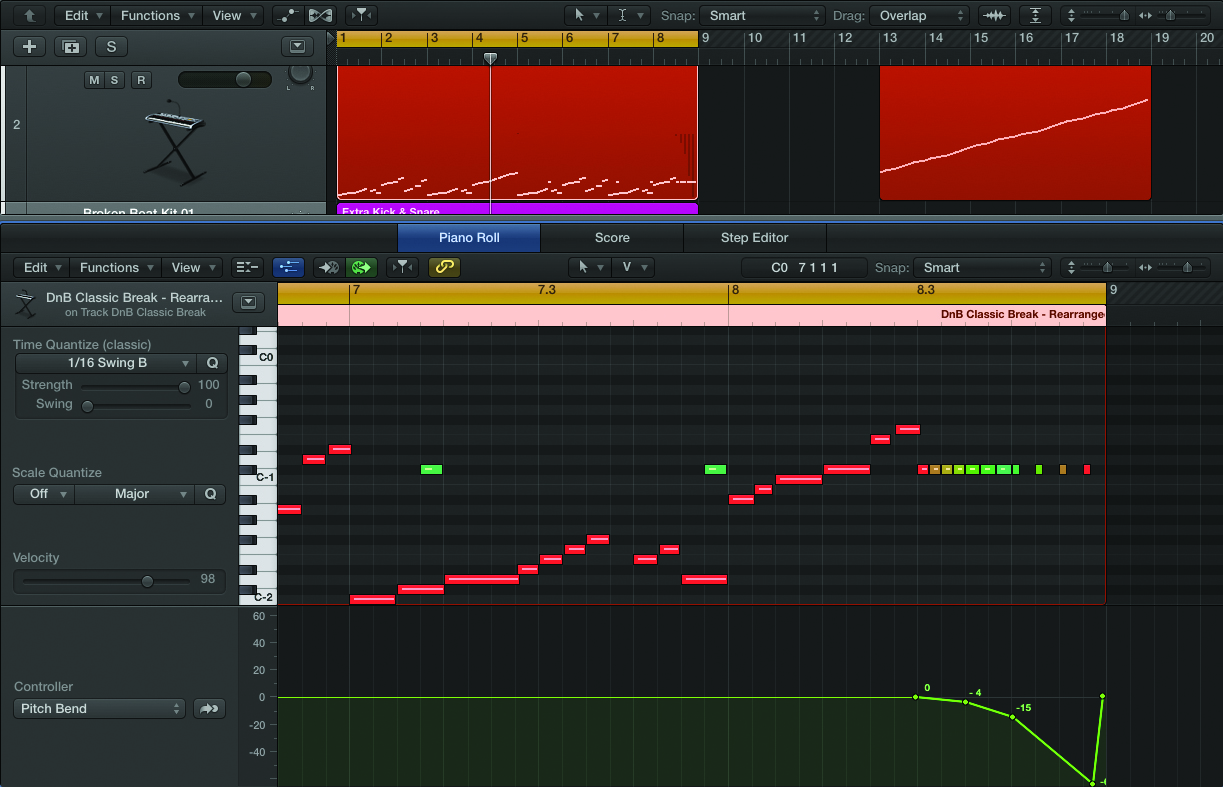
6: The beauty of MIDI is that you can easily program fills, adjust velocity and draw in pitch bends. Once you have this as the main backbone to your beat, you could add a more robust kick and snare on top and start processing the sounds.
This tutorial is endorsed by Point Blank. With courses in London, online and now in LA, Point Blank is the Global Music School. You can study sound to picture on their Music Production Diploma courses, with pro industry tutors.
