Logic Tutorial: Mixing Drums With Drum Kit Designer – Step-by-Step
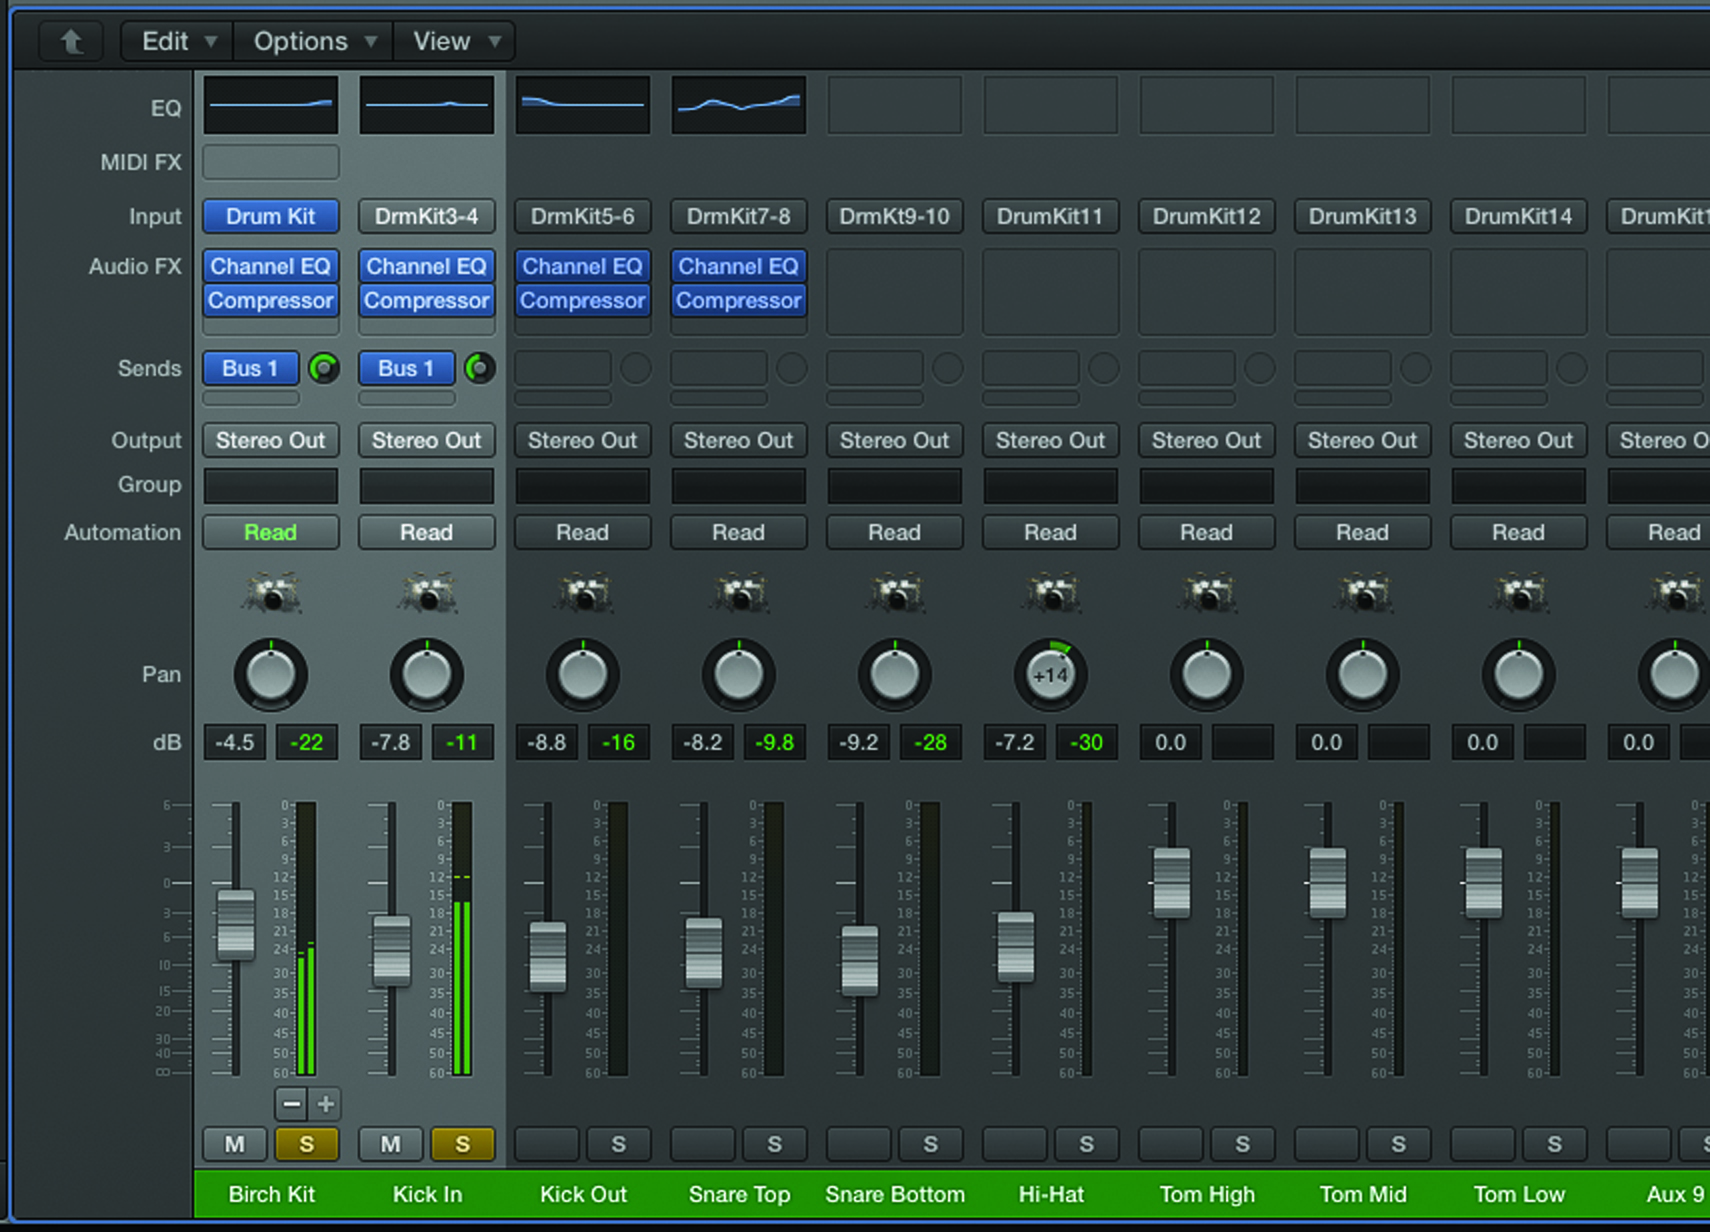
Mark Cousins continues his step by step guide to mixing drums with drum kit designer in Logic Pro X… 7: Adding compression to the two kick channels adds body and dynamic control to the sound. We’ve used the Studio VCA model to keep the sonic footprint input of the compressor discreet, using a ratio of […]
Mark Cousins continues his step by step guide to mixing drums with drum kit designer in Logic Pro X…

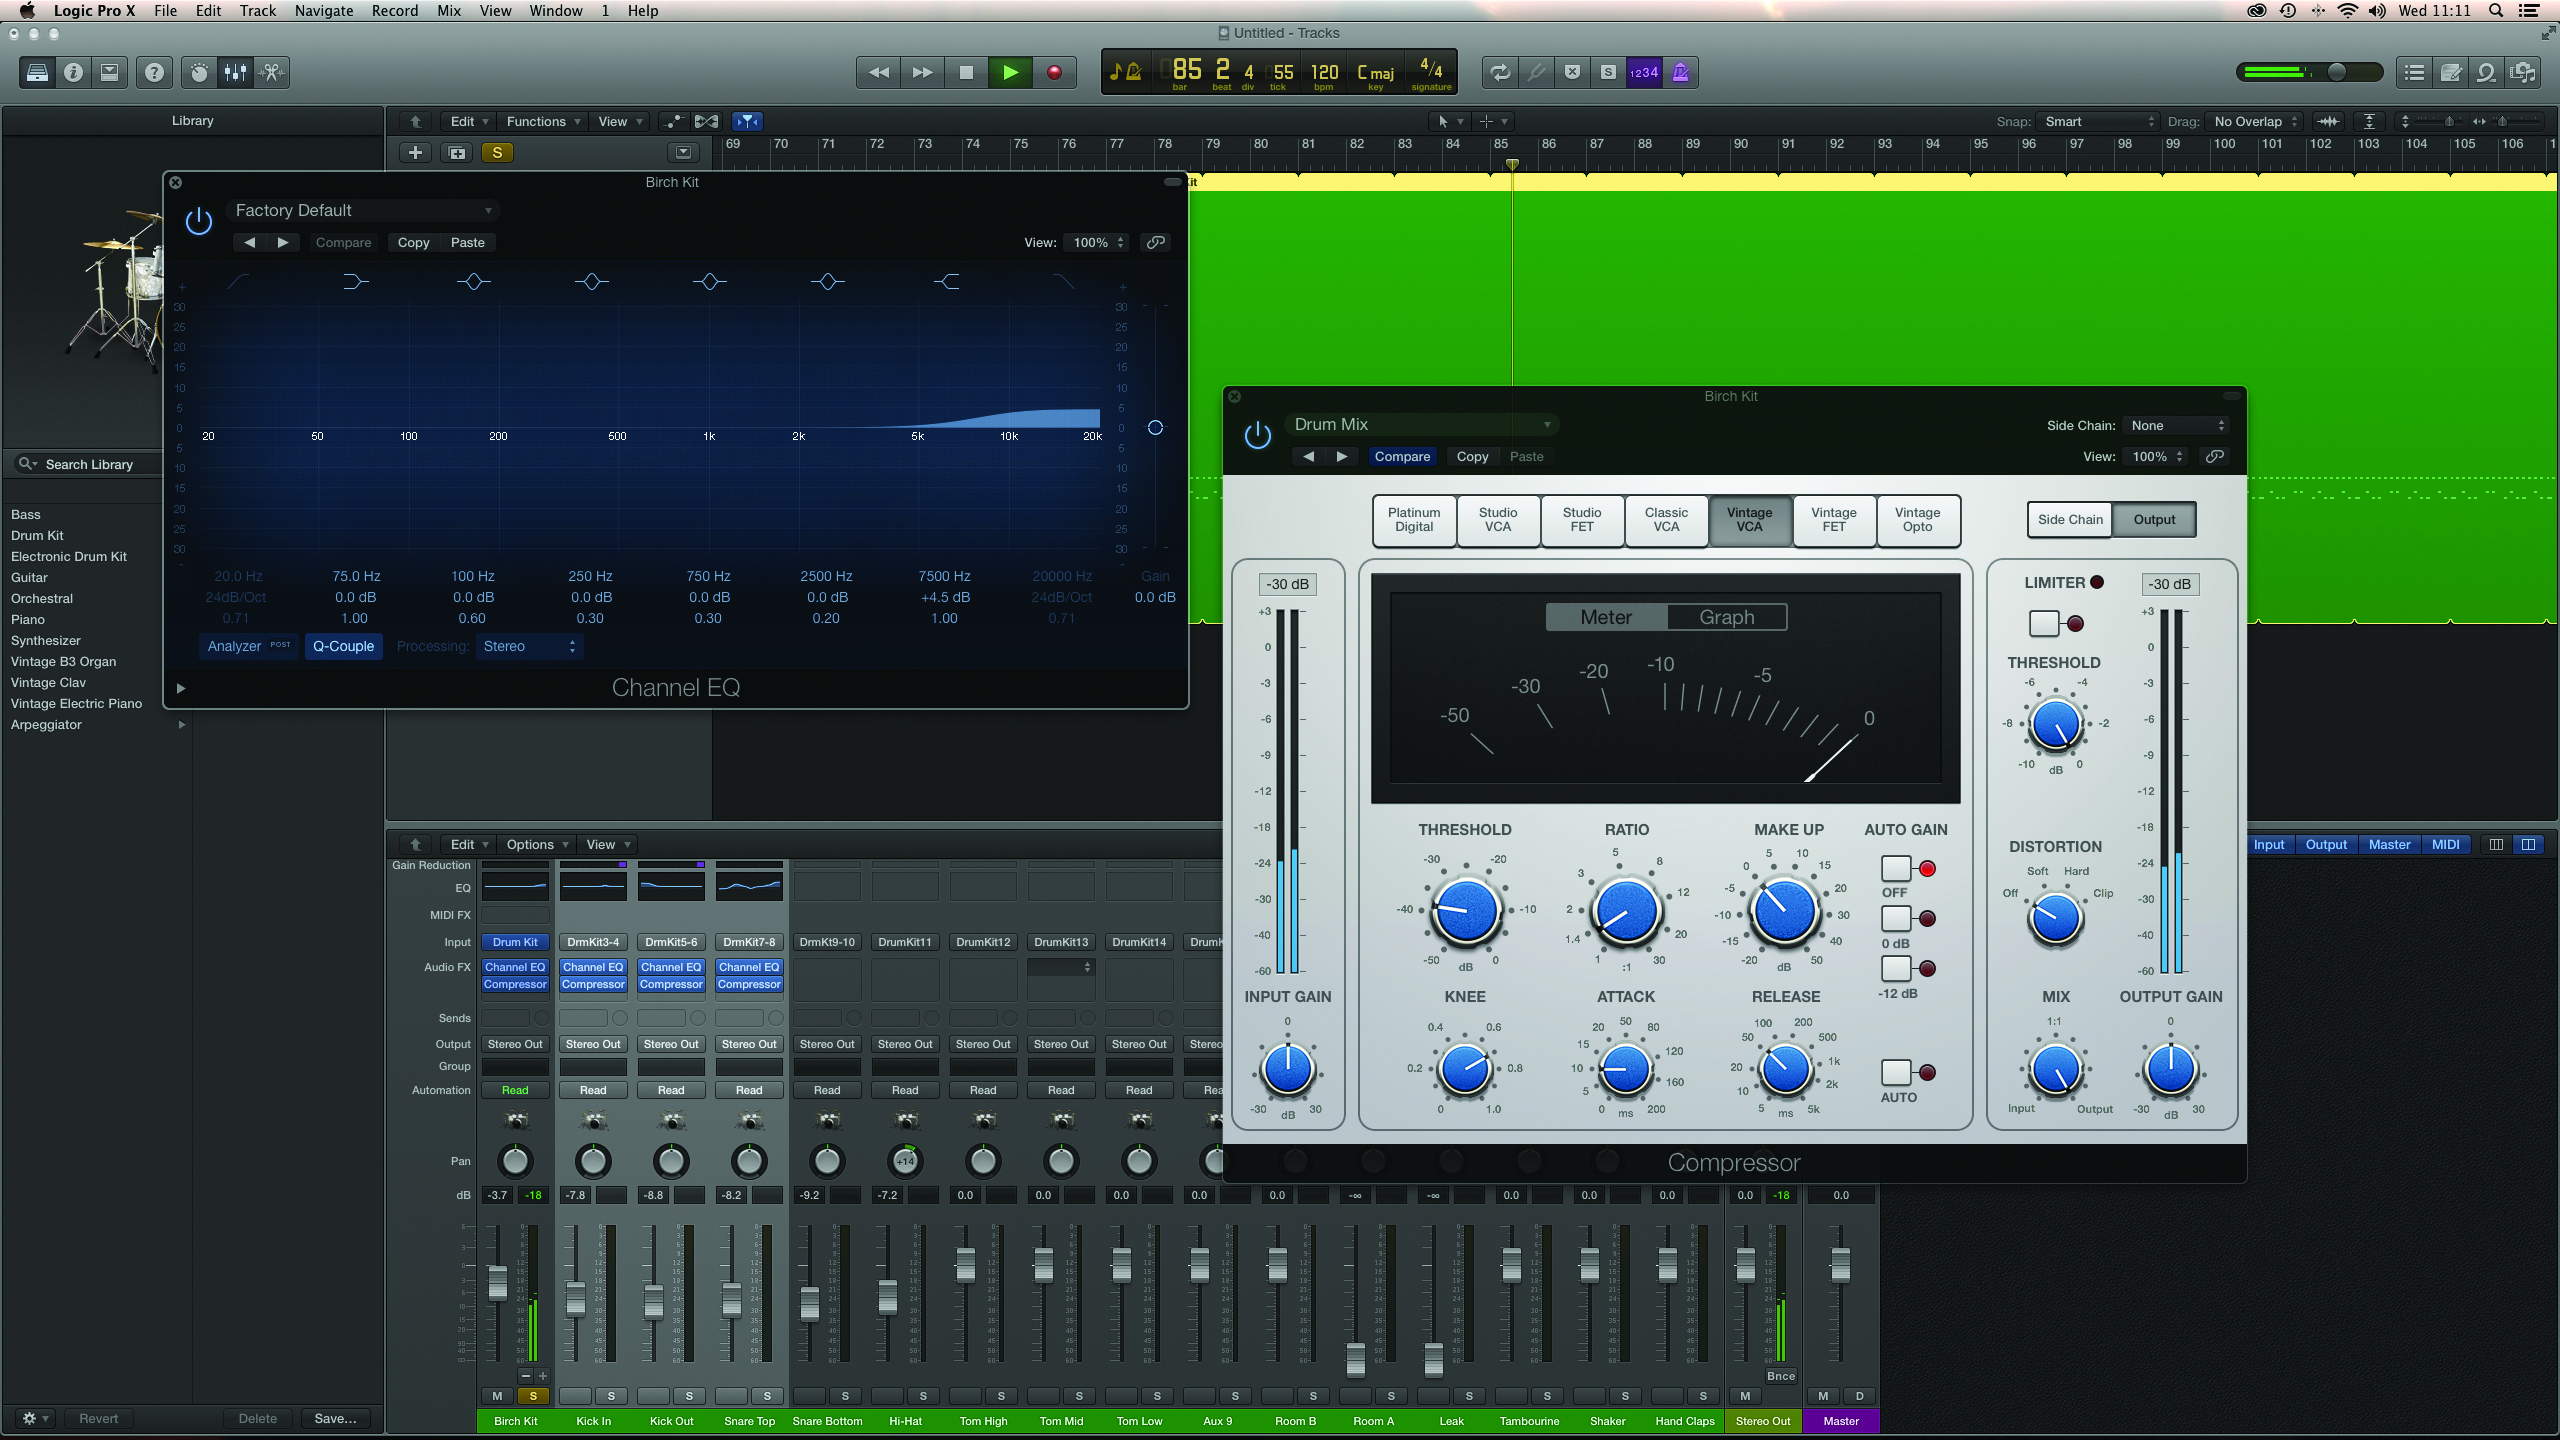
7: Adding compression to the two kick channels adds body and dynamic control to the sound. We’ve used the Studio VCA model to keep the sonic footprint input of the compressor discreet, using a ratio of 3:1 and a slow attack to preserve transient detail.
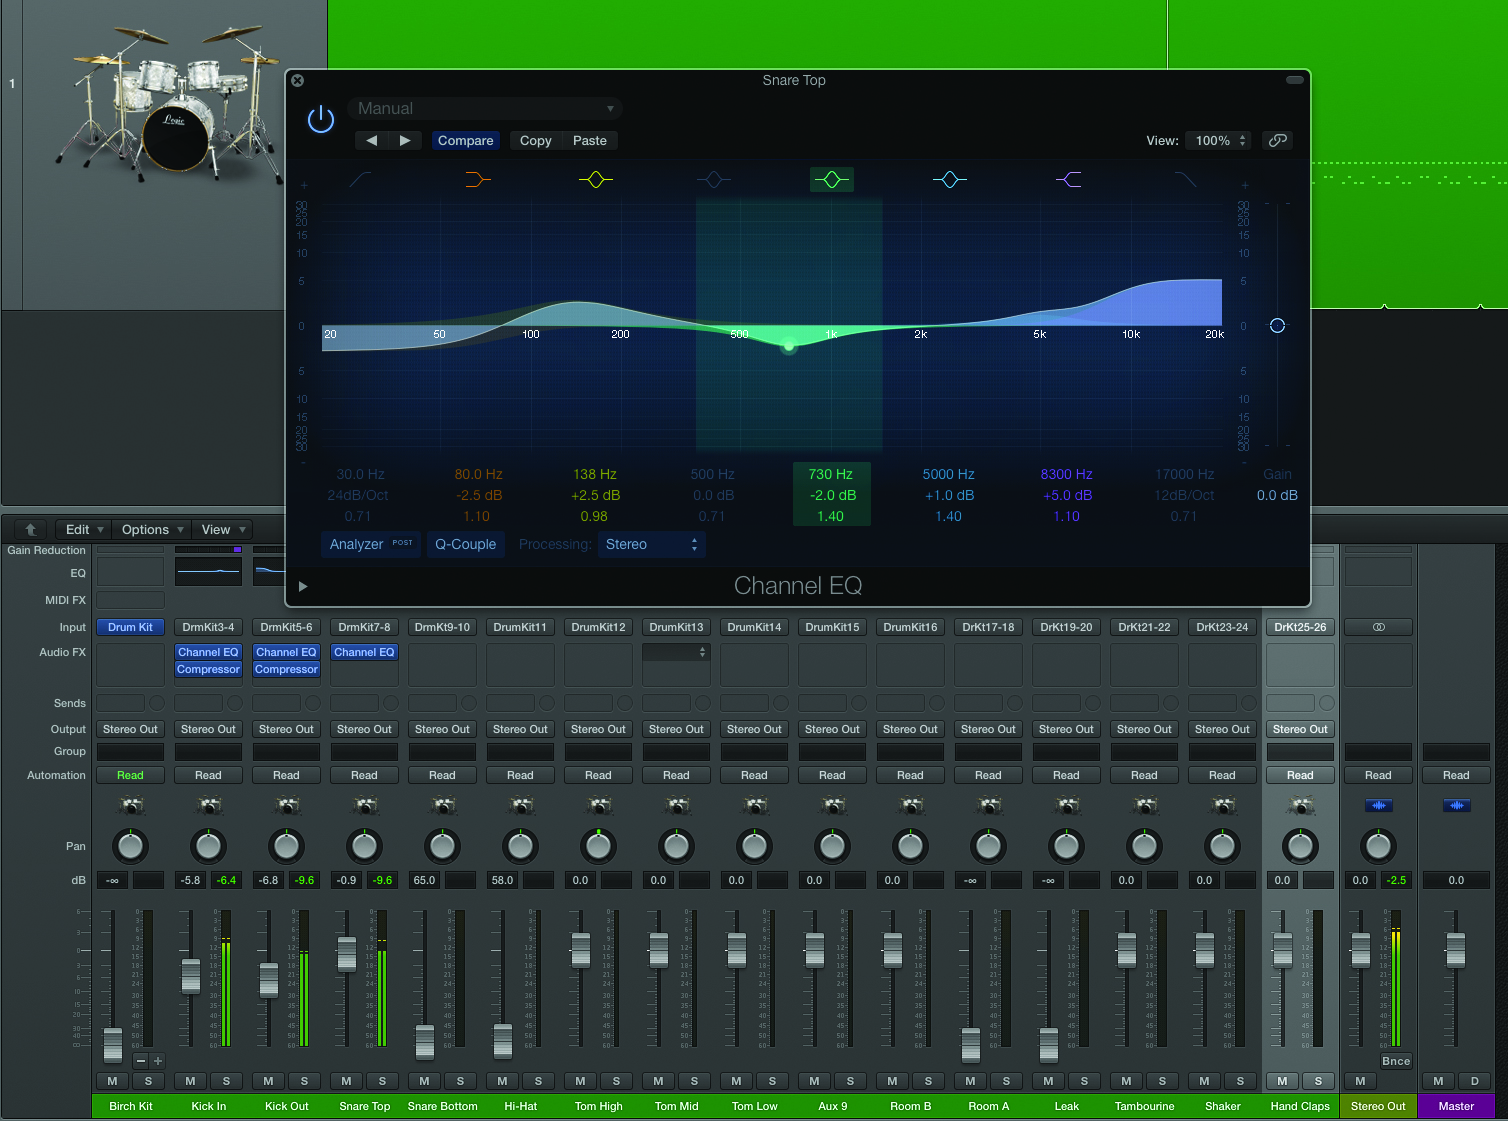
8: The Snare Top channel contains most of the key ingredients in our snare sound. Starting with EQ, we’ve cut the low-end below 80Hz, added some body around 138Hz, a midrange dip at 730Hz and some presence above 5kHz.
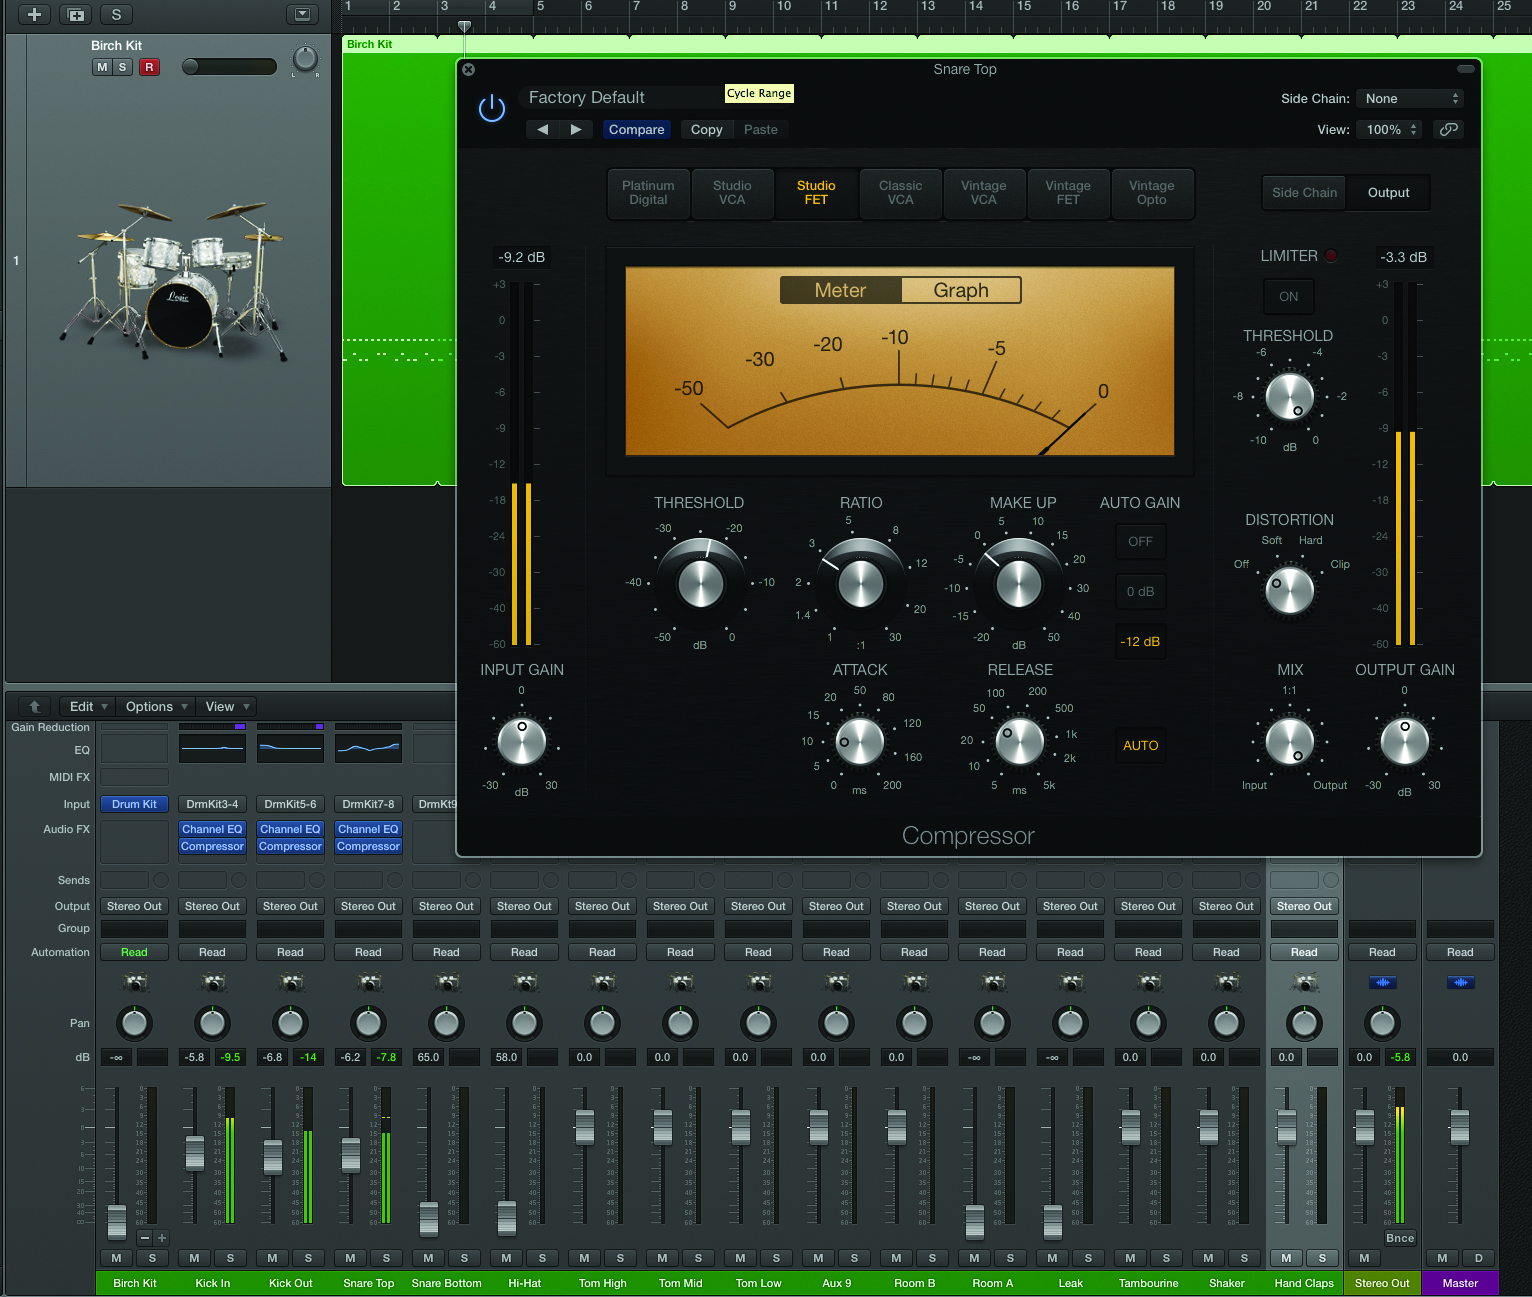
9: By contrast to the kick channels, our snare compression is much more heavy-handed, hence the choice of the Studio FET model. We’ve used a relatively fast attack and release 3:1 ratio and adjusted the threshold so that you can hear the compressor’s movements.

10: Solo the overhead mics on the first channel. With an acoustic kit, it’s often the case that you’ll apply EQ to attenuate the kick from the overheads. Using Drum Kit Designer, though, we can simply select the kick and move the overheads slider to Off.
11: The combination of EQ and compression helps sit the overheads in the mix, with a top-end lift around 7.7kHz and the Vintage VCA compressor. Use a low ratio (1.4:1) and low threshold so that the compressor ‘glues’ the sound of the kit together.
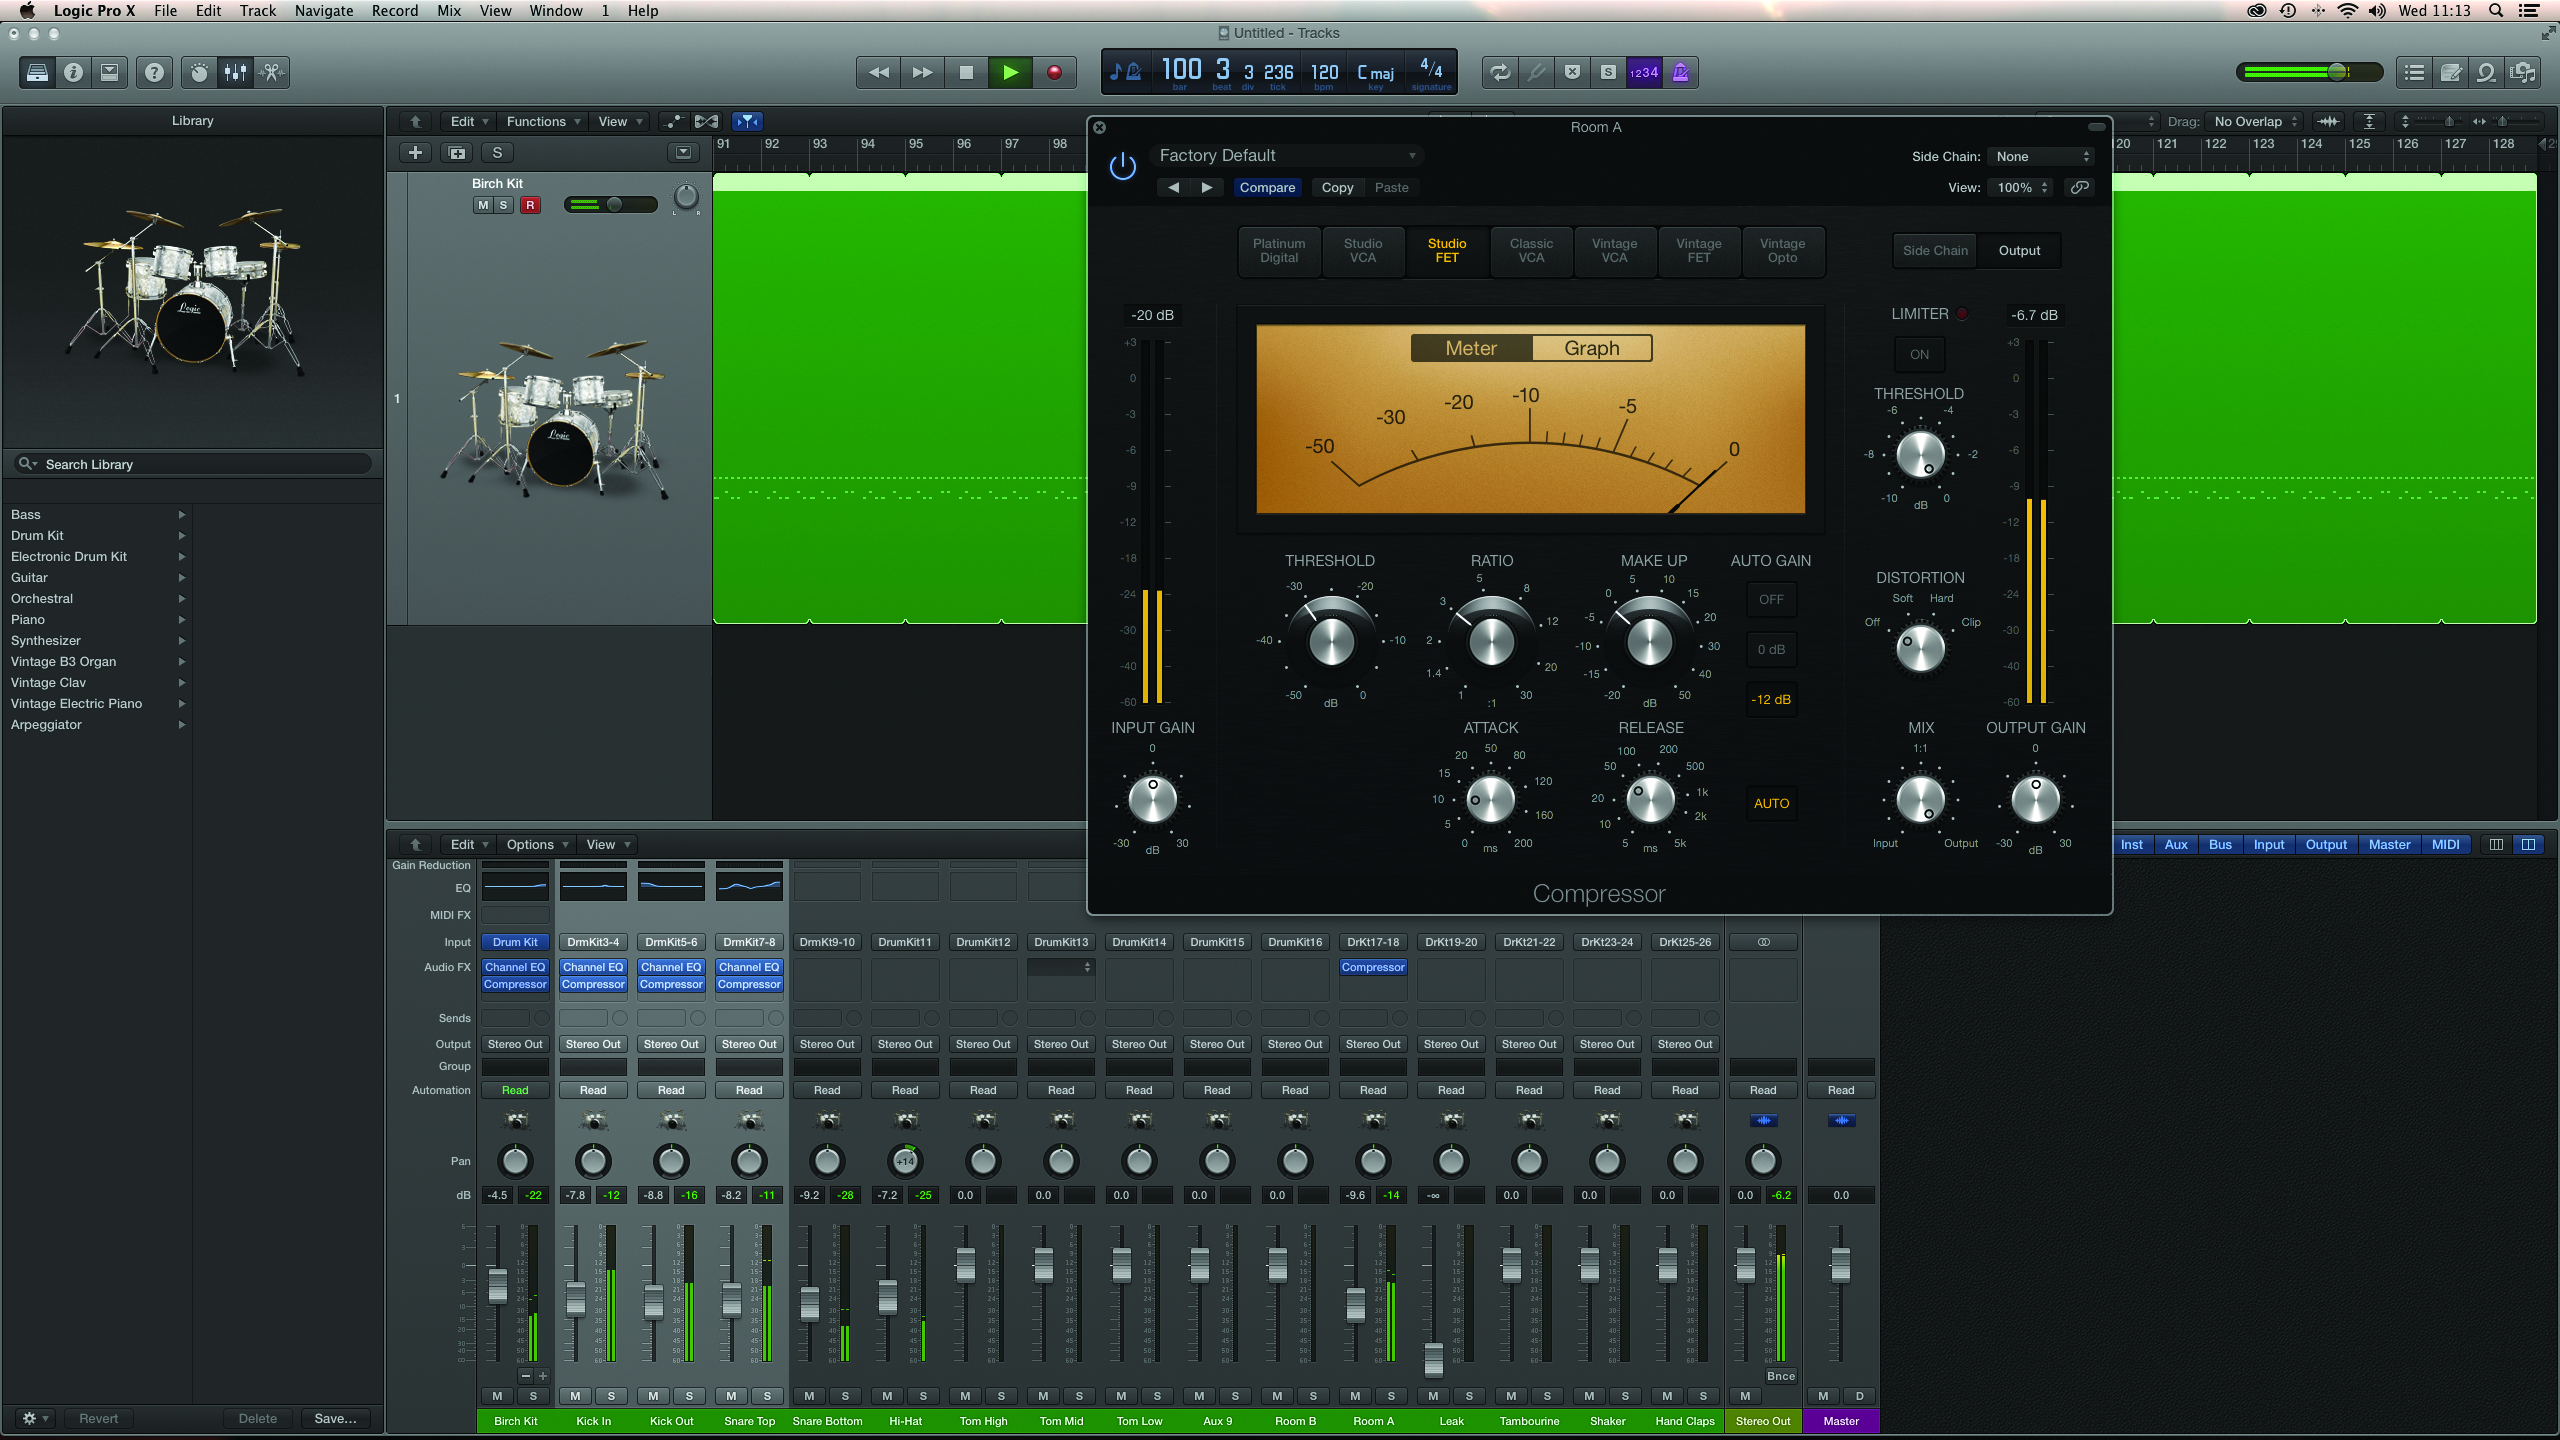
12: The room mics add natural ambience, but also work surprisingly well when they’re heavily compressed. Again, we’ve used the Studio FET model for its heavier style of compression. Experiment with the release time to get a pleasing ‘pumping’ sound over the kit.
13: In situations where you’re compressing the whole kit, it’s often the case that the kick drum can have too much effect on gain reduction. Use the compressor’s side chain, therefore, to filter out the kick, using the HP mode set around 130Hz.
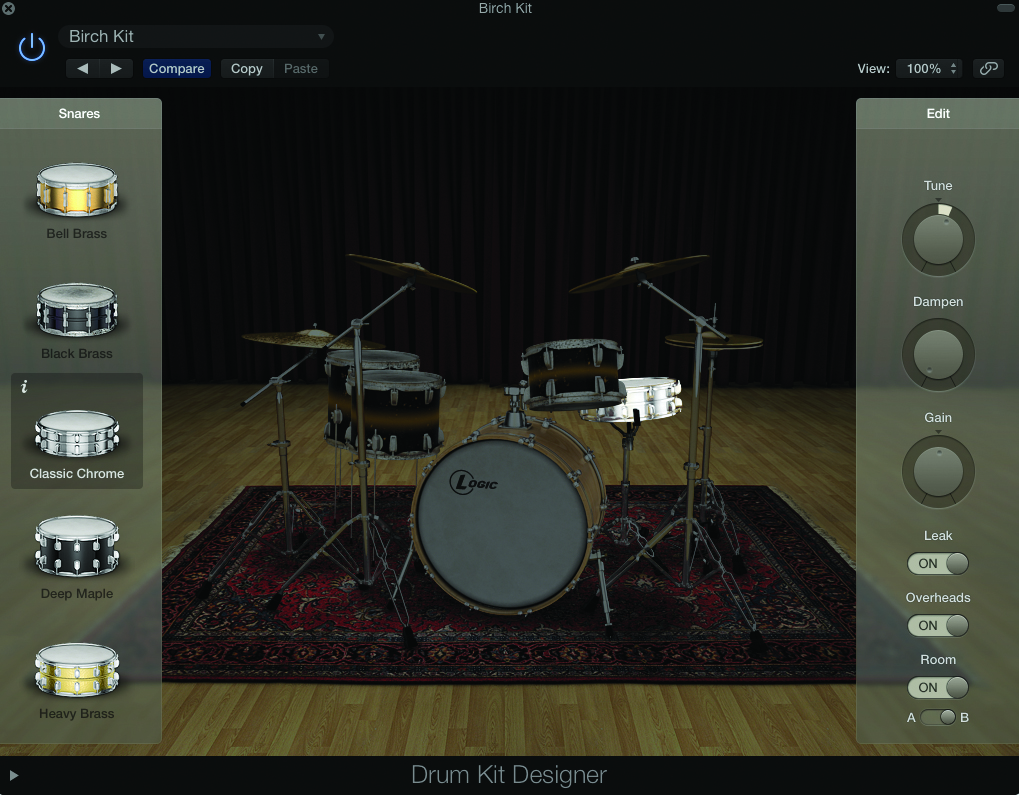
14: Drum Kit Designer offers two different room mics, with Room B having a monaural sound. Try moving the snare out of Room A and placing it in Room B, maybe contrasting different EQ and compression treatment between the rooms.
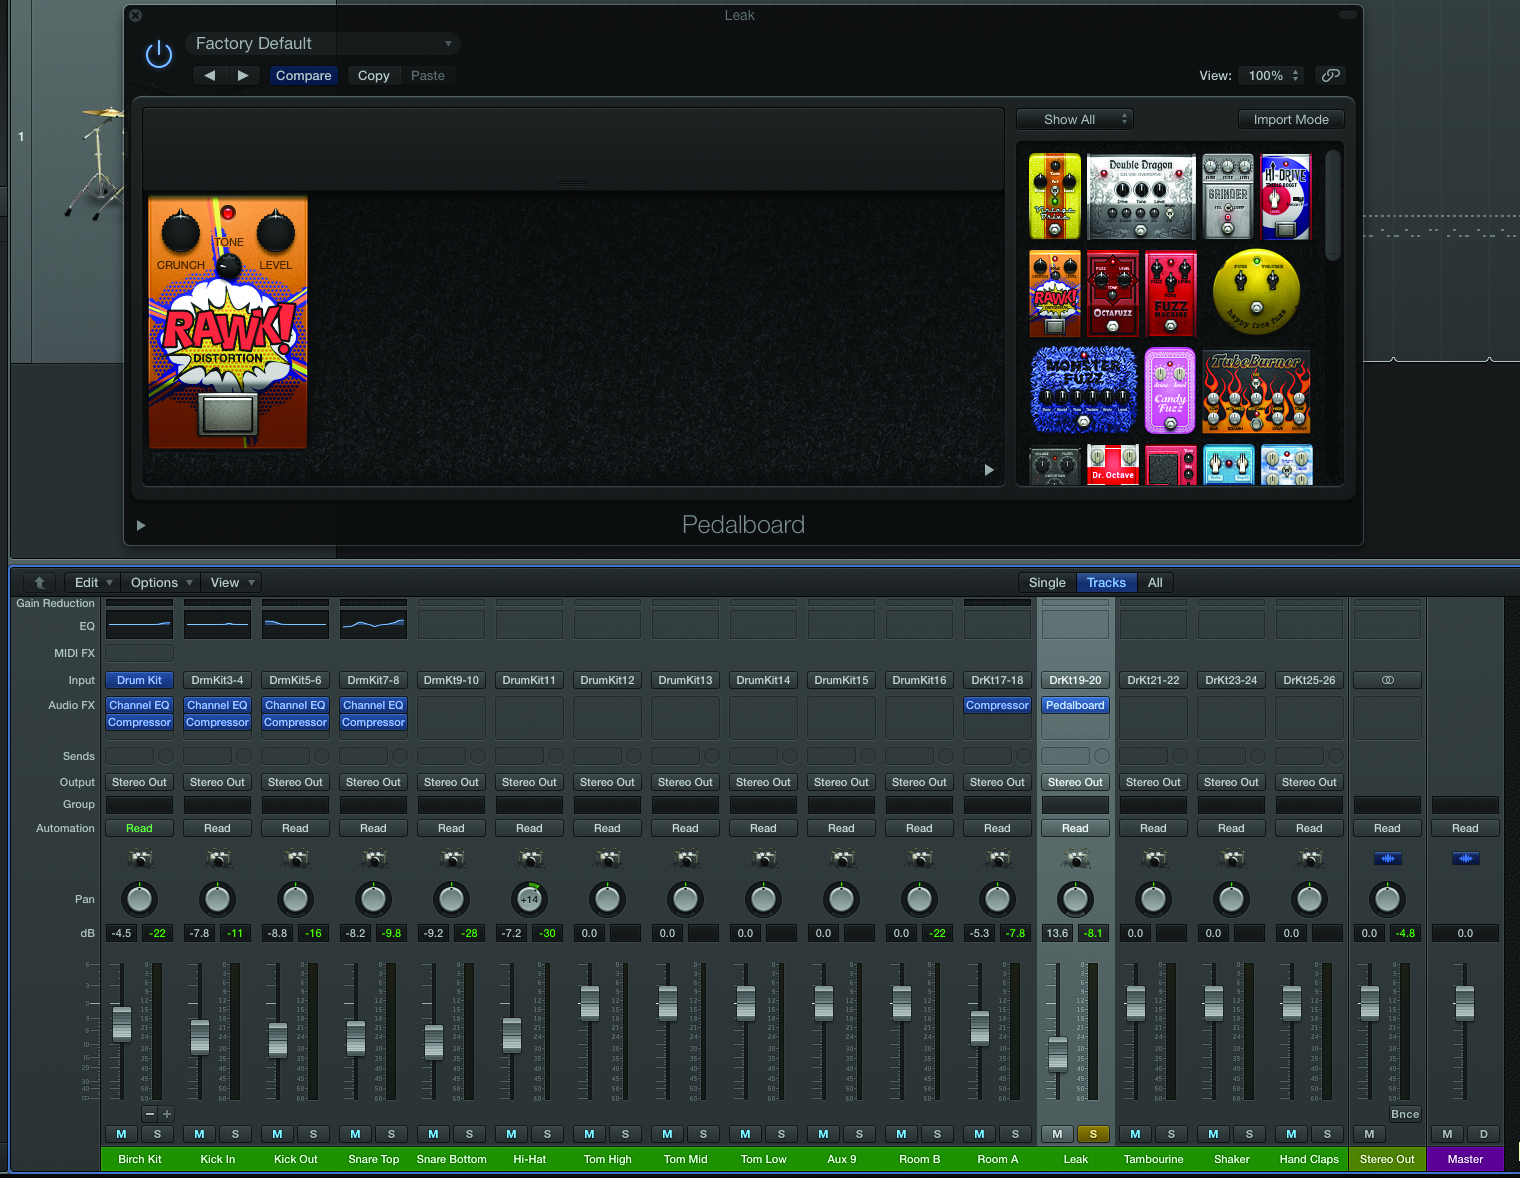
15: The Leak channel captures the bleed between the various mics and can be pulled into the mix for a more naturalistic sound. Leak also works well as a lo-fi channel, in this case being sent through some Pedalboard distortion before being sat (quietly) in the mix.
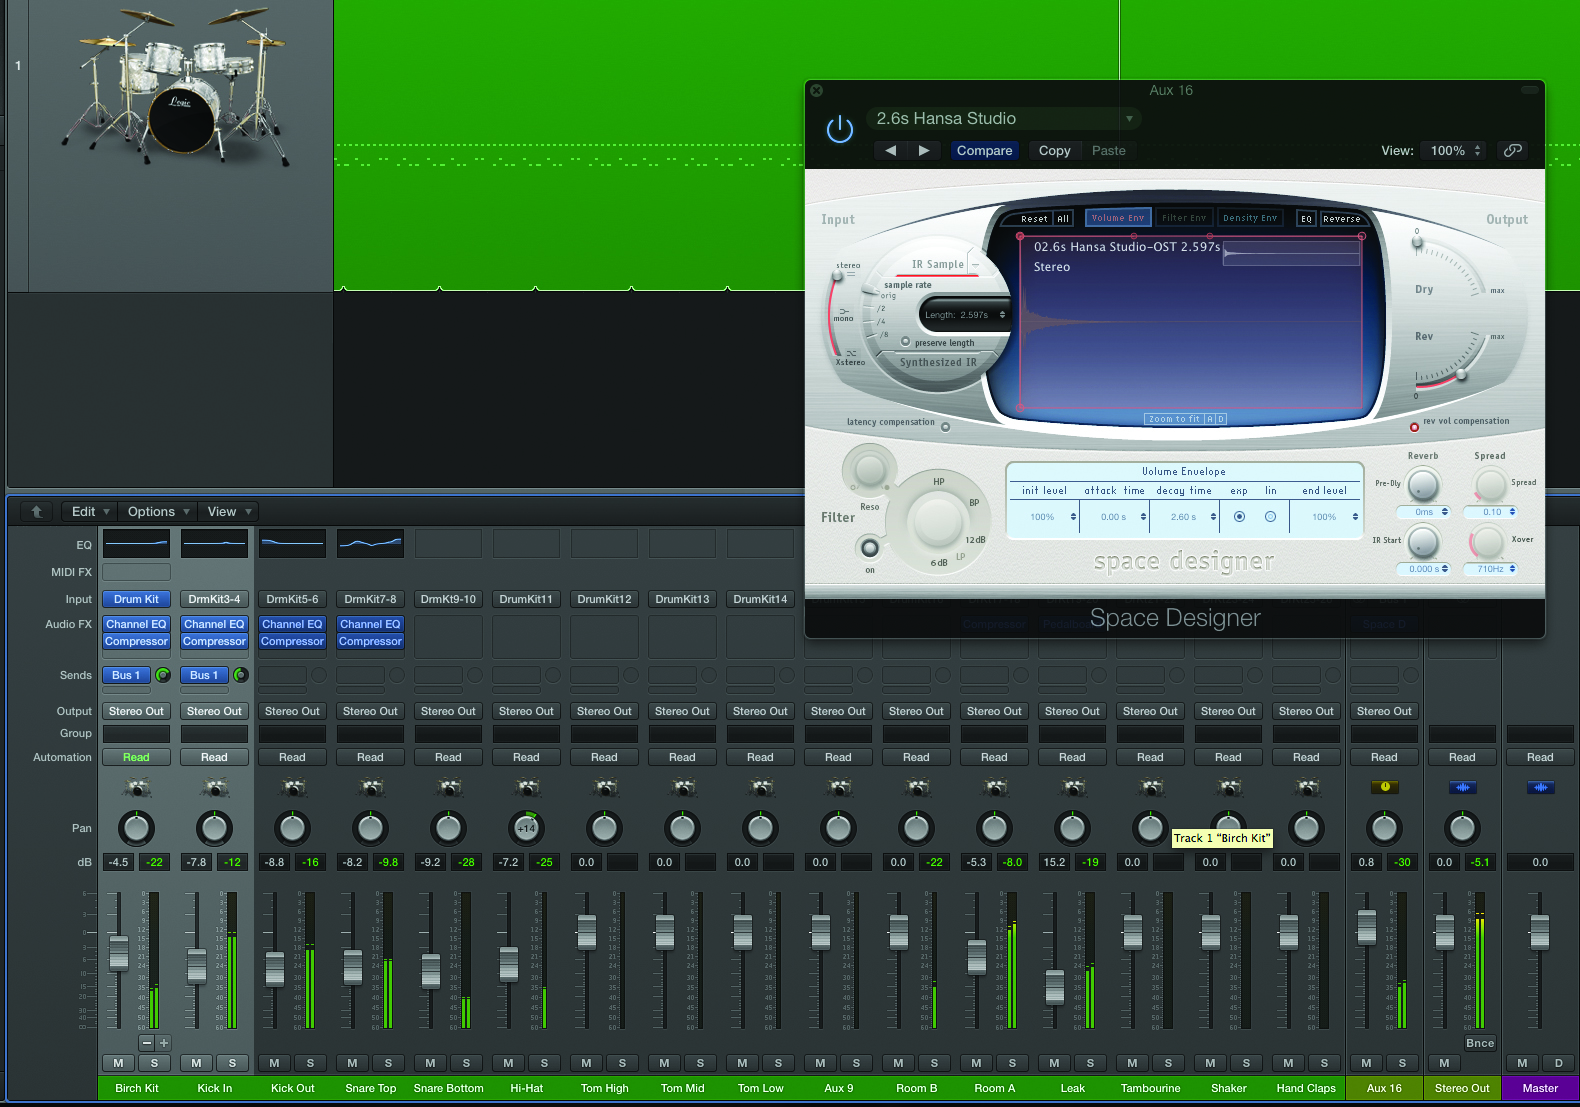
16: Even with the room mics, you might want to add more ambience to the kit, particularly where you need a bigger ambience. Create bus sends from the kit elements you want to process, with the overheads and spot mics often being a good choice.
17: Select the desired ambience using an instance of Space Designer placed across the insert path. Use the aux fader level to set the amount of reverb in the mix, or increase send levels on the respective spot mics if you want more reverb.
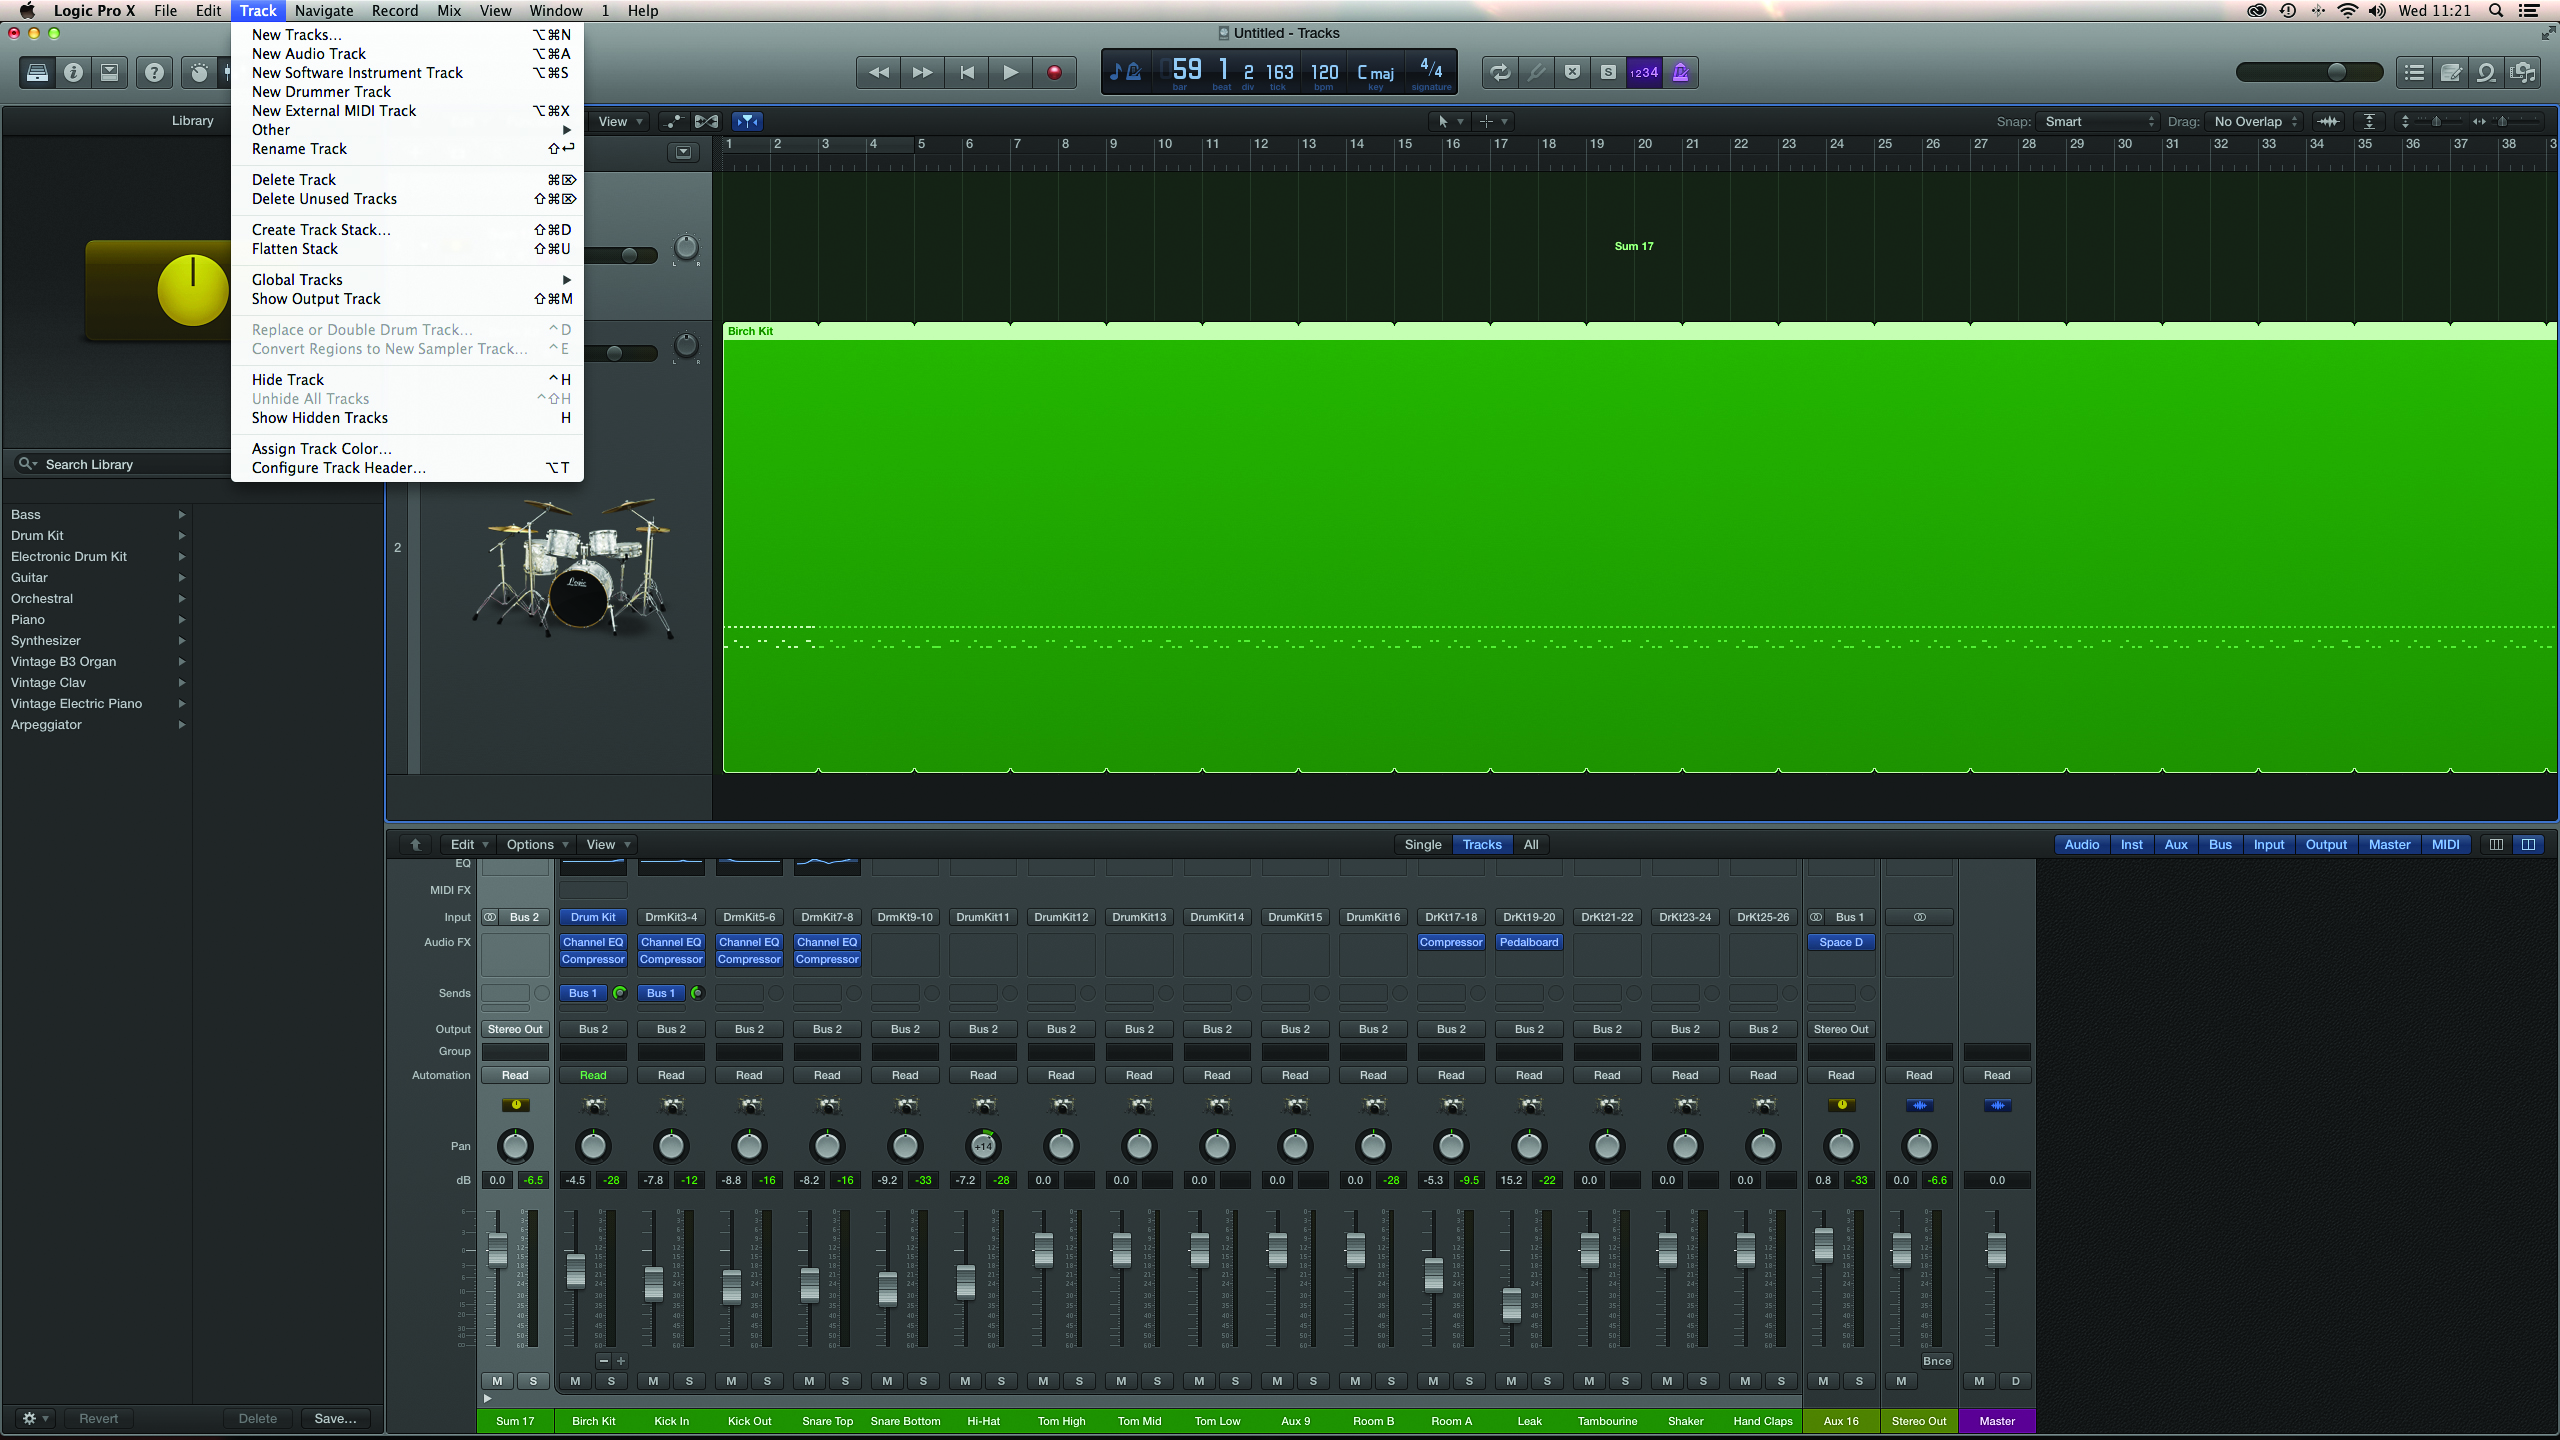
18: To keep your mixer tidy, select all the drum channels and then use the menu option Track > Create Track Stack. Pick the summing option and you’ll be able to pack away all the channels, but still have a master bus of the combined result.
This tutorial is endorsed by Point Blank. With courses in London, online and now in LA, Point Blank is the Global Music School. You can study sound to picture on their Music Production Diploma courses, with pro industry tutors.
