Percussive Opportunities: Better drums in Logic Pro X
Replacing or augmenting your existing drum recordings is a breeze in Logic Pro X, and can open a wealth of percussive opportunities. Mark Cousins doctors his rhythms… In an ideal world, every drum recording would be perfect – each part of the kit tuned to perfection, a collection of world-class microphones expertly placed, and just […]
Replacing or augmenting your existing drum recordings is a breeze in Logic Pro X, and can open a wealth of percussive opportunities. Mark Cousins doctors his rhythms…

In an ideal world, every drum recording would be perfect – each part of the kit tuned to perfection, a collection of world-class microphones expertly placed, and just enough ‘room’ to let the kit breathe. In reality, though, this sonic perfection can be hard to achieve; and even though the performance might be spot-on, there’s some part of the kit’s sound that doesn’t quite work. Maybe the kick drum doesn’t have the low-end punch to hold the track together, for example, or the snare sounds dull and lacks the crisp high-end that your music deserves.
Although few engineers will openly admit it, the dark art of drum replacement is something we all need to turn to from time to time. As we’ll see, this doesn’t necessarily mean replacing the whole kit, but instead opens up a wealth of creative and sonic potential with even the most basic drum recordings. When it comes to Logic Pro X, it’s also pleasing to note that the tools for drum replacement are neatly embedded into the application’s workflow, negating the need for any additional third-party plug-ins that are necessitated in less-well-equipped DAWs.
Get the groove
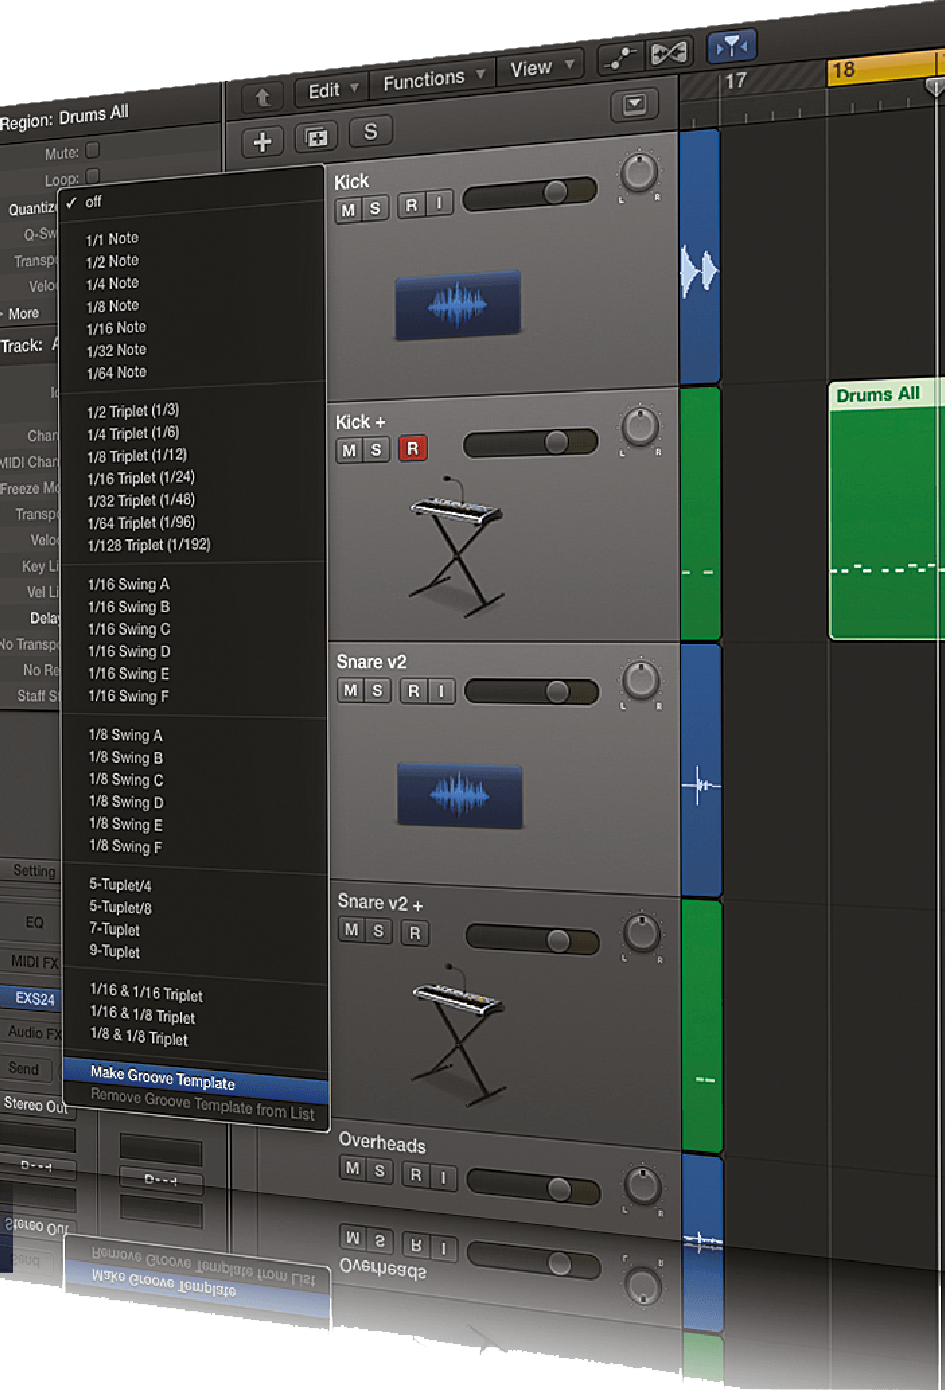
If you’re reprogramming parts of the kit, you’ll want to make use of Logic’s Groove Template feature, rather than simply using a straight 16th quantize. To extract the groove, either use a combined MIDI region with multiple kit elements (like kick and snare, for example) or perform a rough-and-ready extraction of the overheads. Select the MIDI region and, from the Inspector’s drop-down quantize menu, pick Make Groove Template. Once you have your Groove Template it can be applied to any MIDI region, simply by selecting the newly added Groove from the drop-down quantize menu. Once applied, the MIDI will lock to the transient hit points you’ve previously extracted, and therefore be in perfect time with the rest of the kit.
Kick off
The process of drum replacement begins with the raw drum recordings. Ideally, you need a relatively clean, isolated track for each part of the kit you intend to replace. As the driving force of the kit, most engineers focus the majority of their drum-replacement energies on the kick and the snare, which is especially easy – thanks to these parts of the kit often having their own microphones and a good degree of separation. Channels like the hi-hat and cymbals, however, are far more difficult, largely due to the high degree of spill between the various channels.
To make things easy, Logic’s drum replacement is a track-based editing feature, found (logically enough) under the Track menu. When you initiate the command, there are a number of things that happen so that the drum replacement is as immediate and hassle-free as possible. First off, Logic will look through the audio regions on the track and create a new MIDI region based on the transient points of each drum hit. The relative amplitude of each hit will also be transferred to a comparable MIDI velocity, so that the replacement process captures both the timing and the dynamic properties.
Pay threshold
As well as the MIDI region, Logic also creates a new instance of the EXS24 sampler, loaded with individual kit-piece samples. Later on, you can choose to replace the EXS24 with an instrument of you own choice, but the included sounds give you plenty of choice, as well as sounding good in either replacement or augmentation applications.
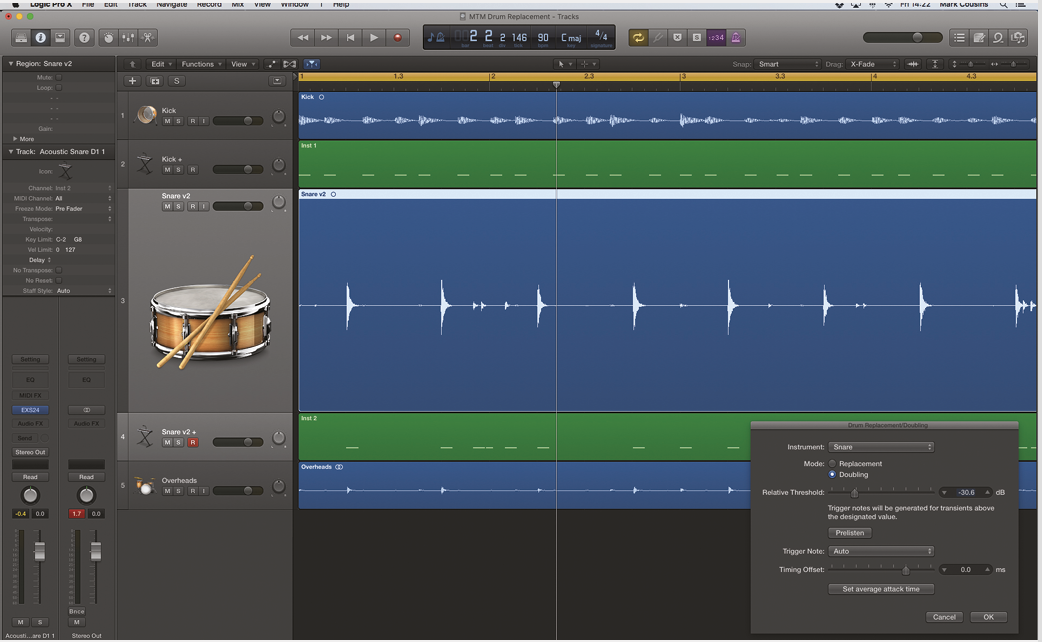
One key aspect of the drum-replacement process is setting the Relative Threshold as part of the accompanying dialogue box. The important point to note is that the MIDI region isn’t a fixed entity, and that in actuality, raising or lowering the Relative Threshold will result in notes being added or removed from the region. The trade-off, of course, is getting the perfect balance between the threshold being too high; and ghost notes or quieter hits not being triggered, or too low; and other parts of the kit ‘bleeding through’ and triggering the wrong sound. It’s only when you press ‘OK’ that the MIDI region is finalised, although you can always edit the MIDI data at a later point.
Regional news
With the MIDI region in place, you then have two ways of further refining the process, either editing the data itself or exploring alternative sound sources. A degree of manual MIDI editing is inevitable – either to edit the occasional incorrect trigger point, or to adjust the note velocity. When it comes to dynamic adjustments, the Velocity Processor (as part of the suite of MIDI plug-ins) is a real godsend. Use the Velocity Processor like a compressor – with a hard ratio to tame notes with a high velocity, or a more graduated curve to create a more even dynamic across the performance.
The creative possibilities of drum replacement really come to the fore when you start to explore sound possibilities away from the EXS24. One popular technique is to double the kick drum using a sound with an electronically generated low-end – like an 808 kick, for example, or a Sine wave. In this application, you might want to select an appropriate Trigger Note rather than default GM drum mapping, arguably picking a note number that matches the song’s key signature. Virtual Instruments like Logic’s Retro Synth are a good choice for subsonic bass sounds.
The range of excellent virtual drumming software (in addition to Logic’s own Drum Kit Designer) means that you can actually take the route of complete drum replacement and achieve some surprisingly realistic results. The issue, of course, is ‘replacing’ the overhead tracks that won’t have the separation of the kick, snare and toms. If the pattern’s simple enough, consider reprogramming the cymbals and hi-hat, or use the drum replacement function to extract all the transient points, which you can then go in and map or delete accordingly.
Doctor rhythm
Logic’s drum replacement feature is a great way to enhance and expand your drum recordings, even if you’re starting with recordings that you’re relatively happy with. The ability to add transient-accurate subsonic bass, or augment an existing snare track with a TR-808 clap, can really aid the sonic scope of your drum recording. Equally, the opportunity to extract the DNA performance and completely remap it to a new sound set means that the recording process is only the beginning of what you can achieve in Logic Pro X.
Step-By-Step: Better drums in Logic
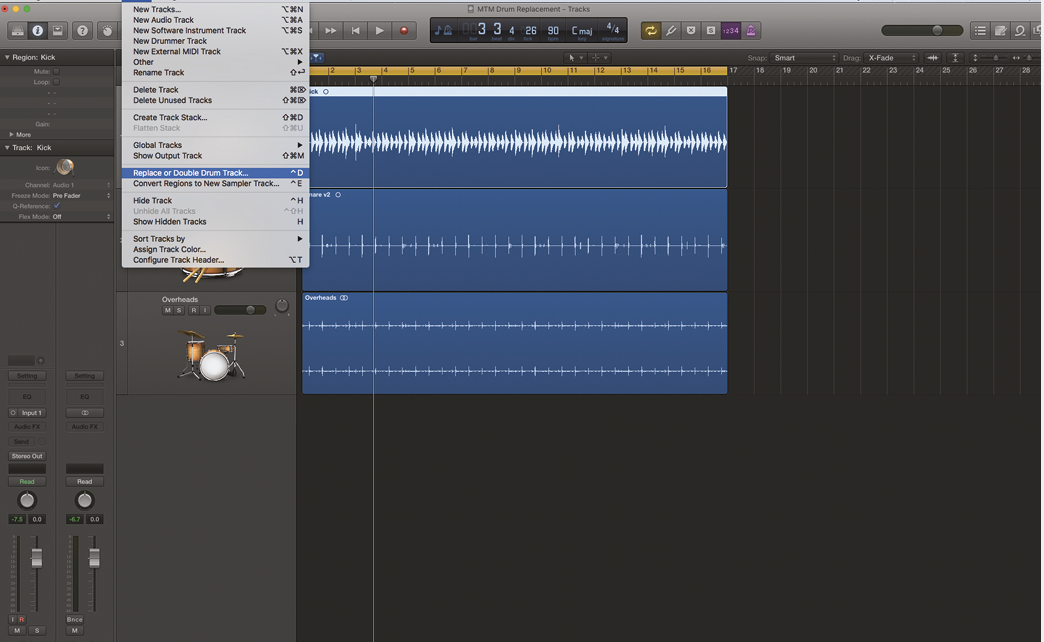
1. Open the project included on the DVD, or another multitrack drum recording of your own choice. Select the kick-drum track as the first part to work on and then choose the menu option Track > Replace or Double Drum Track.
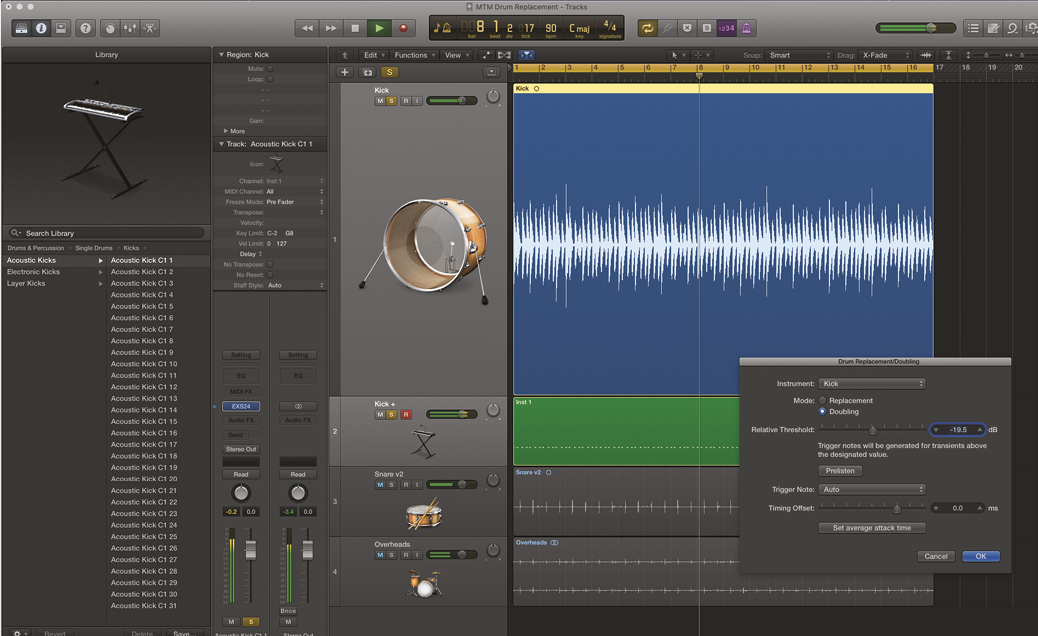
2. Once you’ve initiated the command, Logic will create a new instrument alongside an accompanying MIDI region based on some initialised settings. Pressing Prelisten will play back the replacement alongside the original kick drum to audition it.
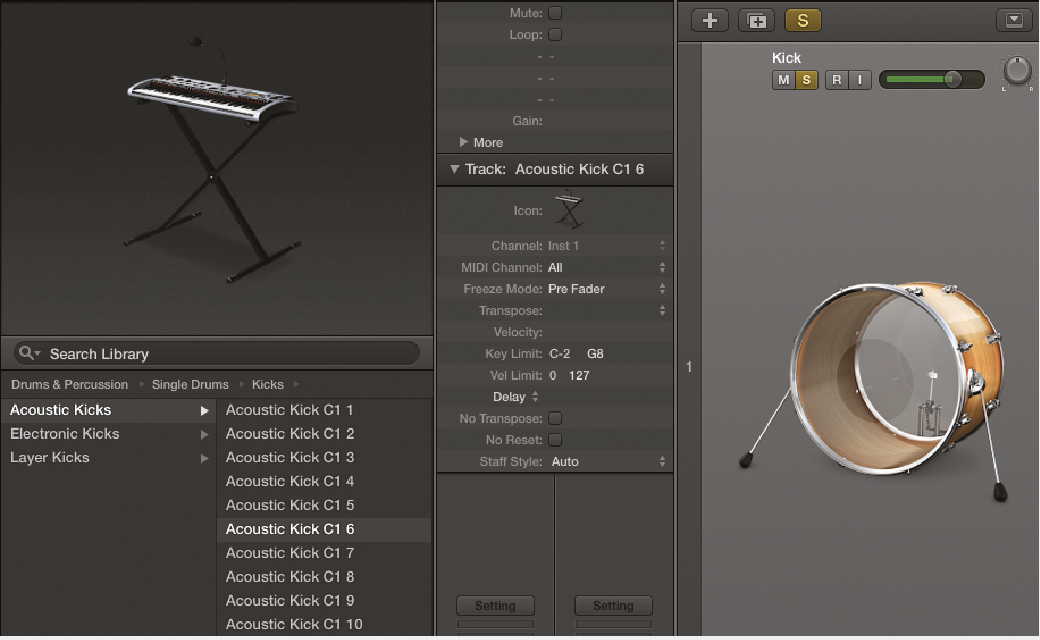
3. You’ll want to select a sound that closely matches or complements your existing kick drum. Scroll down the list in the Library to select from a palette of 31 kick drums. You can expand your options later on, so go with what works for now.

4. The crucial parameter with drum replacement is the Threshold. Pay close attention to the differences between the audio region and the MIDI region, raising or lowering the threshold so that it captures all the kick drum’s hit points.
5. Press OK once you’re happy with the settings, and then move over to the snare-drum track. This time, ensure you select the Snare option from the drop-down Instrument selection. This will ensure both the correct sound assignment and MIDI note.
6. Again, you’ll want to pay close attention to the threshold. Set the threshold low enough so that it captures the ghost notes, but isn’t triggered by the kick-drum spill. Use the MIDI region as a guide to what notes you’ve captured correctly.
This tutorial is endorsed by Point Blank. With courses in London, online and now in LA, Point Blank is the Global Music School. You can study sound to picture on their Music Production Diploma courses, with pro industry tutors.
