Max MSP Beginners Guide: Presentation Mode and presets for your synthesizer
Learn how to turn your patch into a monophonic software synthesiser on Max MSP using the presentation and preset functions
Presentation Mode and presets for your synthesizer
If you haven’t caught up on the previous four tutorials where we go through the basic tools needed to use Max MSP, how to build an input/output and oscillator, how to build an envelope system, and a filter system, you can do that ahead of this tutorial.
In this guide, you’ll add the finishing touches to your synth by creating a GUI (Graphic User Interface) and a bank of presets.
First, open up your patch from the last tutorial and ensure that the page is setup correctly before we start patching. Unfortunately, these do not save, and need to be reset each time you open up Max MSP. You can refer back to Part 1 of this tutorial series if you need any guidance.
Presentation Mode
Now you’ve built the synthesizer, you might want it to look like an actual synthesiser rather than just a circuit board.
To do so, you’ll access Max MSP’s Presentation Mode, which can be found at the bottom left of the screen, next to the lock icon.
When you click that, your patch will disappear. But, don’t worry! Your work hasn’t been deleted, it’s just hidden.
Presentation Mode allows you to select what objects you want to see and what objects you want to hide so that you can make your synthesiser look more aesthetically pleasing.
To get elements of the main patcher on to the presentation mode, left-click on all the things you want to put in your final synth; whether that be objects, messages, and/or comments. You then need to select ‘add to presentation’. After they’ve been added to presentation mode, they’ll have a red border.
Once all the elements have been selected, click back into Presentation Mode, and feel free to move everything around until it resembles a synthesiser.
However, rest assured that no matter what you move while in Presentation Mode, it will remain in place in Patching Mode. You will also find more use for the comment boxes that were used throughout the tutorials, as they can turn into labels for your final patch.
Using the inspector sidebar, you can also change the colours of objects, messages and comments to make it look however you like. There are also other customisation options within the inspector, such as the shape of bangs, the length of the Kslider, and many many more.
We recommend using an object named ‘Panel’, which you can use as a background to your synth and create different boxes for different elements to your patch.
At this point you have complete create freedom, so feel free to mess around.
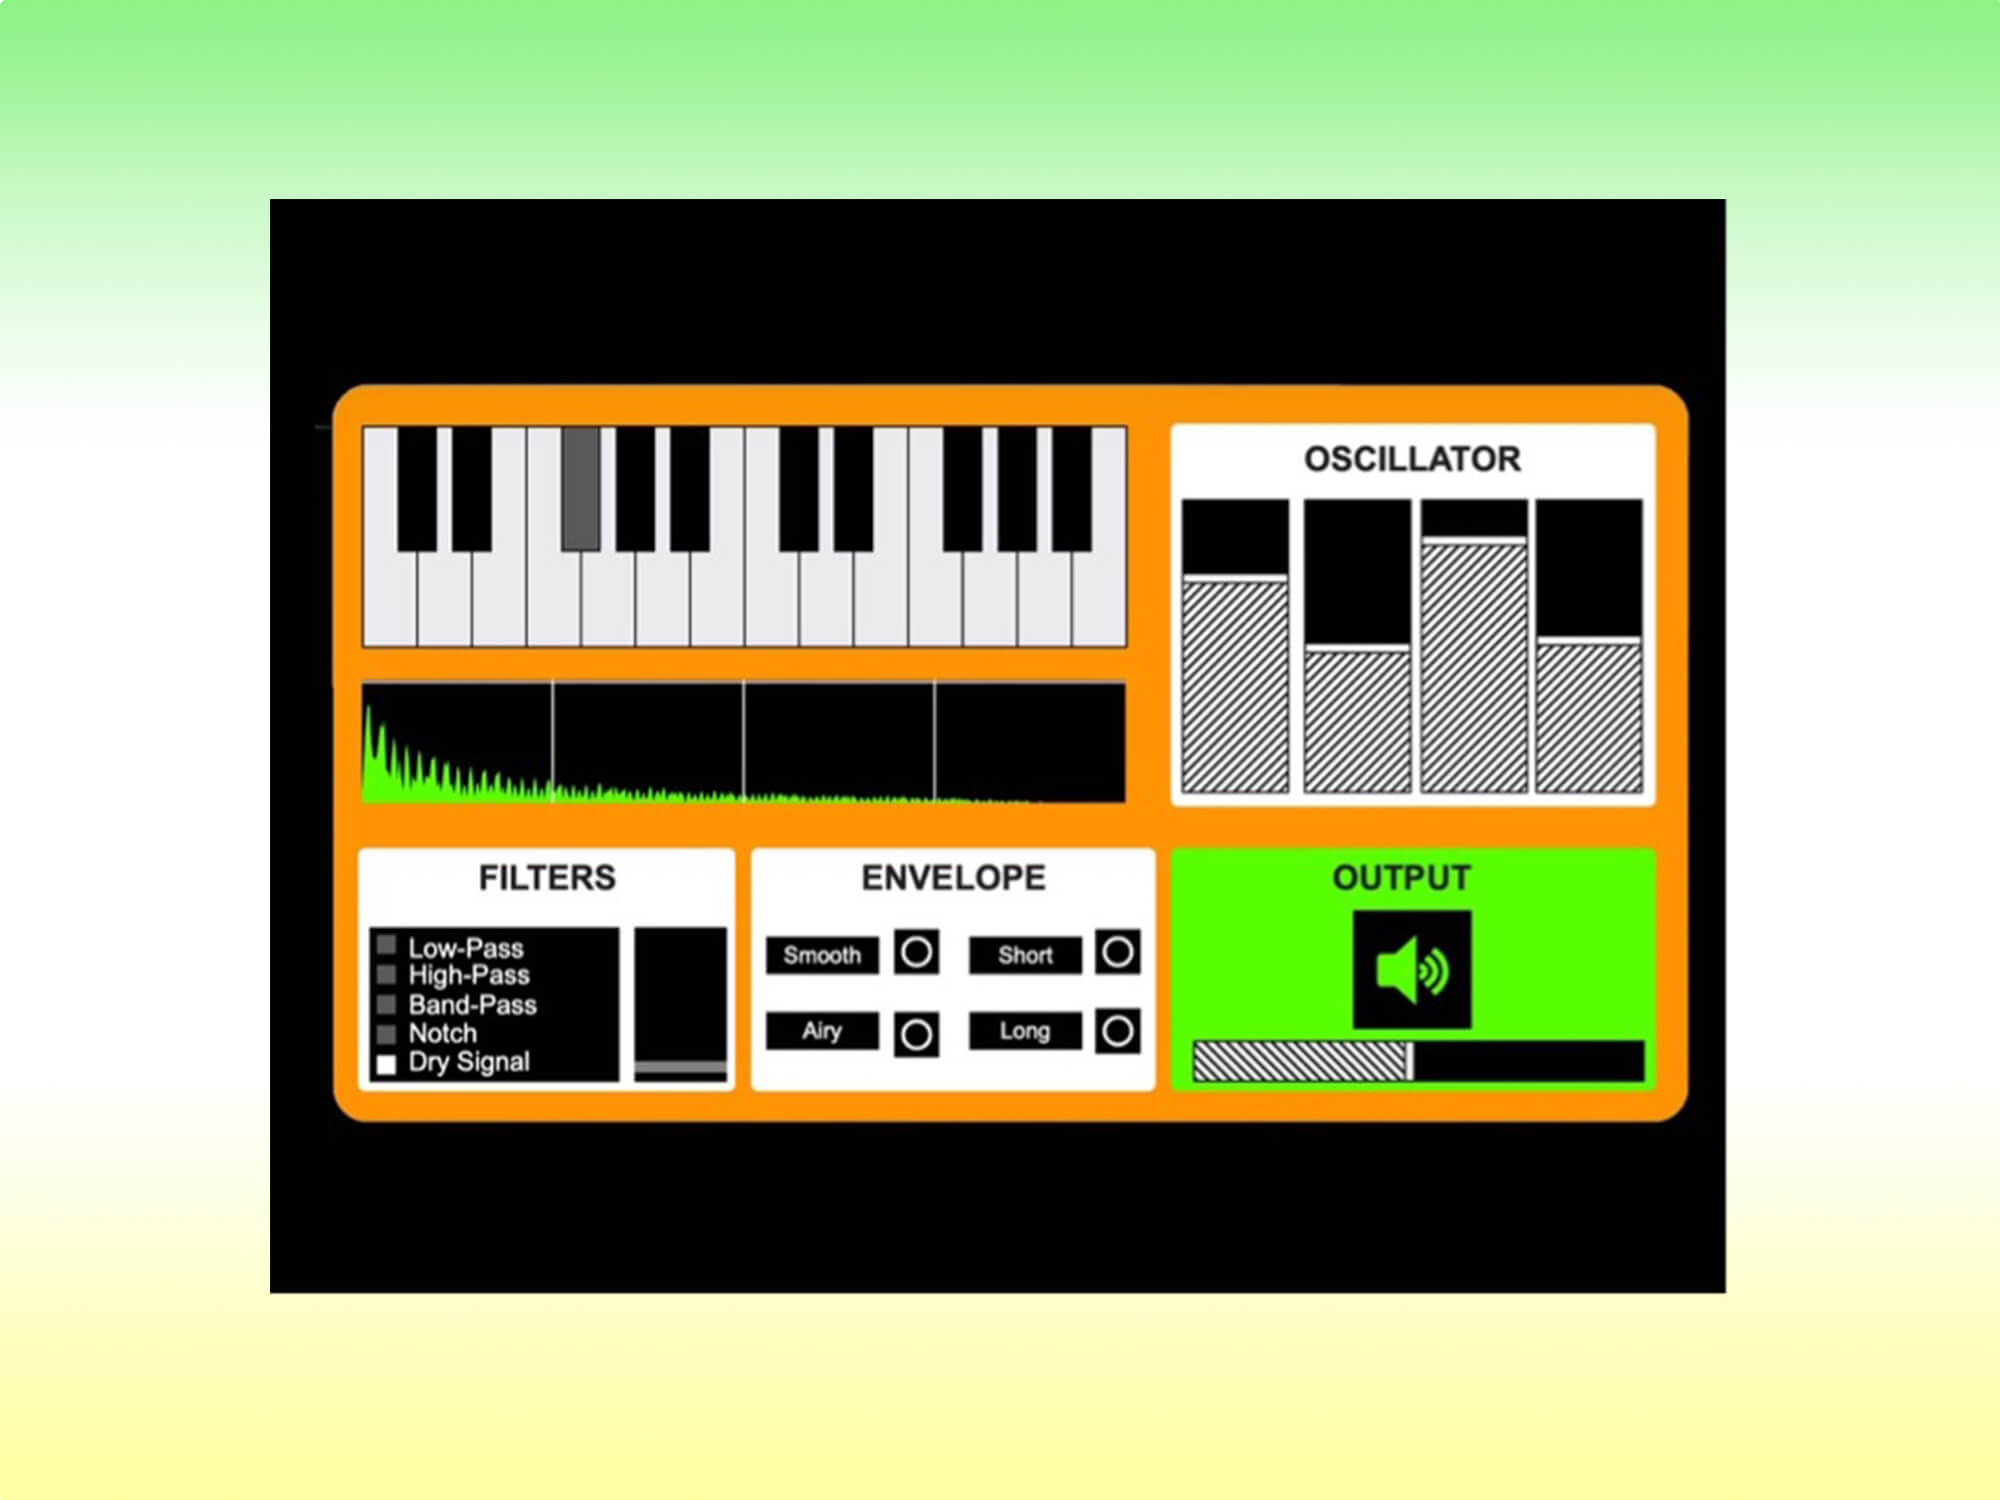
For inspiration, here is our finished synthesiser in Presentation Mode:

Presets
The synthesizer has now been complete both in terms of the patching it’s final look. Now, we recommend creating presets of the entire synthesiser, as well as a reset button.
This step is entirely optional, but it gives you the chance to transform the synth at the click of a button, rather that setting it manually.
To do so is fairly straightforward and involves the object ‘Preset’. It’s best to do this step in patching mode.
Once the object has been created, open up the help file, and you can see that it programmes presets through messages, which will instruct the object to ‘store’ data into the different presets.
Therefore, you need to create a message that says, ‘store 1’ and link it to the preset object. After this is done you need to set the synthesiser up to your desired settings, before clicking on the message. You will that the first box on the preset object will turn a light grey. This means that your preset has been set.
You can continue to do this for how many presets you want, changing the store number each time. At this point you can also create separate messages stating ‘1’, ‘2’, etc, which will recall each preset for you. Add these to Presentation Mode.
After you have created all of your presets, you will want to create one more, but setting all of the elements in the patch to zero. This will then act as our reset button. As we have only decided to created three presets, this reset will be stored into 4.
However, instead of adding the ‘4’ message into our Presentation Mode, you can attach a bang to the message, and add that to the presentation mode instead, as it will still trigger the fourth option on the preset object, but will simply look different. Therefore we have three preset options for our synth, and a bang which will reset the patch.
The Final Steps
The final step for to this monophonic software synthesiser is to export it.
Firstly, ensure that when the Max MSP file is opened, it opens in Presentation Mode, rather than the patcher itself. To do so, go to View > Inspector Window, and scroll down to where it says ‘Open in Presentation’. Ensure that box is ticked.
There are multiple ways to export a Max MSP Patch, but we will be exporting it as a standalone application.
Under file, click on ‘Build Collective/Application’. A ‘build’ window should pop up, giving you options of what you want to happen when the application opens. However, as we are not using any additional audio, video, or files, you can just click ‘Build’ at the bottom of the screen and ensure it is saved to the location of your choice.
Congratulations! You have just built a monophonic software synthesiser from scratch using Max MSP. This should hopefully provide you the skills and tools needed to continue on your software synth journey using Max MSP.
Want to share your finished piece? Drop an image on socials and tag us!
If you haven’t yet downloaded Max MSP, Cycling 74 are offering a four week free trial.